One big problem on the Opel Manta is the steering. As standard its fine, but start modifying the engine and adding a bigger exhaust and it gets a bit tricky. Left hand drive cars are nice and easy as they don’t have to contend with the steering and manifold all on the one side! or brake servo’s getting in the way of things.
But i suppose as it was originally built as a left hand drive it wasn’t something they needed to worry about 🙁
The problem has always been getting a nice tubular manifold down past the steering shaft, as after the shaft enters the engine bay its just goes straight across to the rack, right in the place where you would want the manifold to go! I have tried making one that curves around the steering shaft but its still so tight that i could never get enough clearance to make sure it didn’t knock against the shaft.
Moving the rack up or down didn’t seem like it would work. So a few years ago i thought about trying a different rack that wasnt bolted onto the cross member as i thought this might give me a degree of flexibility. I bought a mini rack as this was a similar width and the steering rack shaft came out straighter and more to the left so i thought i could route the steering shaft in a different way and just needed to work out how to fix it on.
Then i started to read up on bump steer! and that was the end of the mini rack! The steering rod end joints where in a different location to the manta one so that would have put the steering geometry right out 🙁 back to the drawing board!
I then concentrated on the engine and other stuff and the car just get left for quite a few years while tinkered with other stuff and pondered on the rack.
But this year i started back on the car in earnest as i had a bit more spare time and started thinking about the steering again. This time i decided i needed to keep the original Opel Manta rack and modify that, so then a plan was hatched. I had an old spare rack, so i started some testing to see what i could do. Now this still might not work but i have taken the plunge and given it a go.
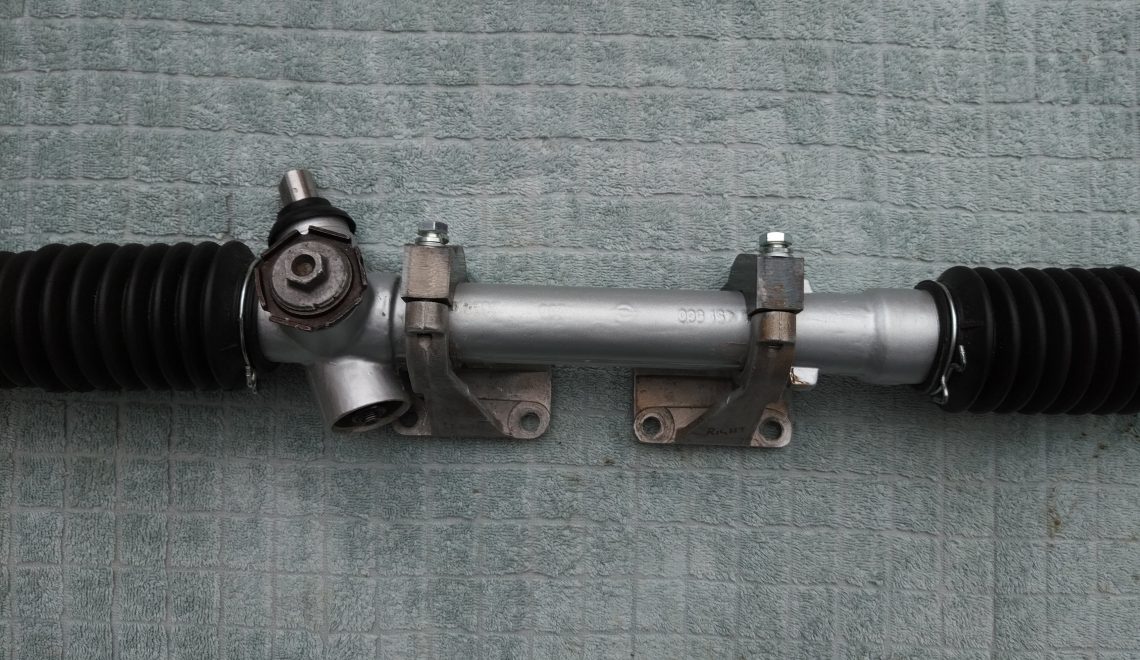
The thought was, if i mounted the rack on some brackets that kept it in the original position, i could then rotate the angle of the rack which would allow me to bring the shaft in from a different location. Looking at a lot of the america custom cars they have some crazy setups with the double universal joints. Below is the steps i have taken so far to get the rack adjusted and brackets customised to fit. Im now fitting the rack and Part 2 will be connecting up the steering shaft, it wont be fully finished until the engine is back in as 1. i need to see if the sump clears the new brackets as they sit above the rack and i might need to modify them for clearance as they are 20mm high and i think there is about 15mm from standard (but my engine does sit higher to give a bit of extra clearance for the throttle bodies, so lets see!), 2. what clearance i have for the manifold as i might need to tweak the route a little.
So for anyone interested here are the steps i have taken:
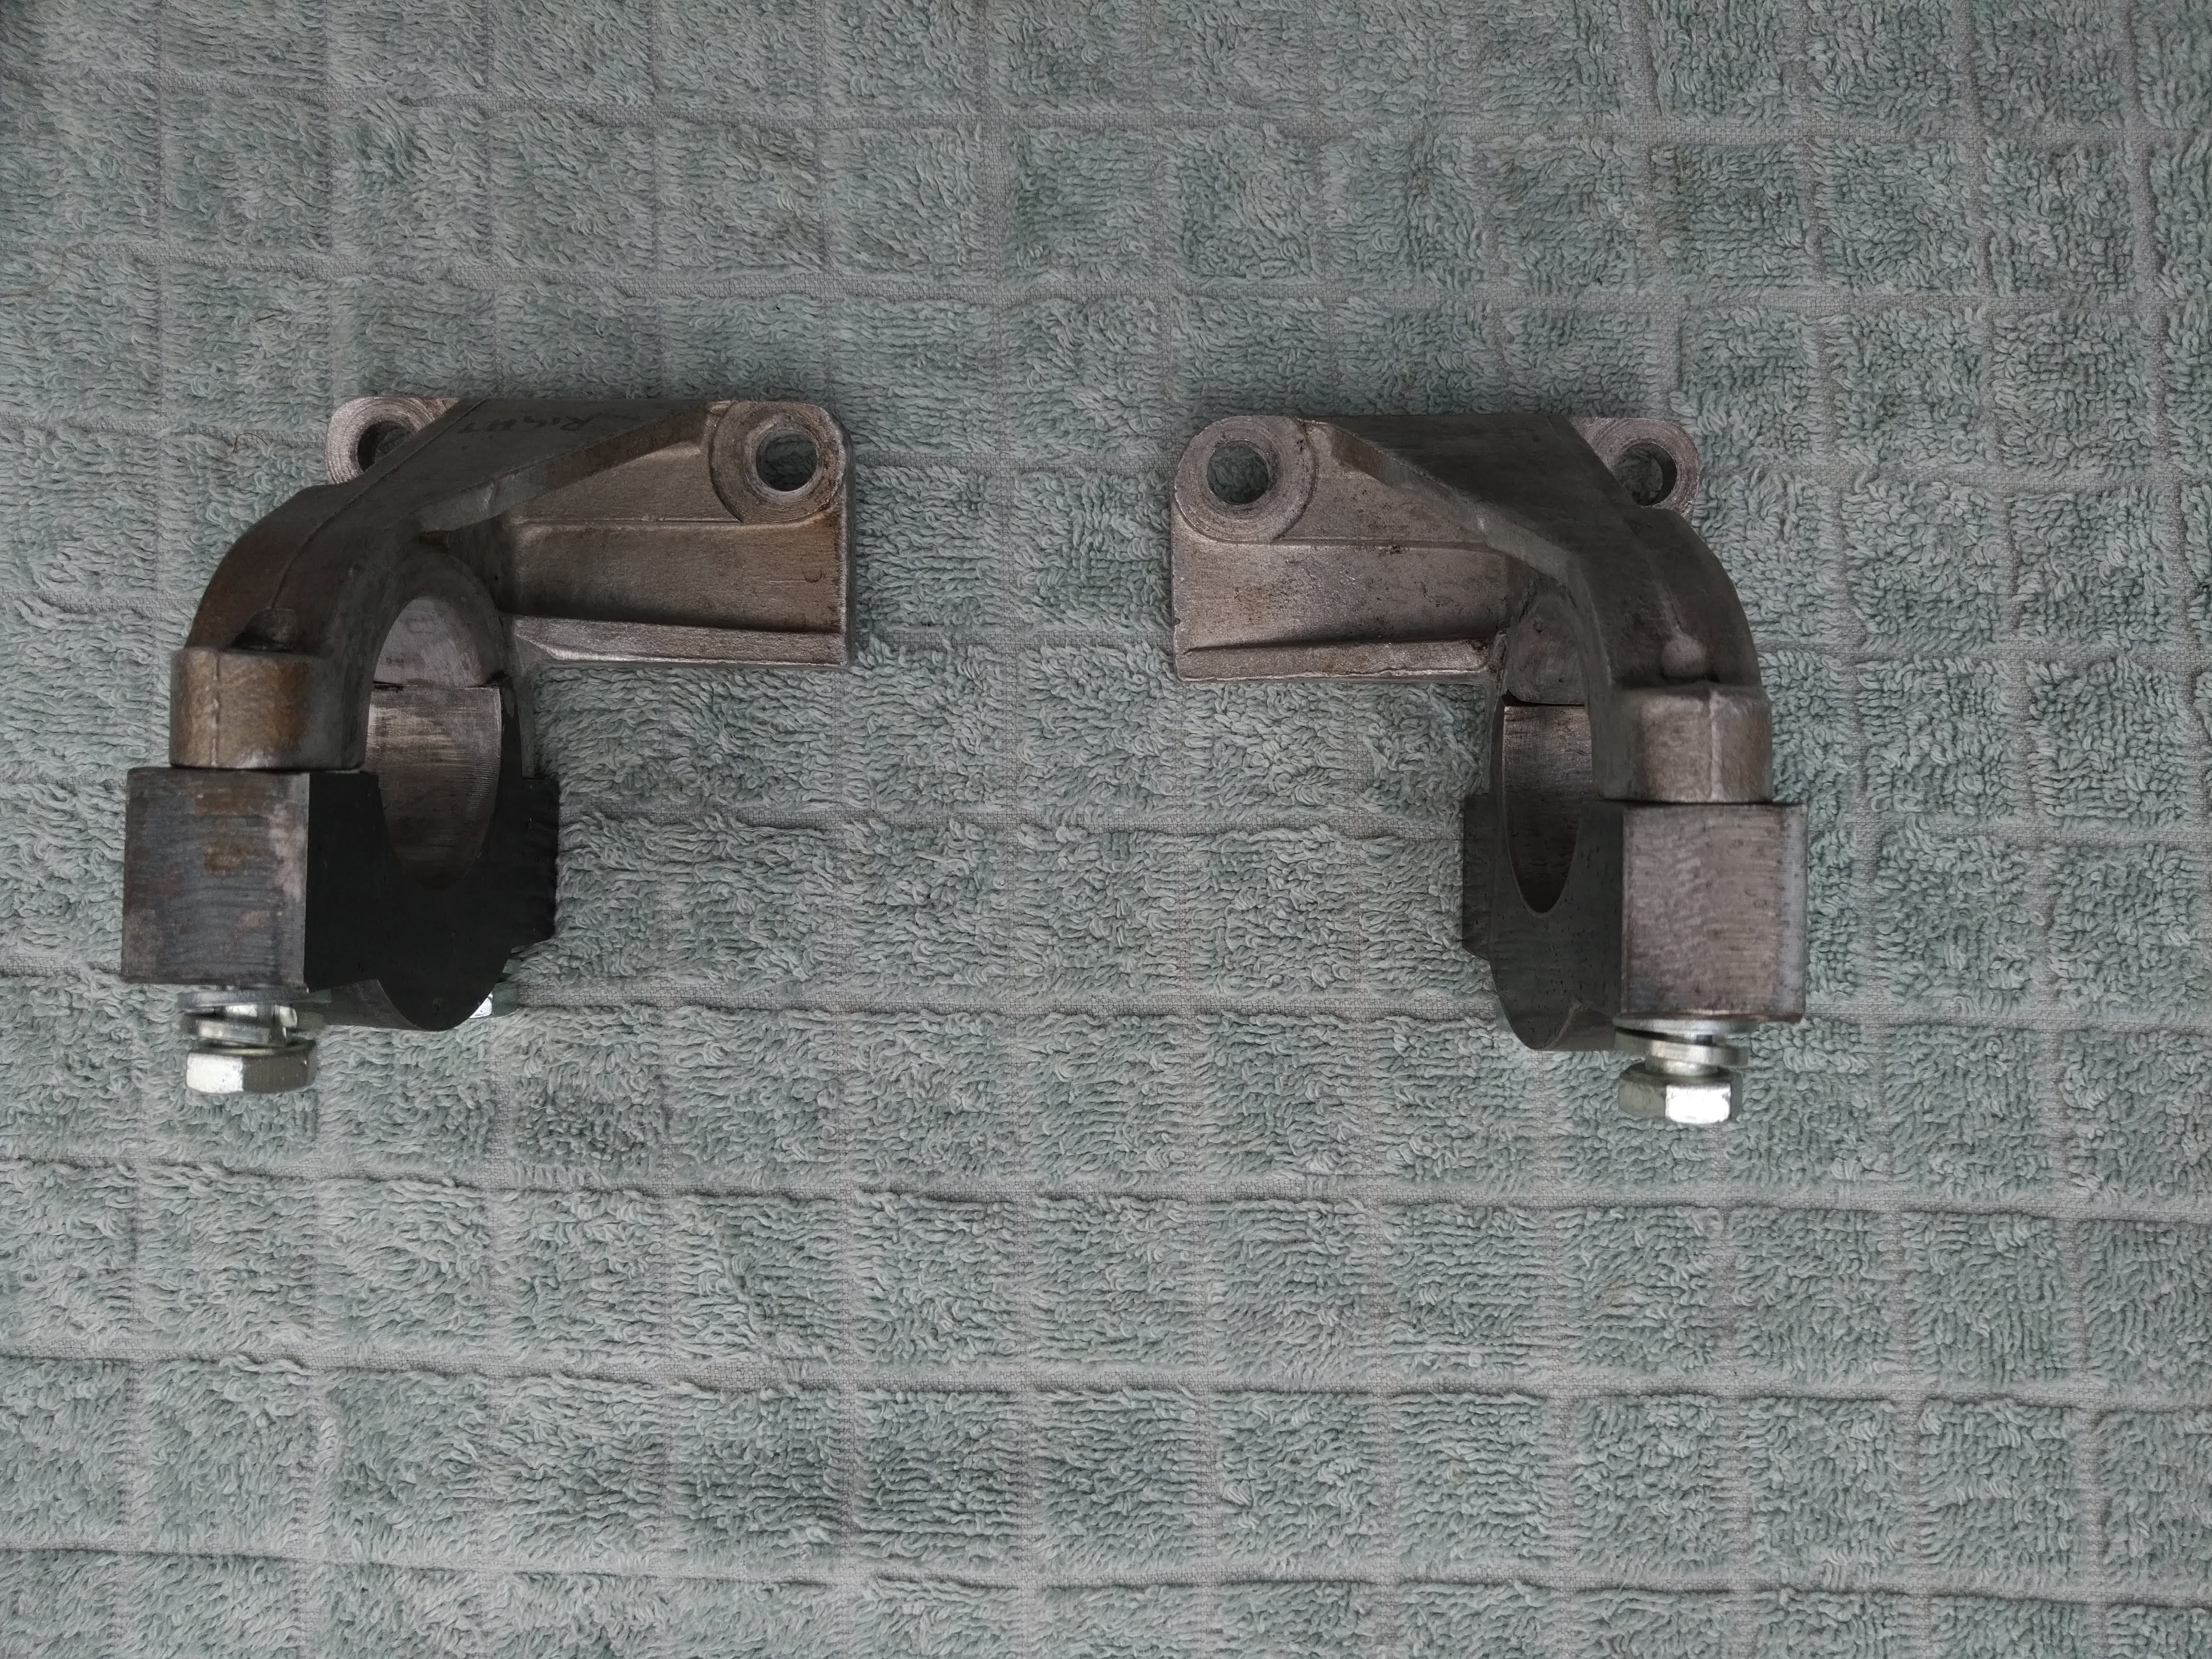
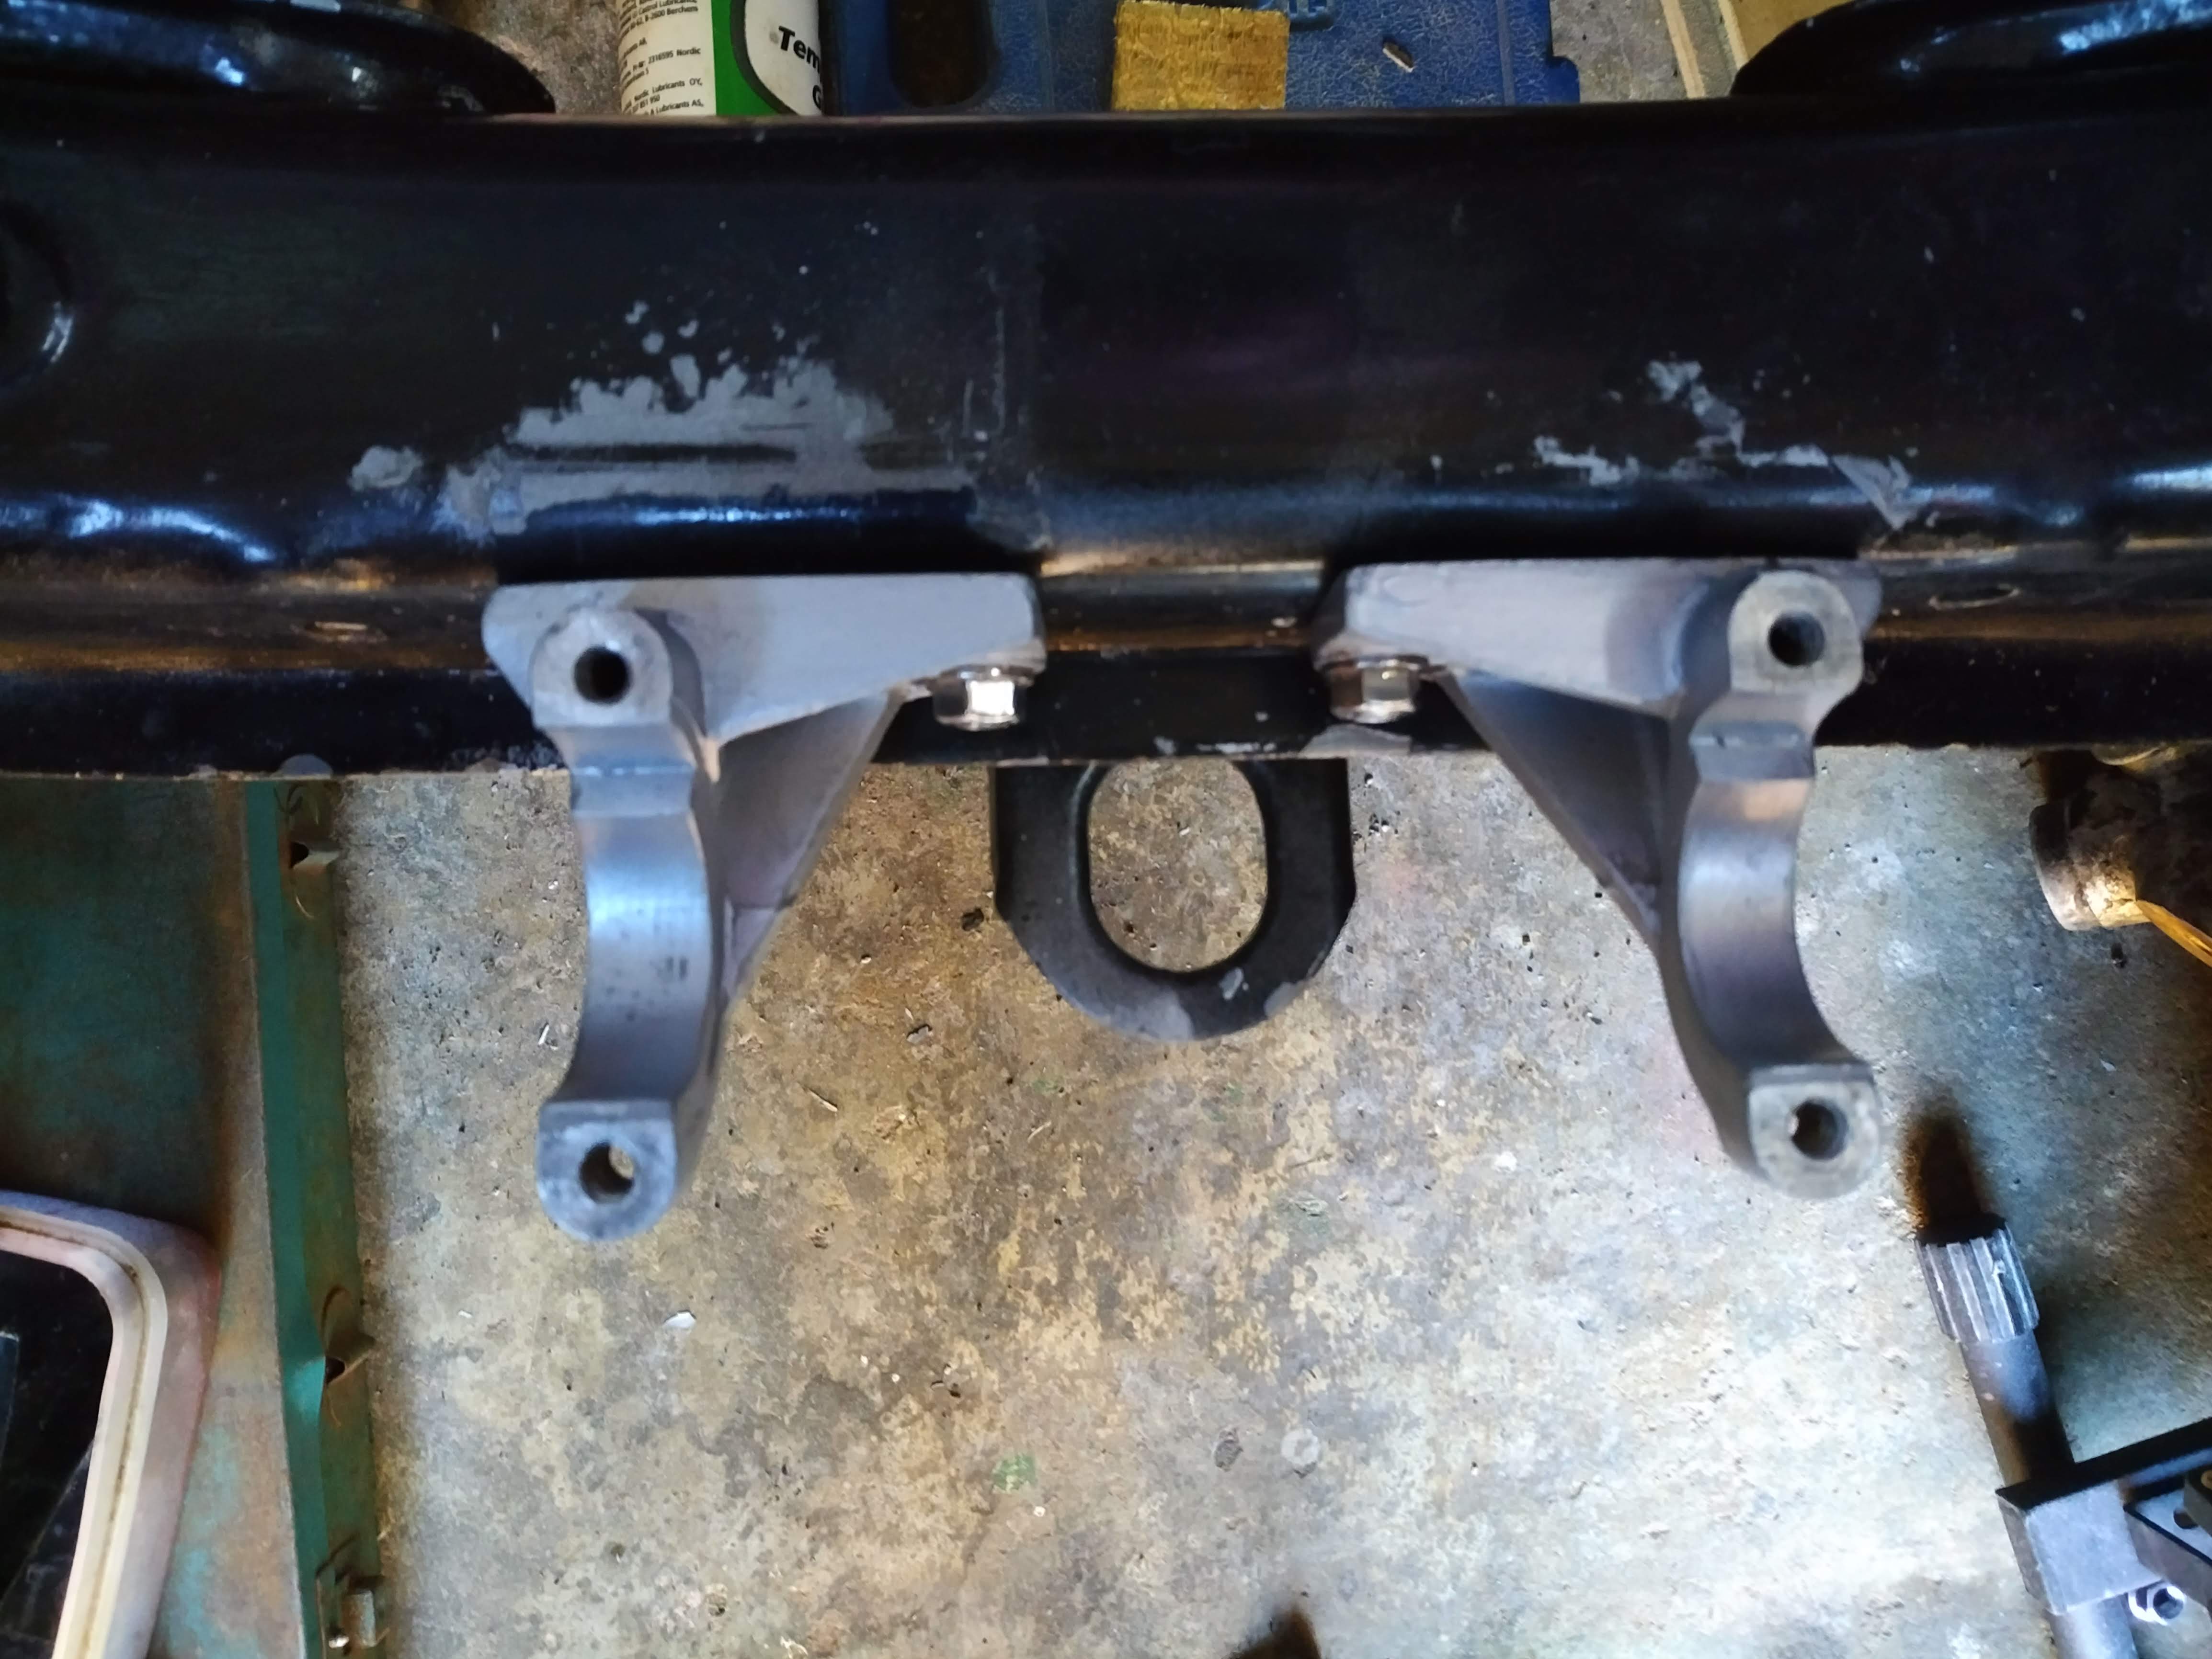
1. Find some brackets that would hold the rack in the same location as the original bolted on one. After a bit of searching i came across these. These are brackets from an Austin, i think the Healey and some of the MG’s used them. They looked the right setup as they would hold the rack up, allowing me to modify them to bolt onto the front cross member. I did think about having some made, but as i got these off of eBay for about £25 i thought it was worth a try first. I have no way to know sizes so it was a bit of a guess!
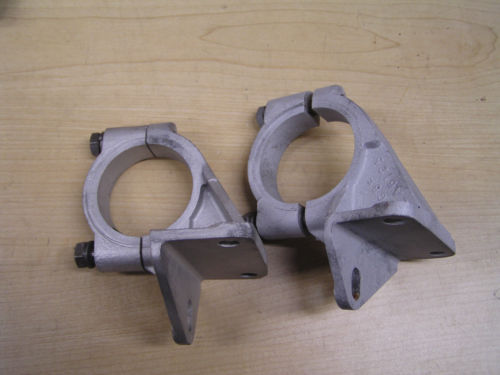
When they arrive and i did a bit of testing, they looked like i could easily modify them to fit. I cut the bit that sticks out the back off and they would then bolt to the cross member and were in almost the correct position to keep the rack exactly positioned as it was on the original setup!
One main problem was the the Austin racks have an area built up at each end for these brackets. So the diameter of the hole was 49mm and the Manta steering rack is only 38mm, eek! Now if i had some custom ones made this would not be a problem, but finding someone to make something like this and what the cost would be was going to be hard. So while i was having some brackets laser cut for the remote reservoirs and the coil i asked about having one cut and bent to the smaller rack. This was not something they could do or thought would work, but they did have another idea!
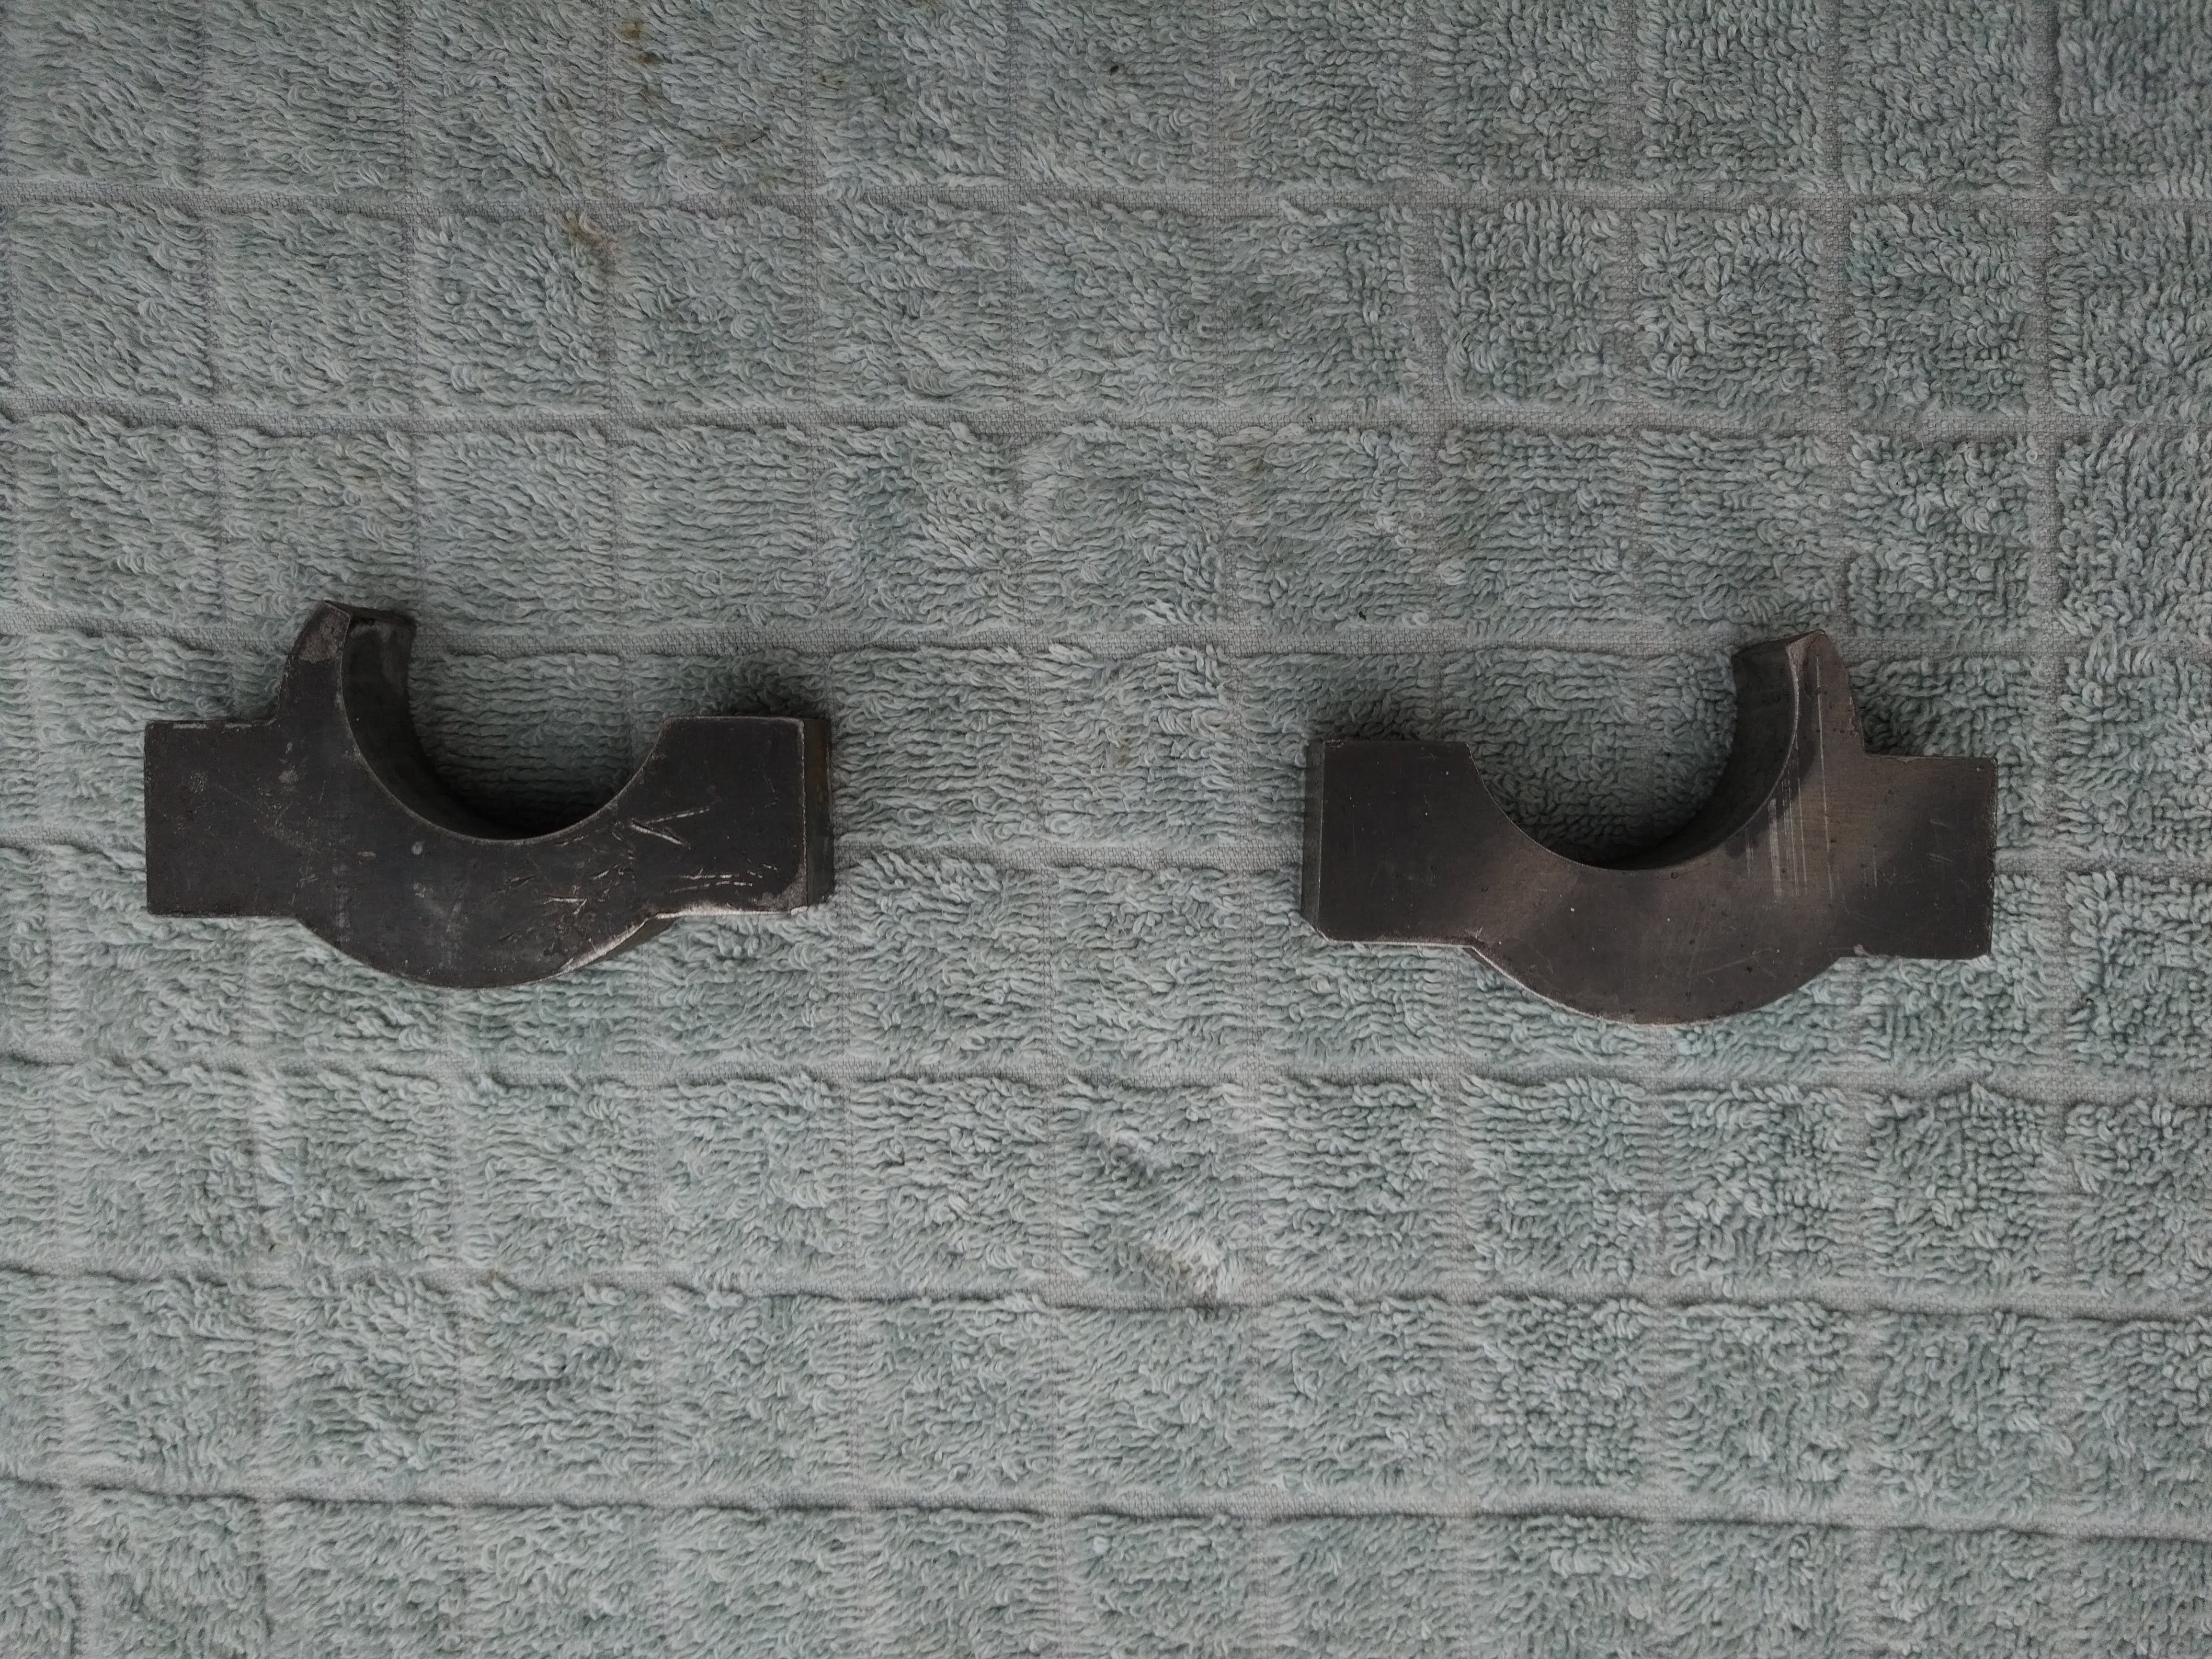
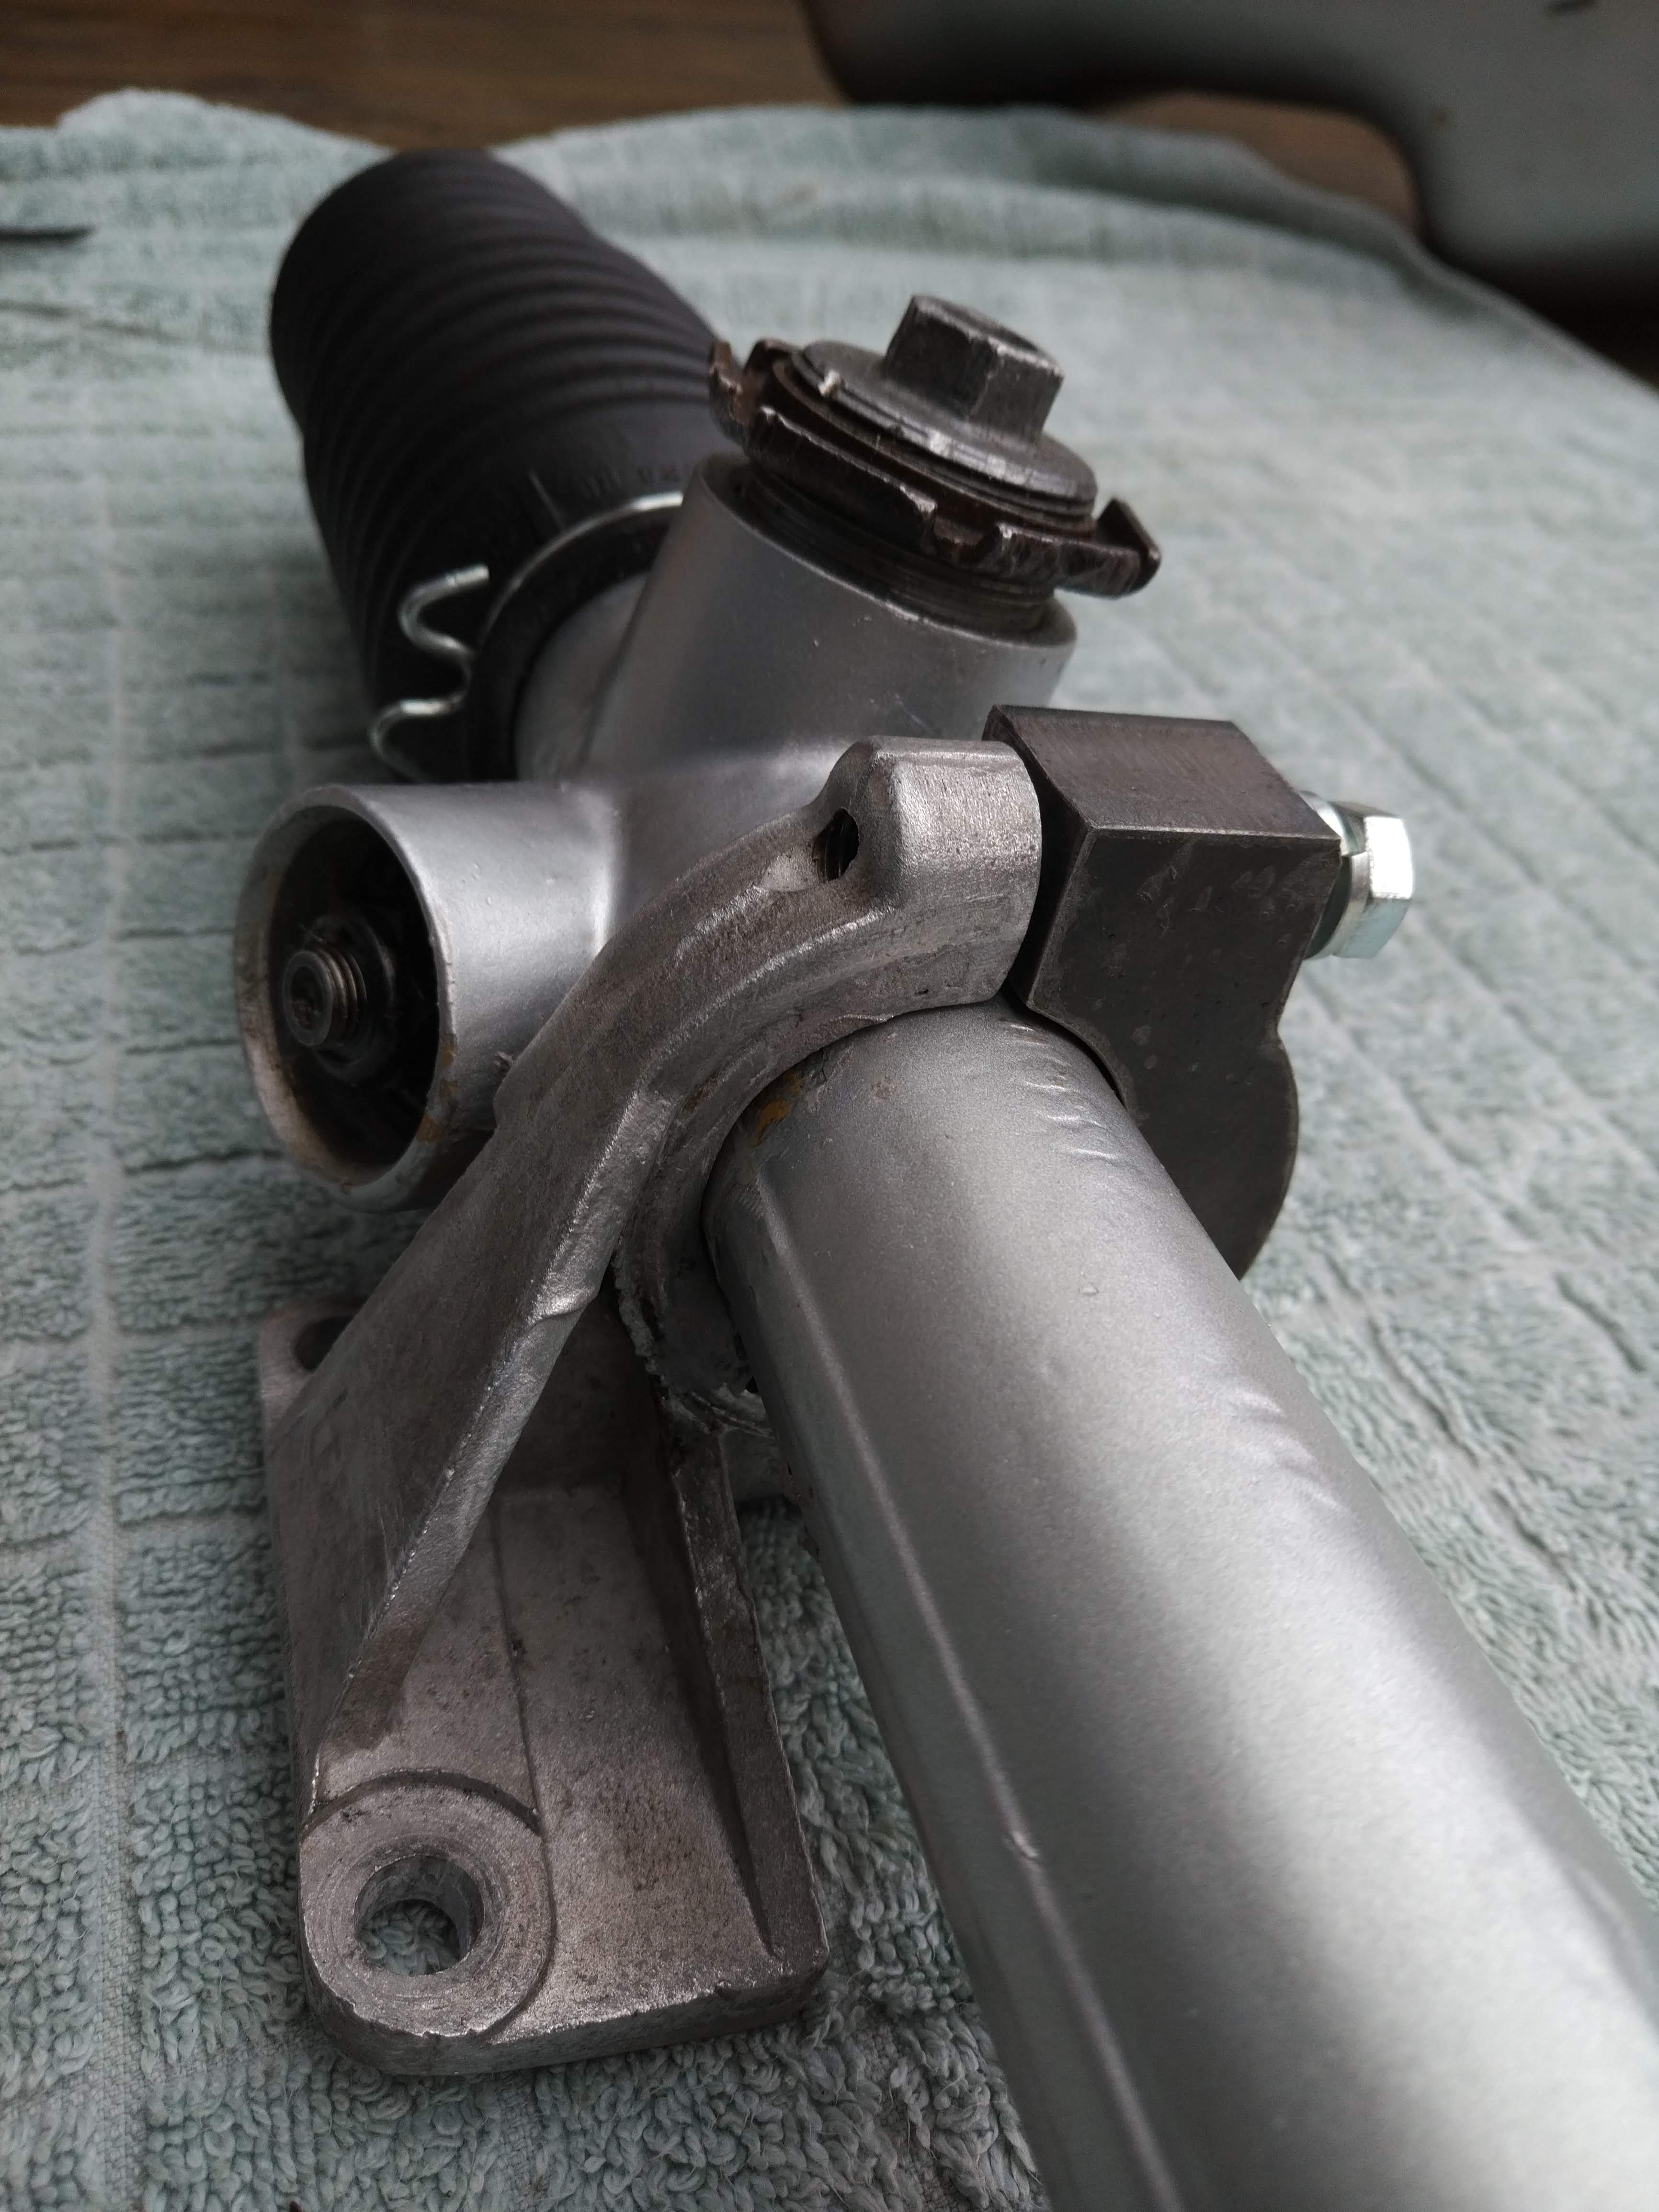
2. Make a new top bracket with internal reducer for the smaller rack!
Opel Manta A Series steering rack conversion.
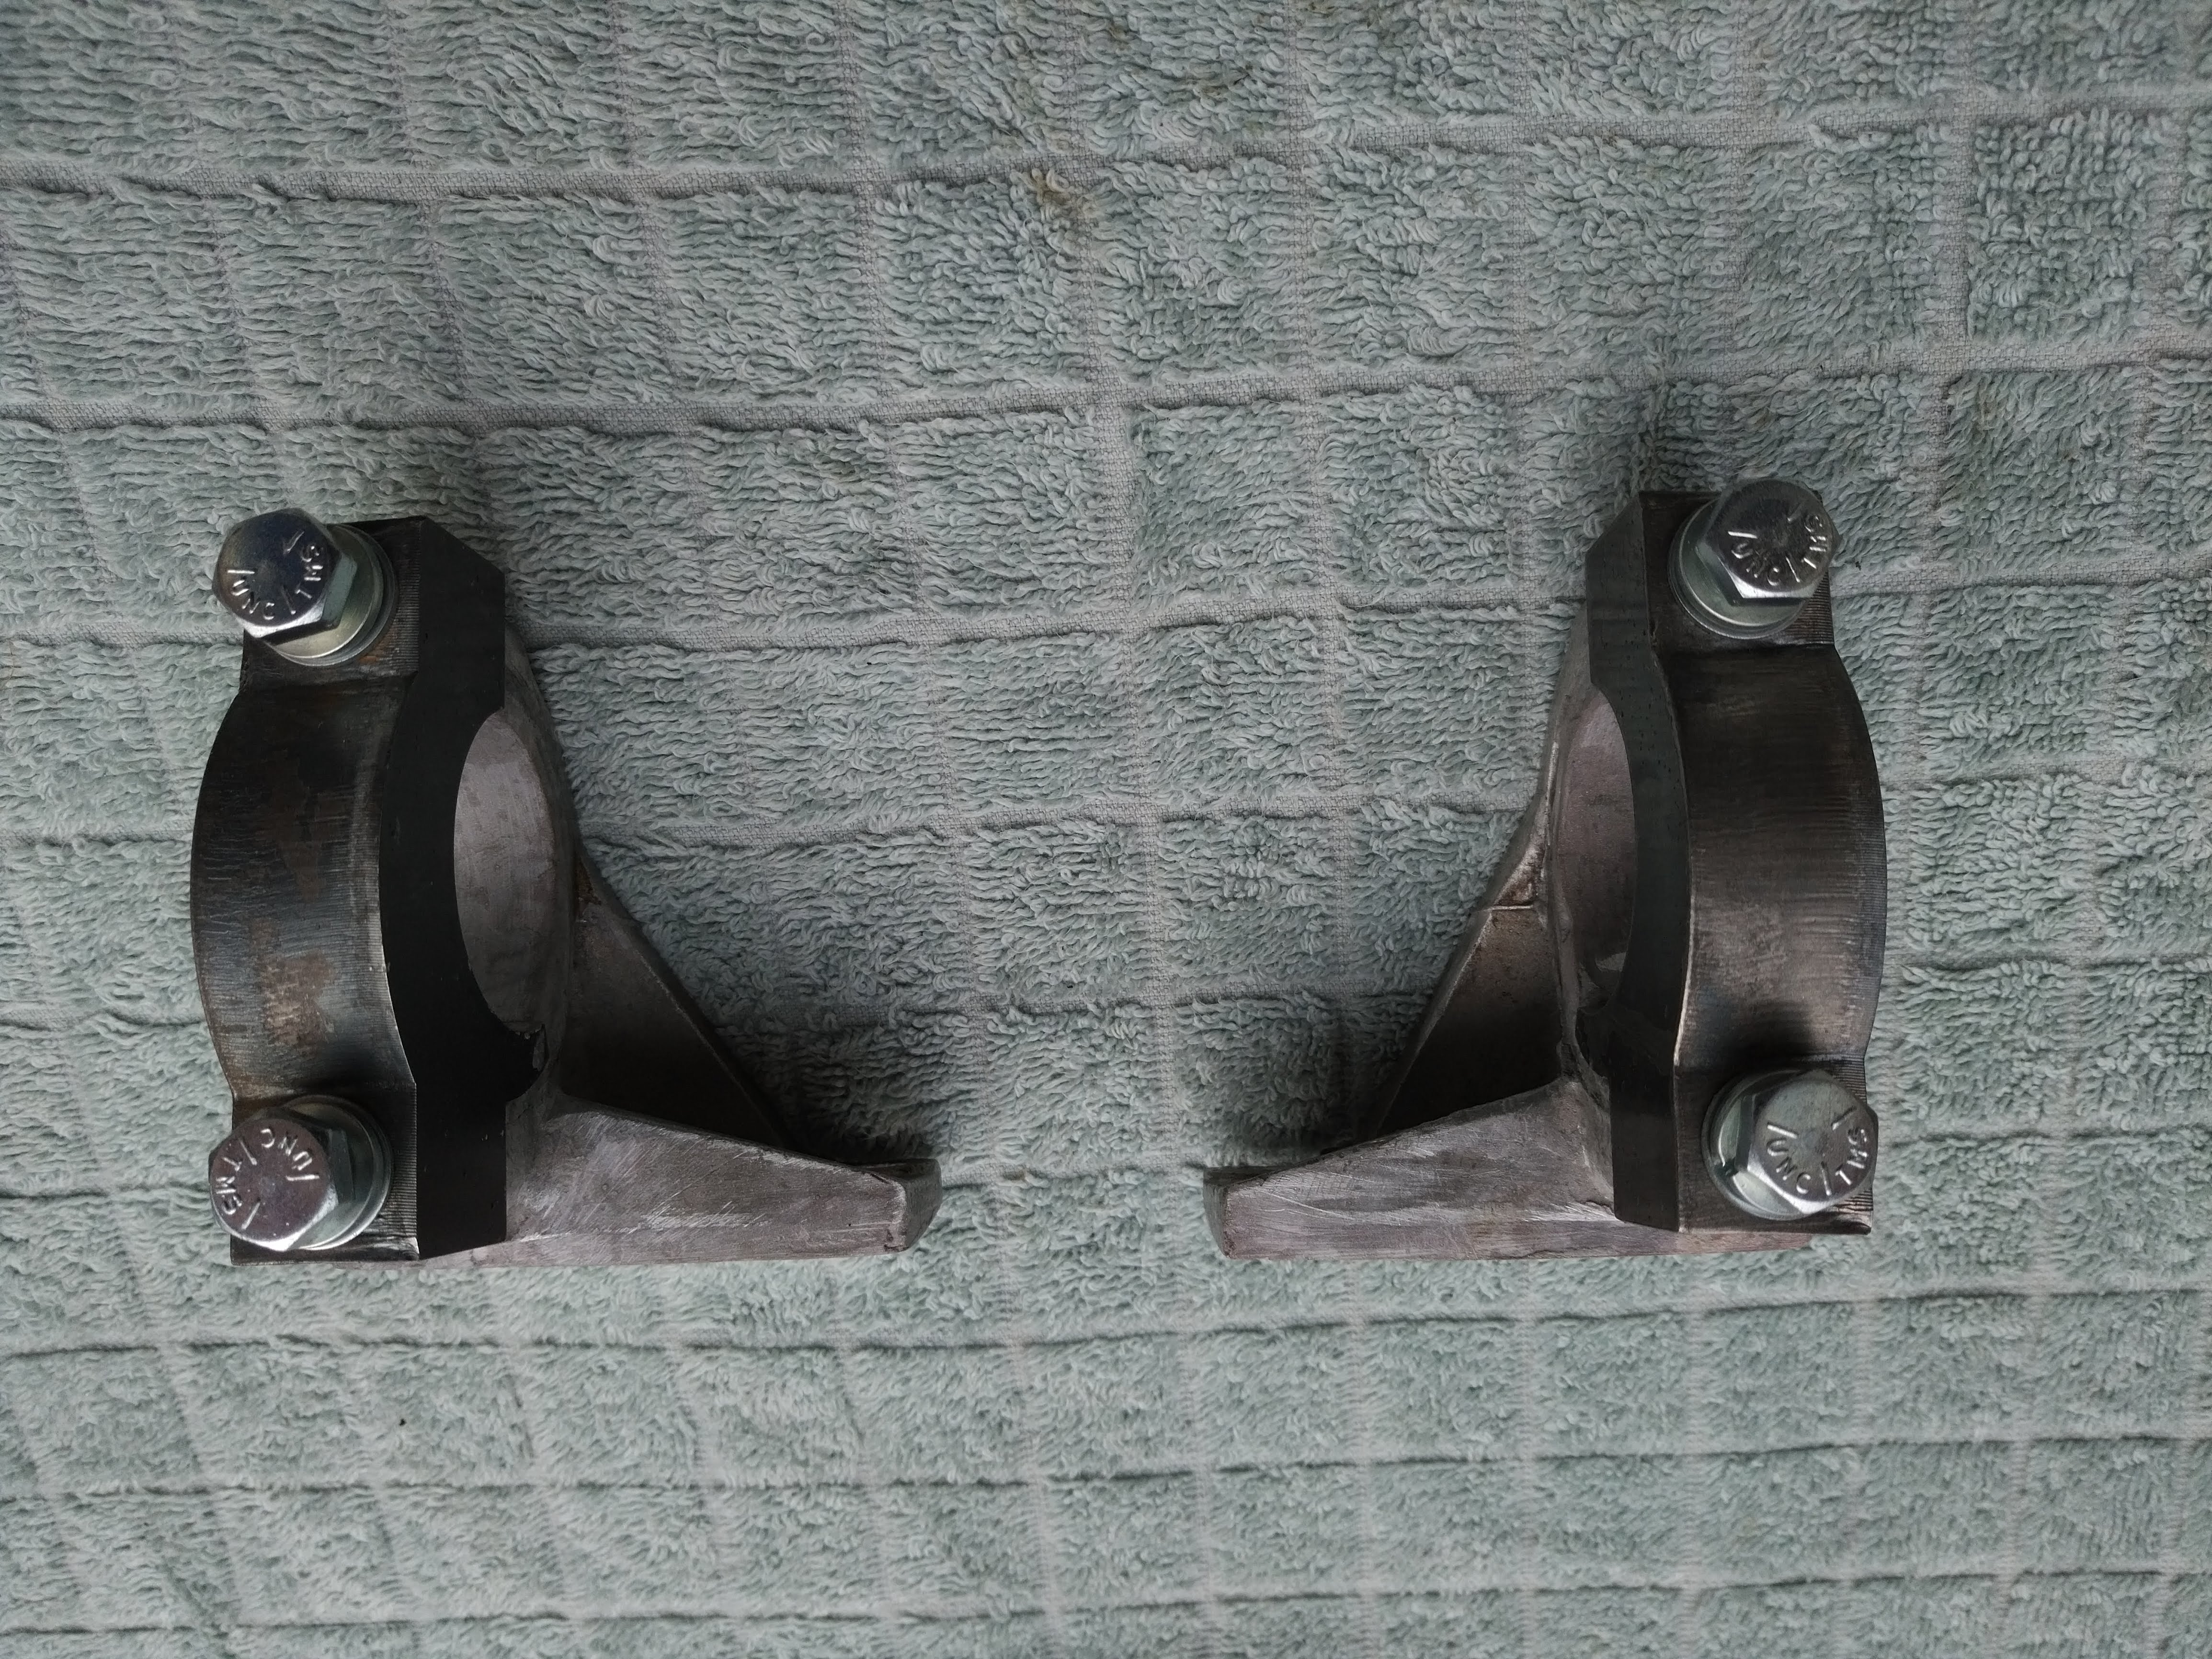
These were cut from 20mm steel plate and had the holes machined to the exact location of the original top bracket. We decided to follow the top of the original bracket profile and include the reducer below, making them a bit chunkier that original ones. I thought it was better to have a chunkier bracket that i could cut down rather than one too thin. So now this should hold the rack in place and stop it moving about. A little bit of aluminium weld was needed on the inside of the lower bracket just to make up the edges as the laser cutter could only go down to about 2mm at the thinnest point on this thickness! Normally places that cut this thickness of steel have a minimum cost for setup etc.. but luckily i got it added to another and it only cost £20, so i could at a later date have this modified and hopefully do the same thing and get it cheap.
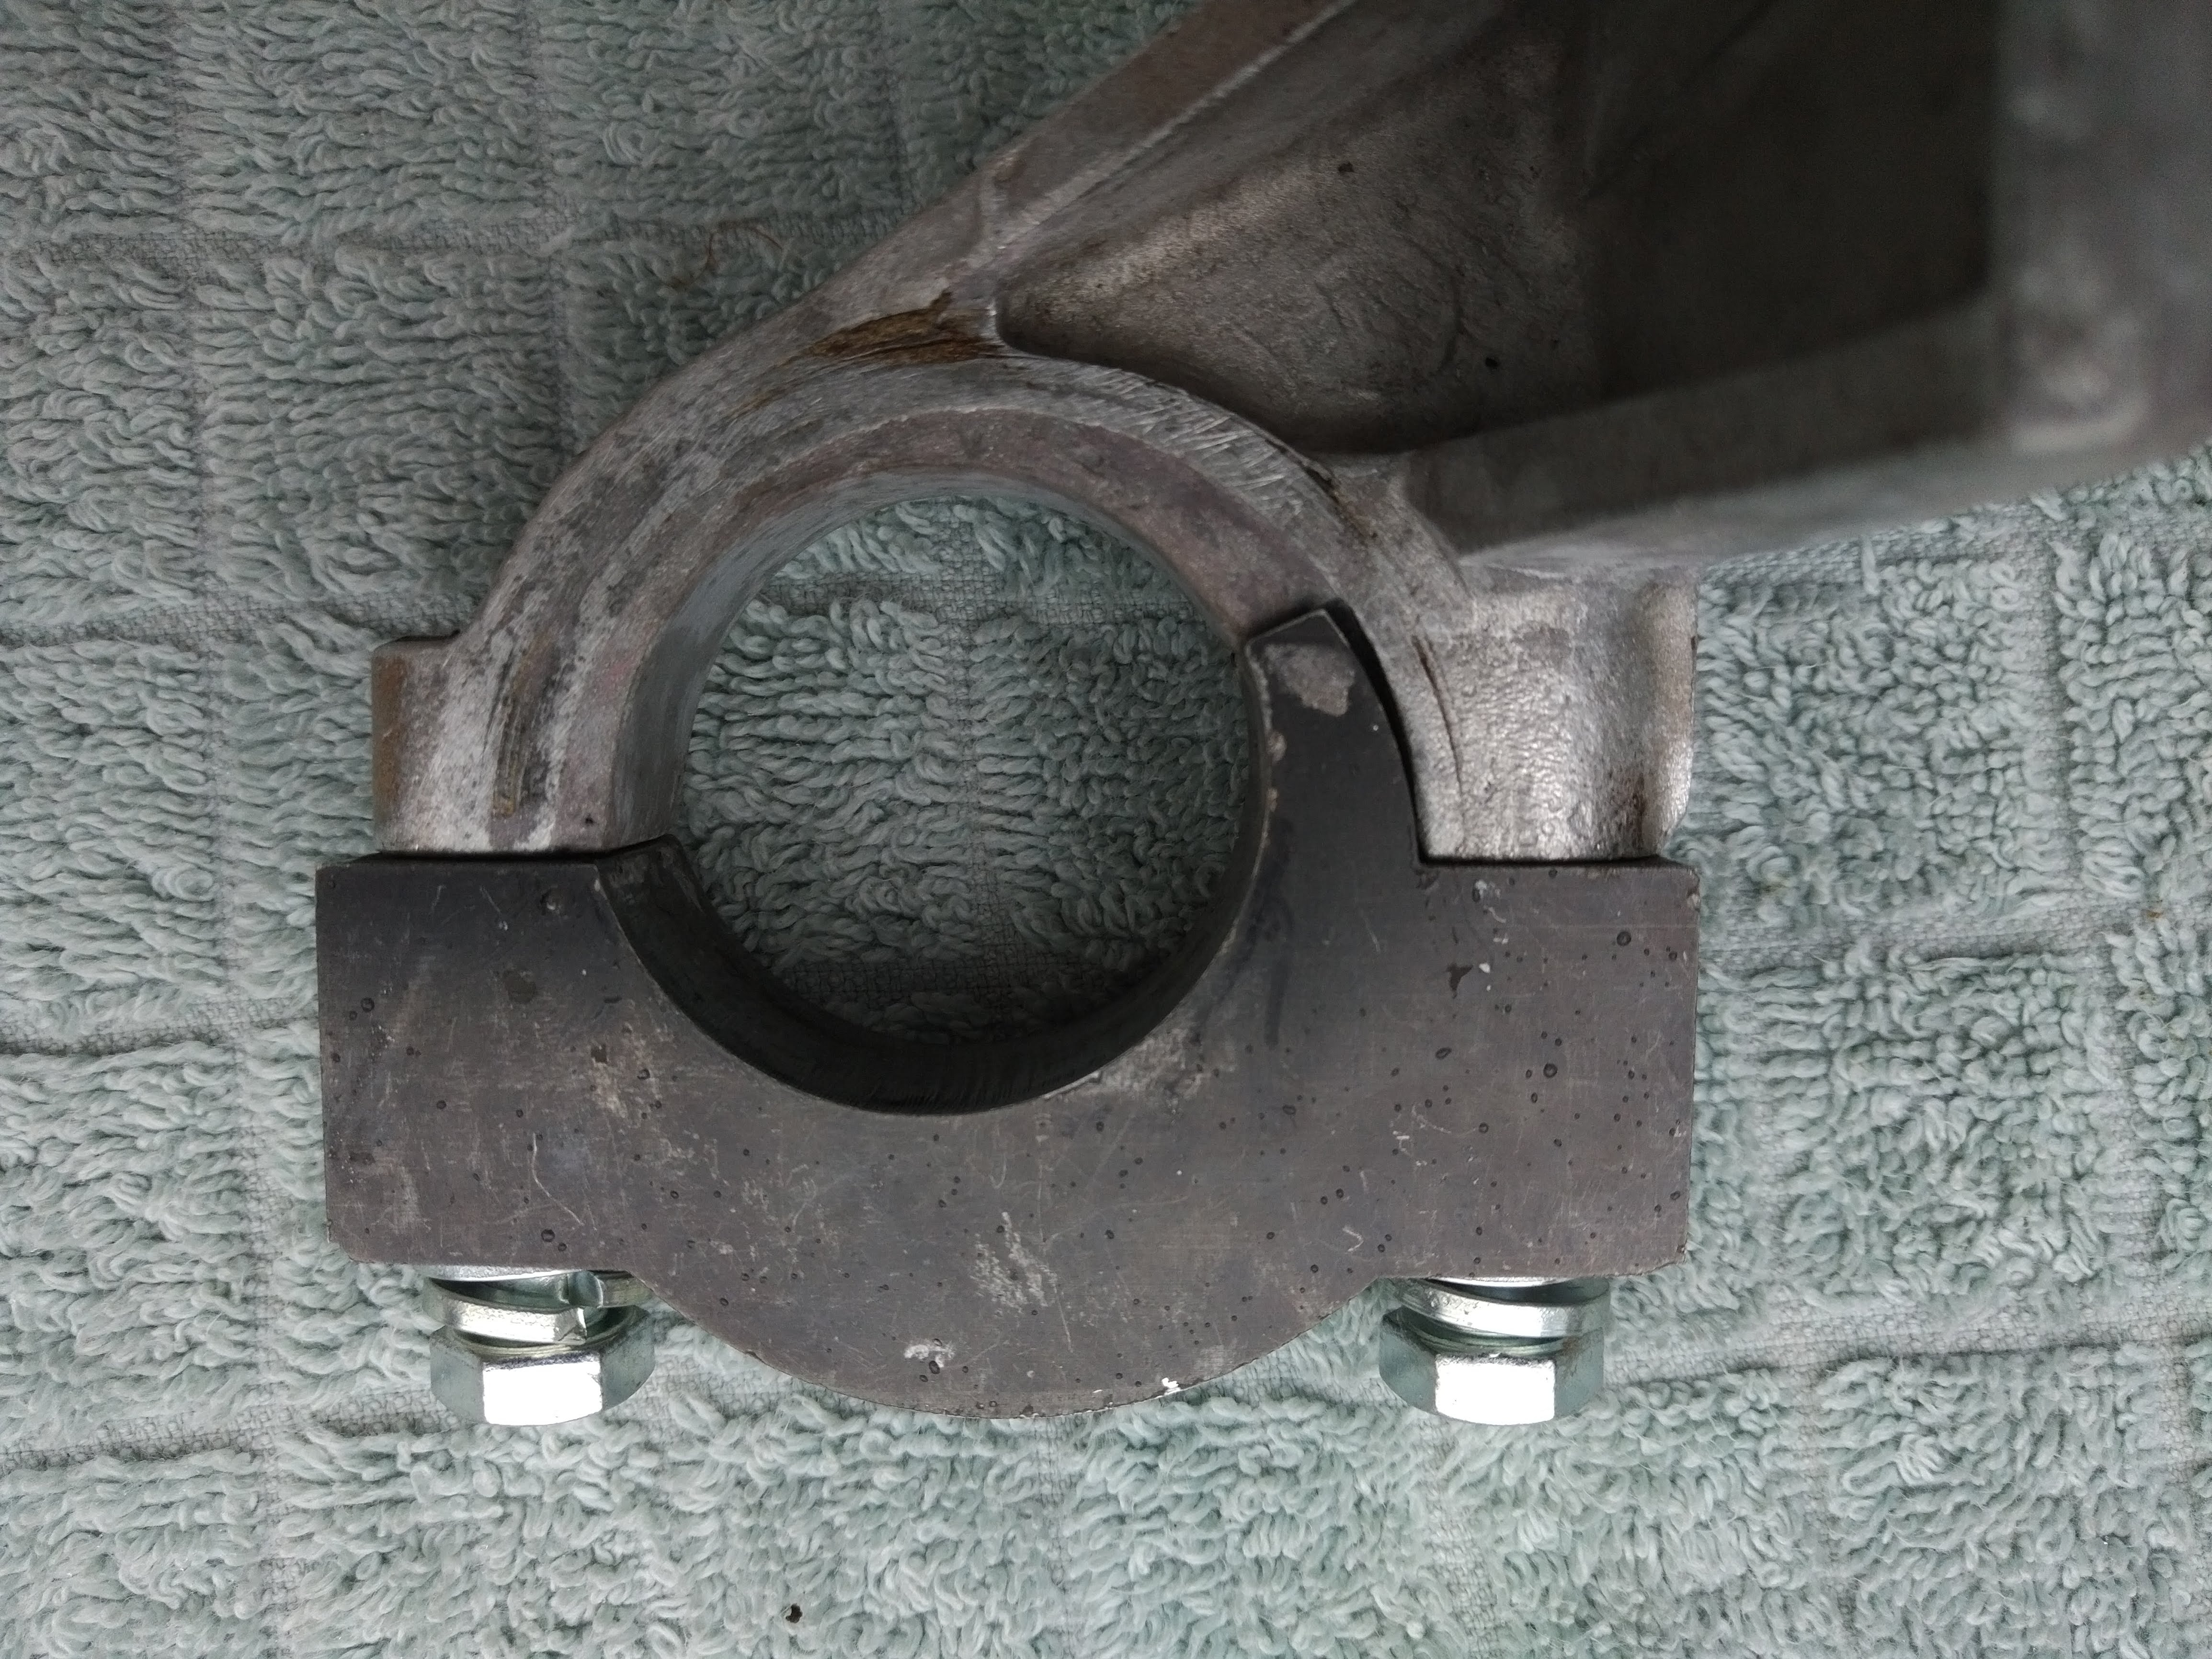
3. The new look brackets
Opel Manta A Series steering rack conversion.
Opel Manta A Series steering rack conversion.
Opel Manta A Series steering rack conversion.
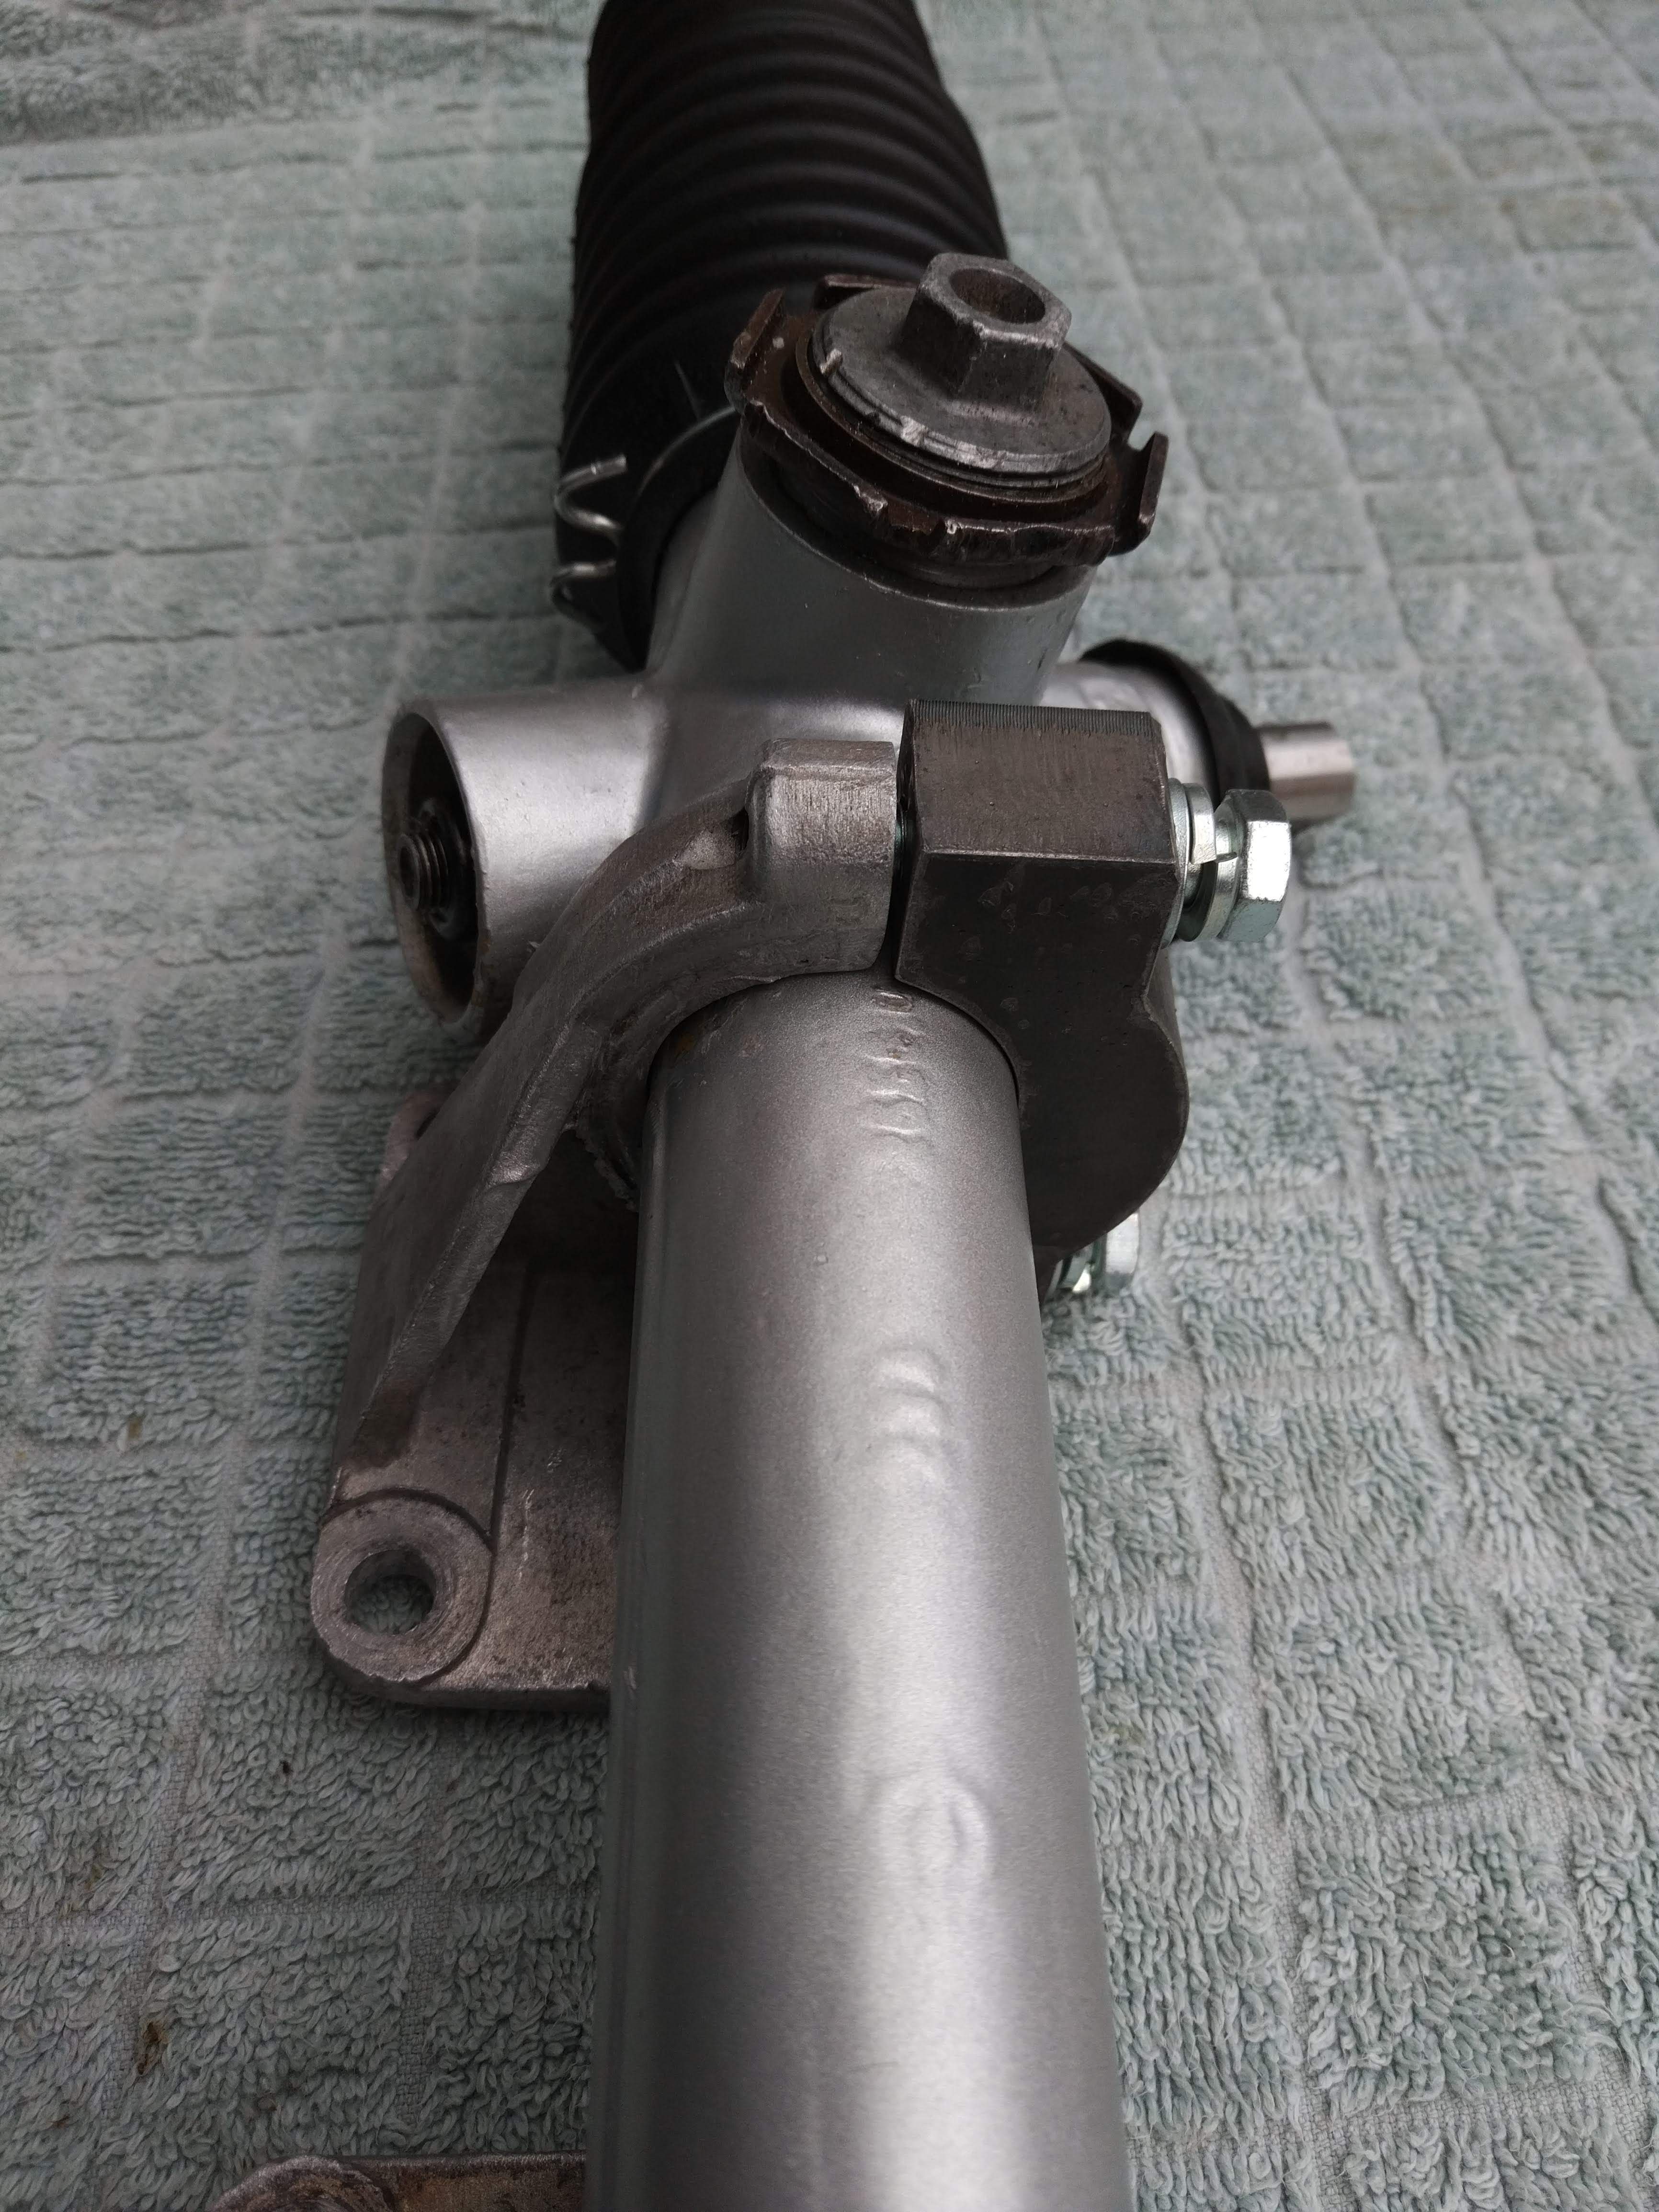
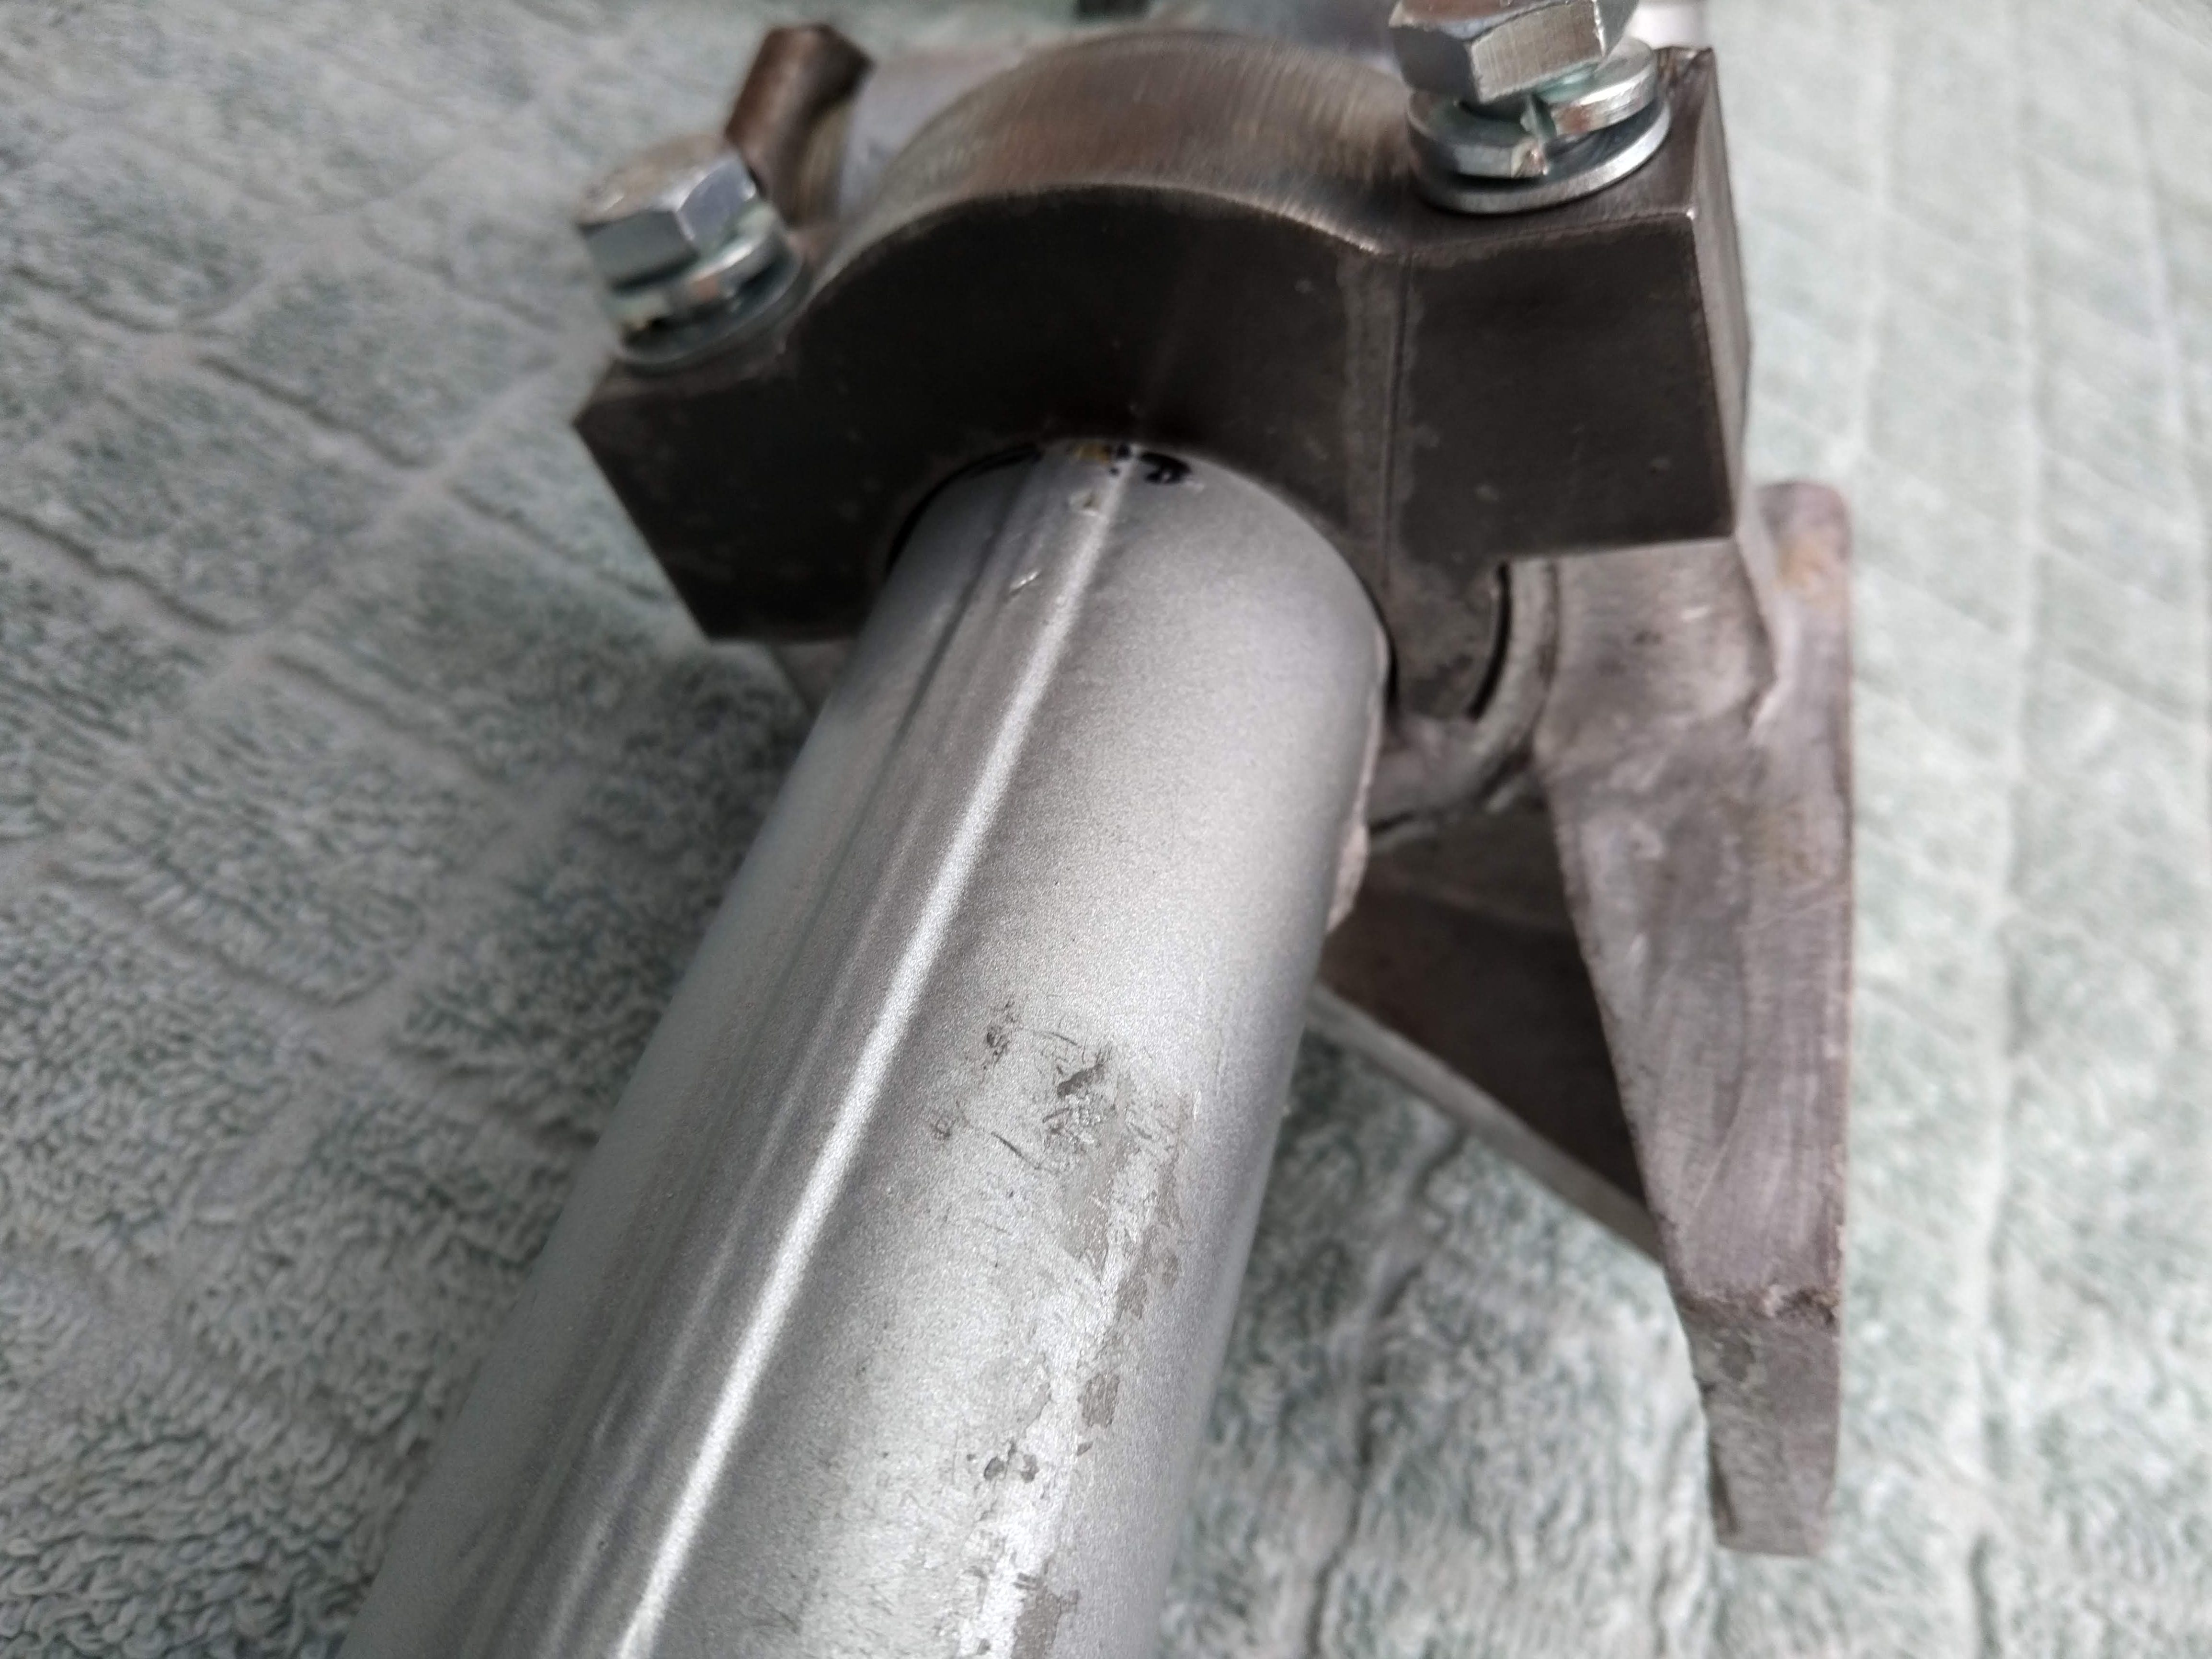
As you can see, the rack will now fit towards the front and the new reducer will keep it night and tight. You can also see where i have had the lower bracket built up with some weld. I did think about having the original top bracket built up with weld, but as you can see that is a lot of weld to add and im not sure if it would effect the strength.
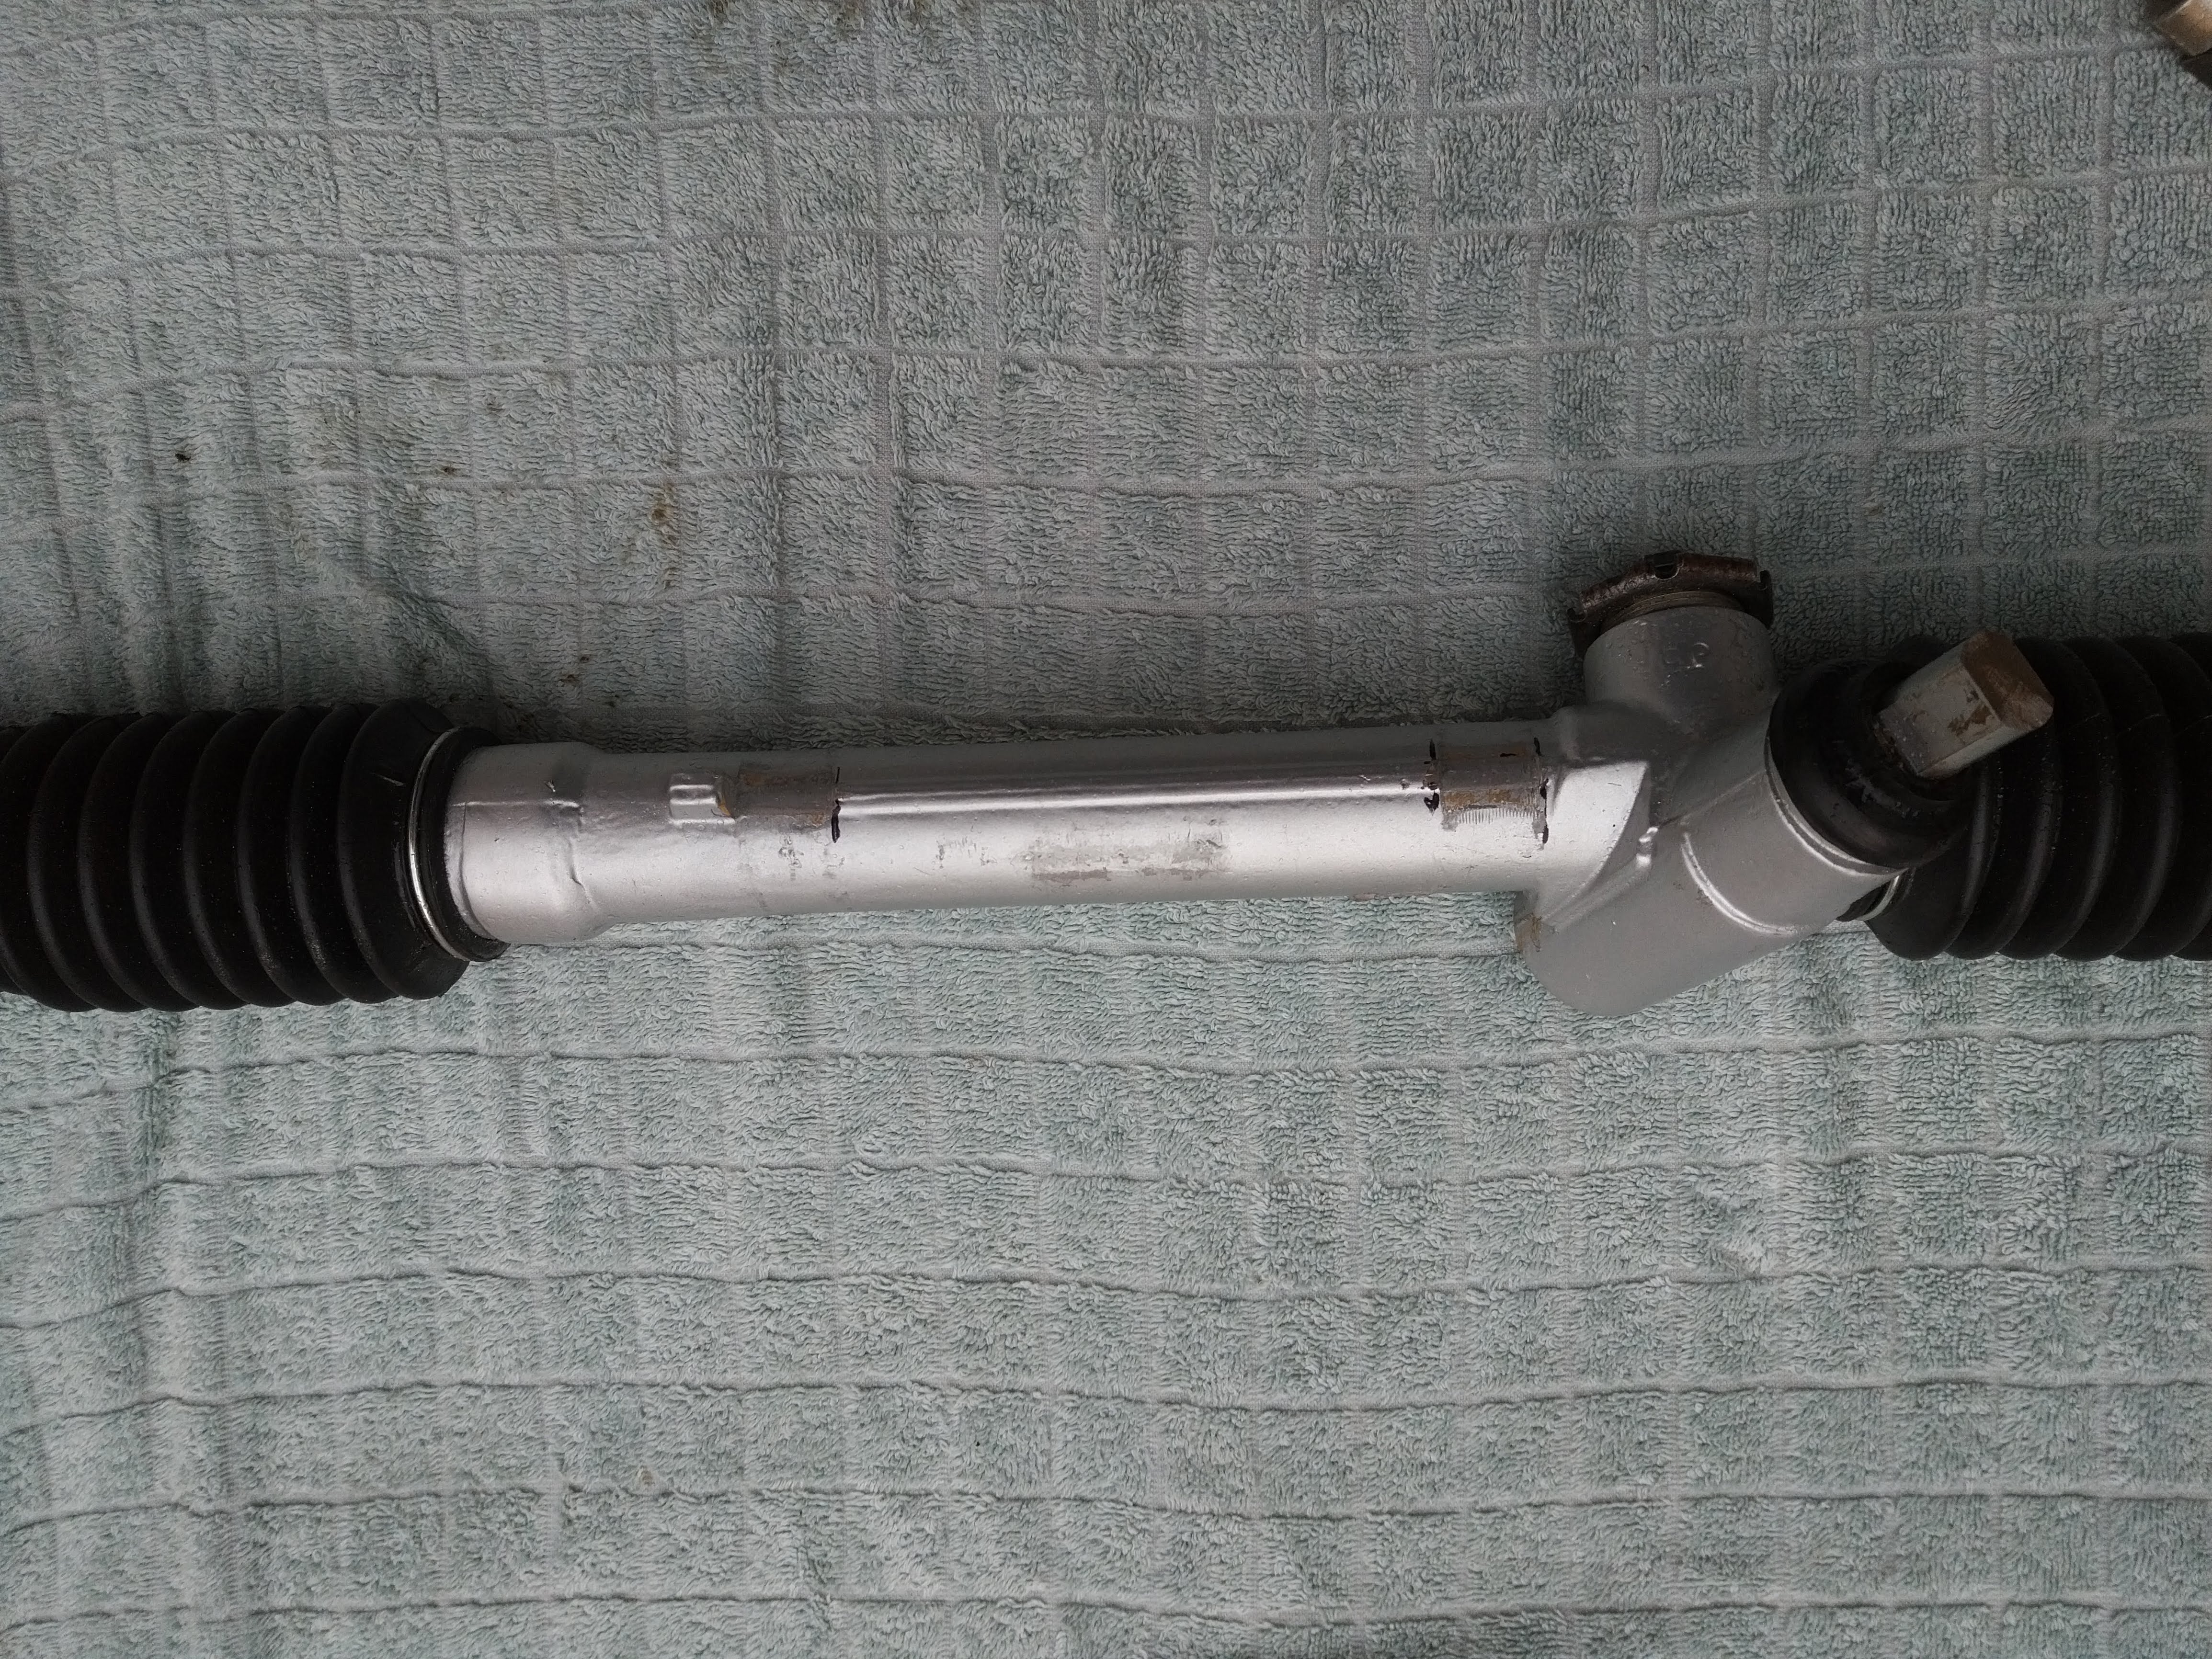
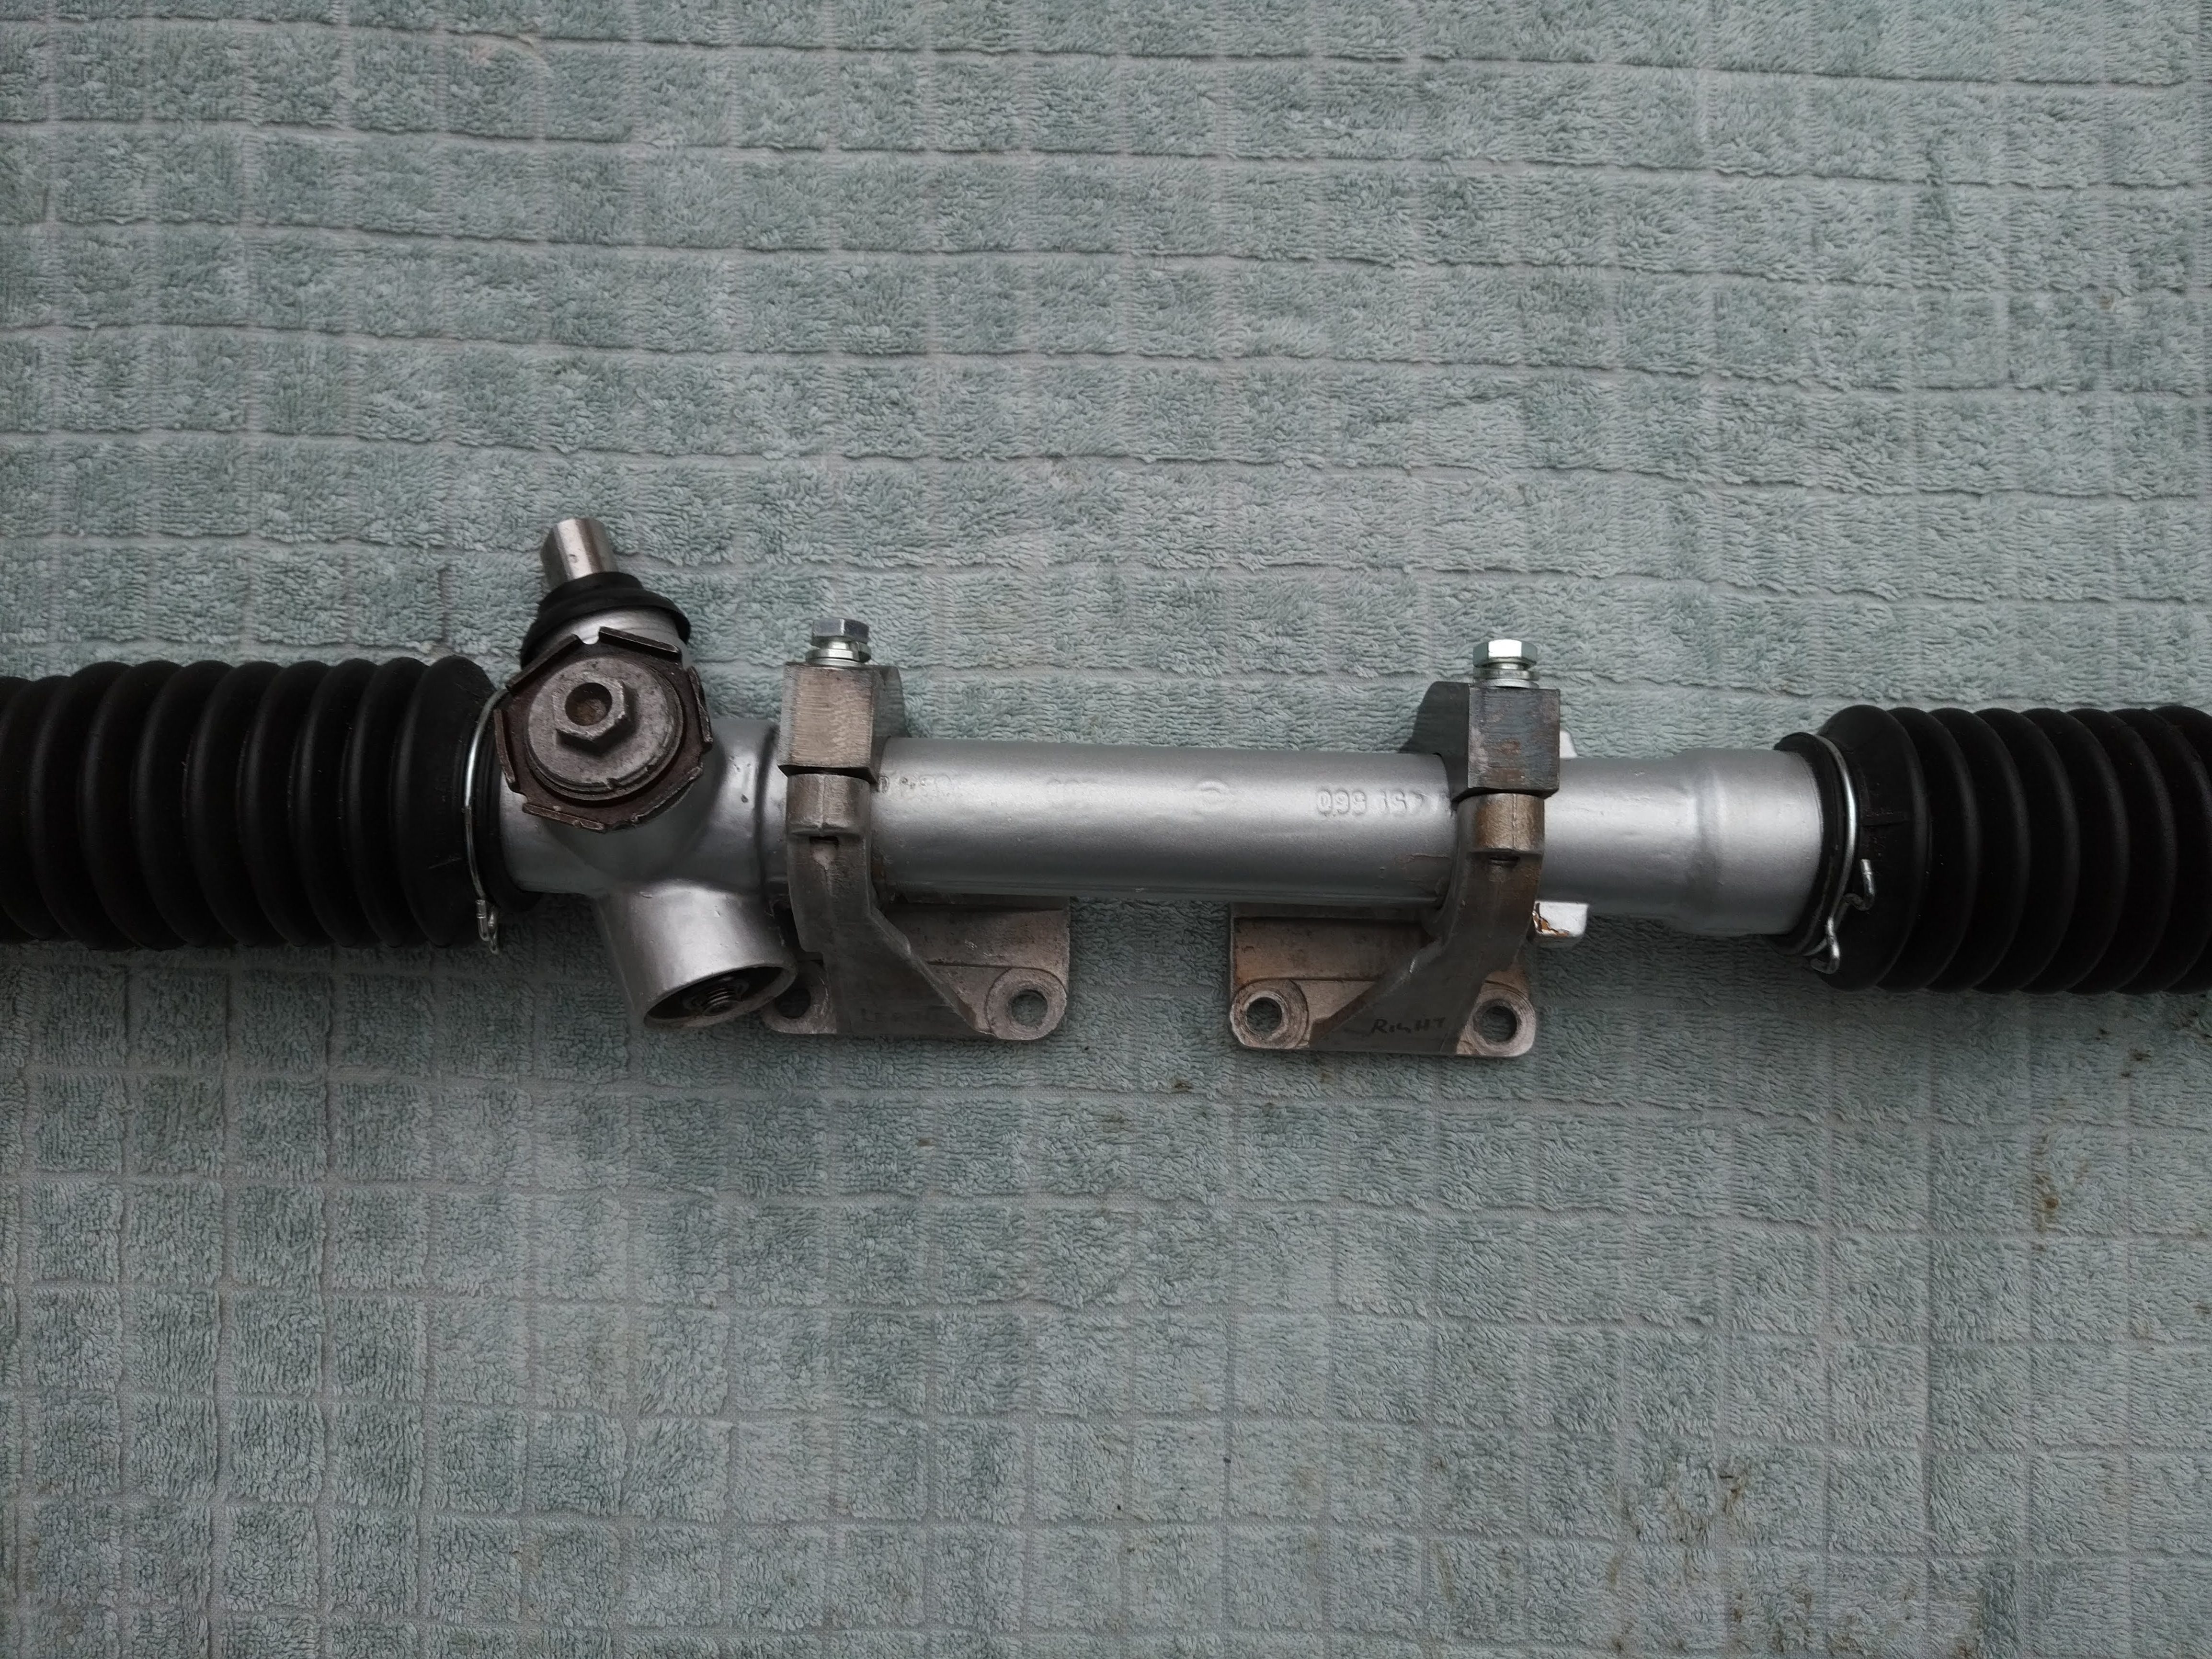
4. Now to modify the rack by removing the bits where it bolts to the cross member, to make it nice and round to fit the brackets.
Opel Manta A Series steering rack conversion.
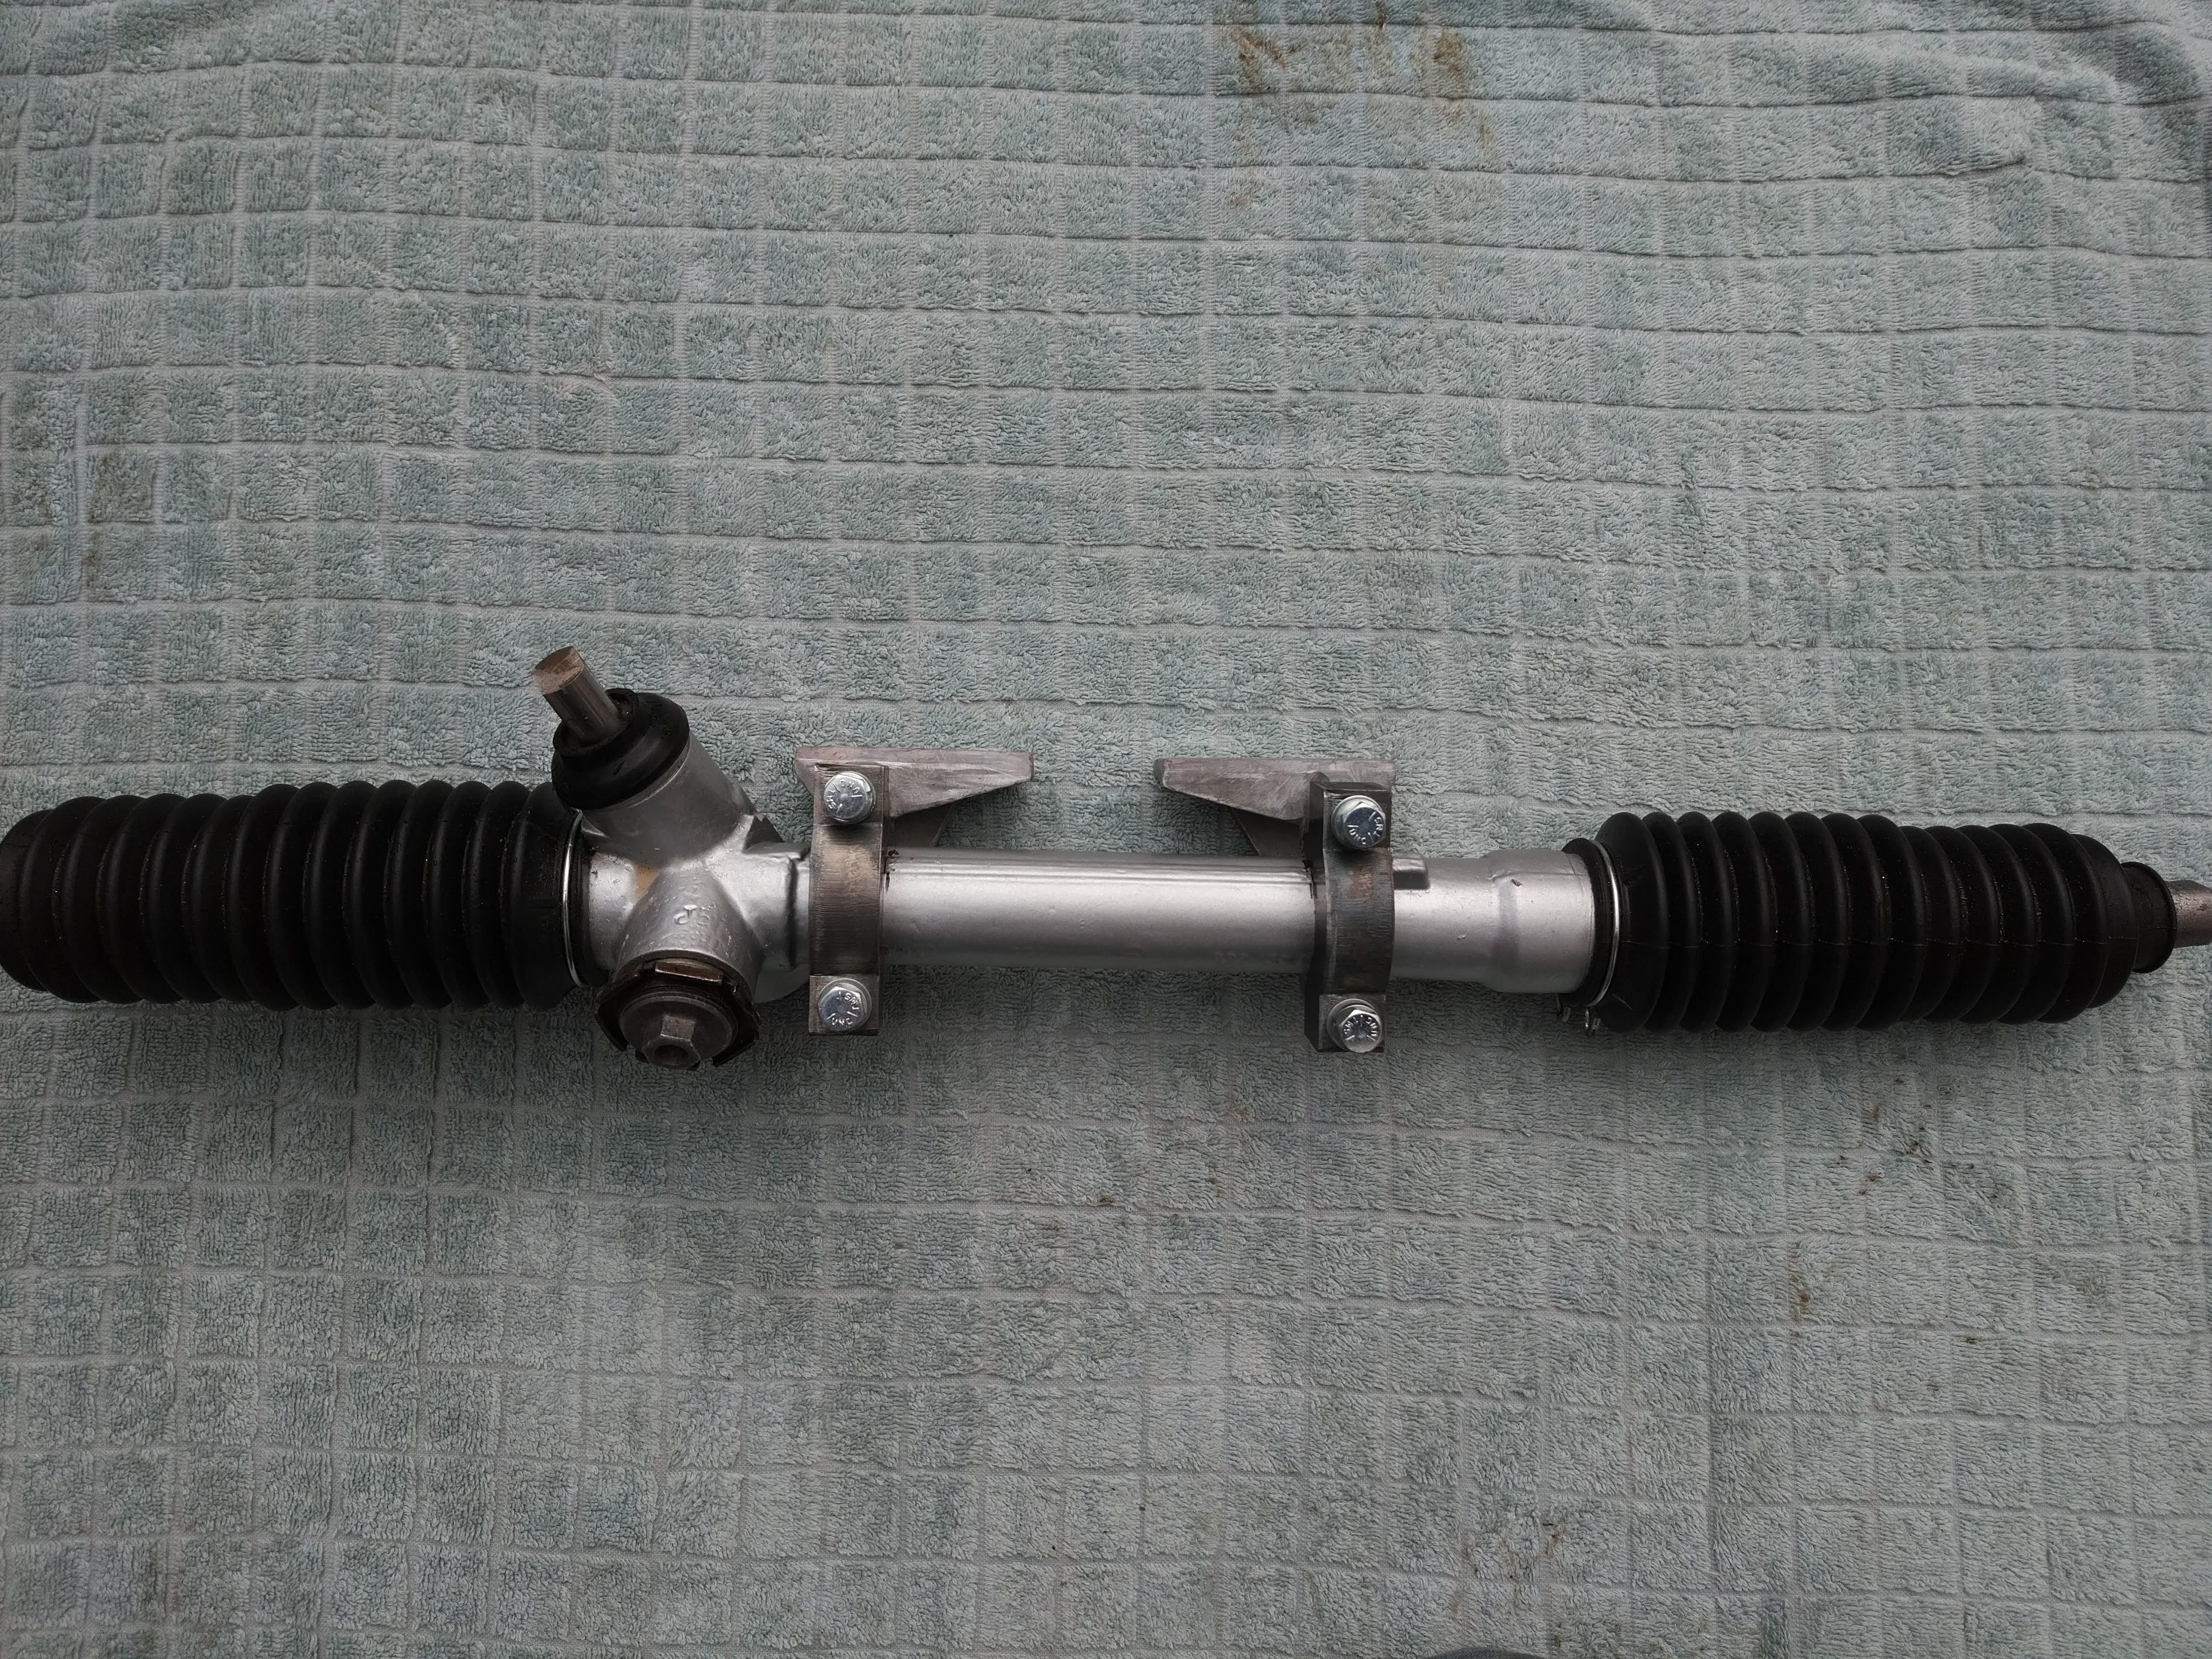
As you can see if have removed the mounting points and used the original little studs that stick out as a locator for right hand side to stop the rack sliding left to right and i will probably add a bracket to the other side just to be 100% sure it doesn’t move about. and i think i will add a little rubber inset around the rack to give it better grip.
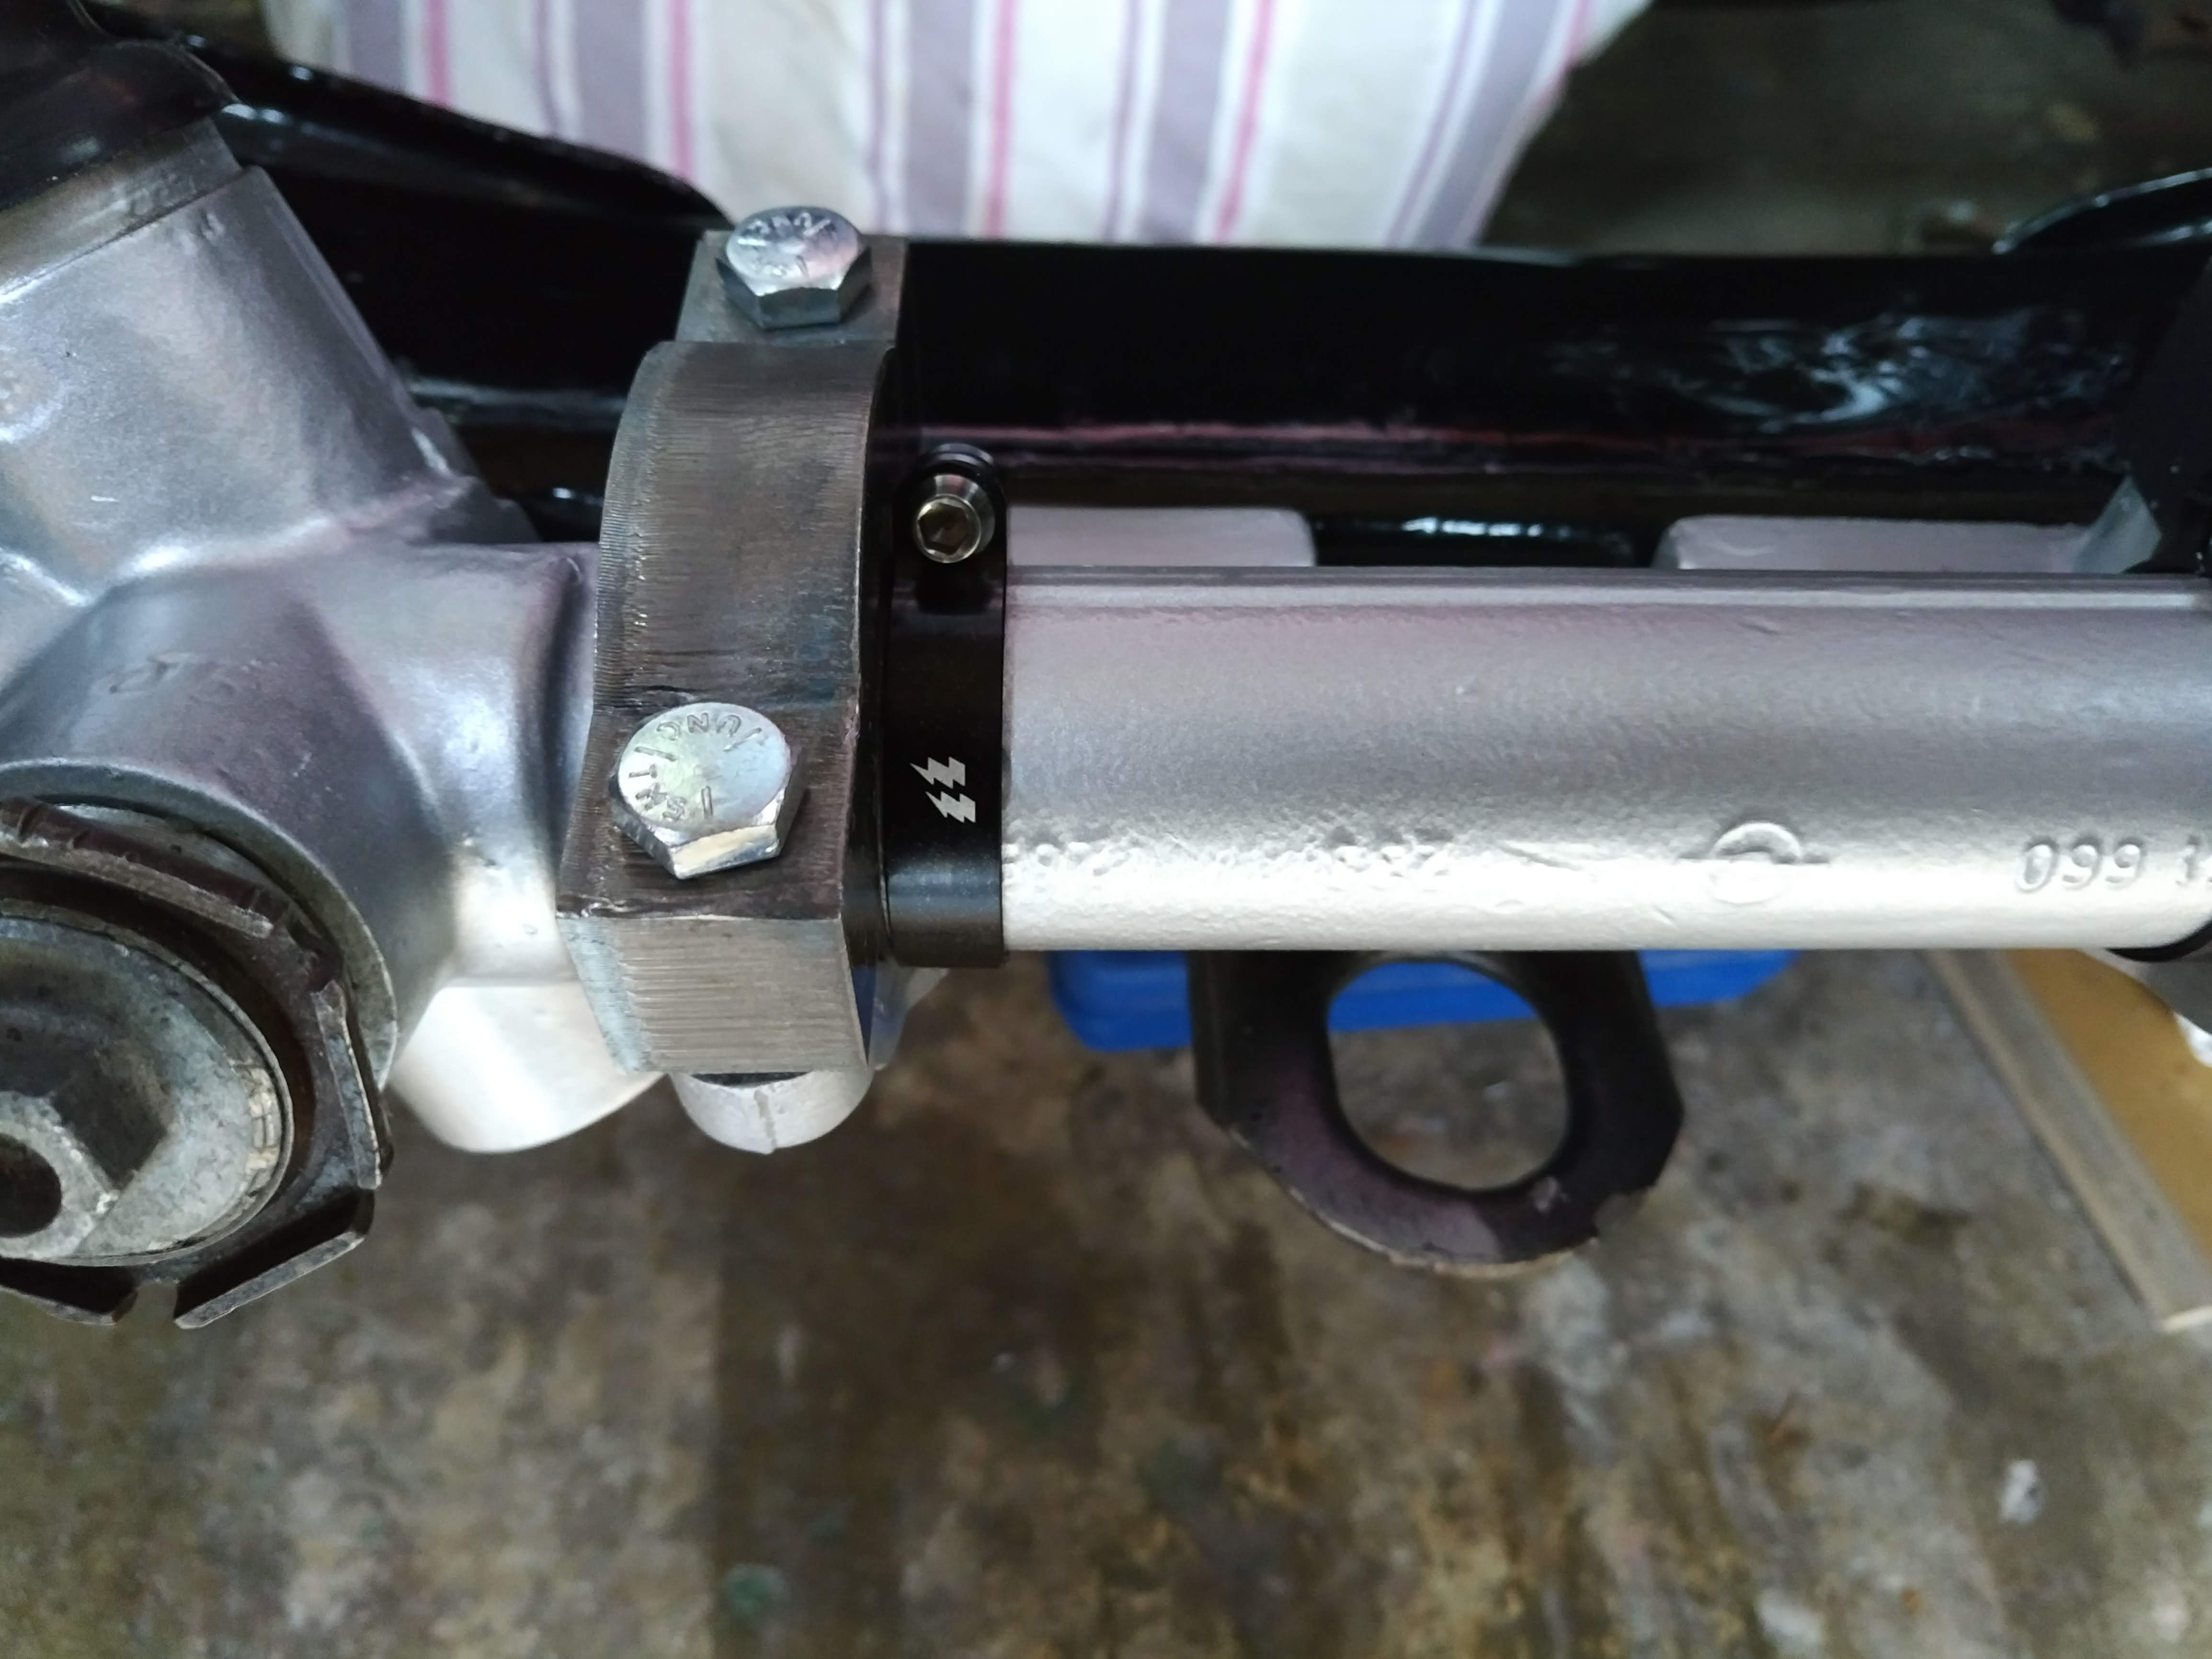
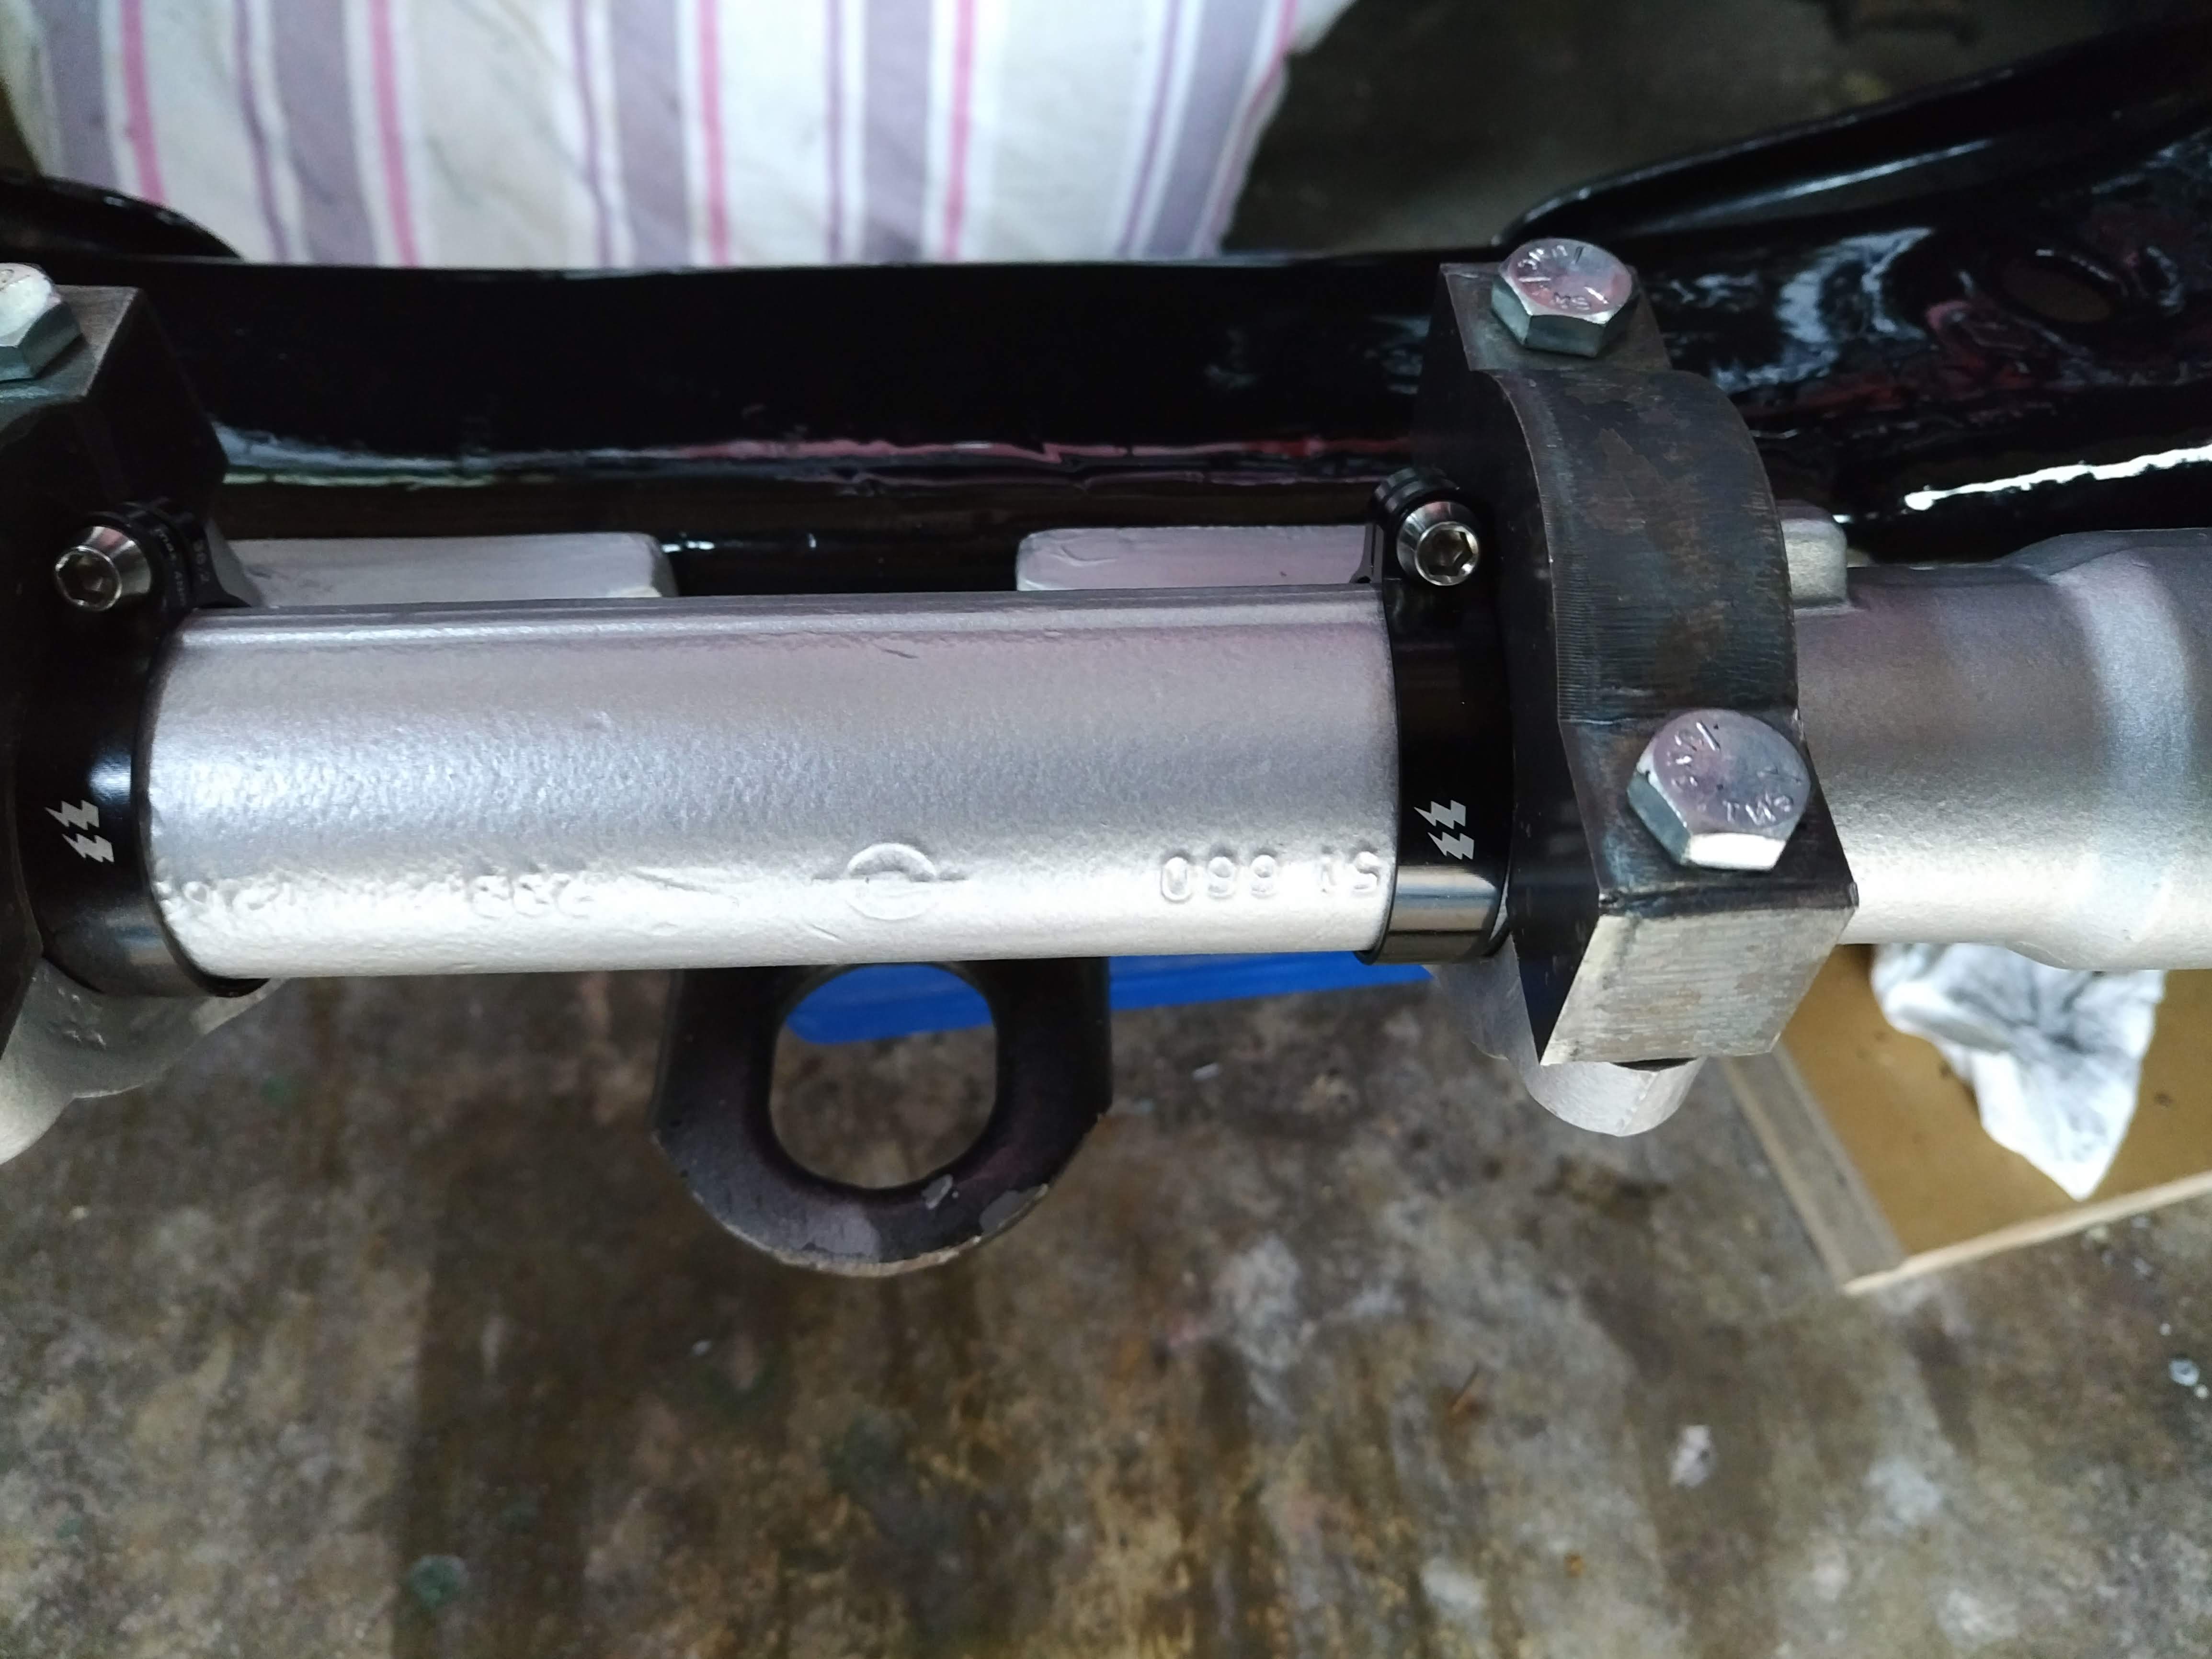
5. Fitting the brackets to the rack.
Opel Manta A Series steering rack conversion.
Opel Manta A Series steering rack conversion.
Opel Manta A Series steering rack conversion.
Opel Manta A Series steering rack conversion.
Opel Manta A Series steering rack conversion.
Opel Manta A Series steering rack conversion.
6. Brackets fitted to cross member.
Opel Manta A Series steering rack conversion.
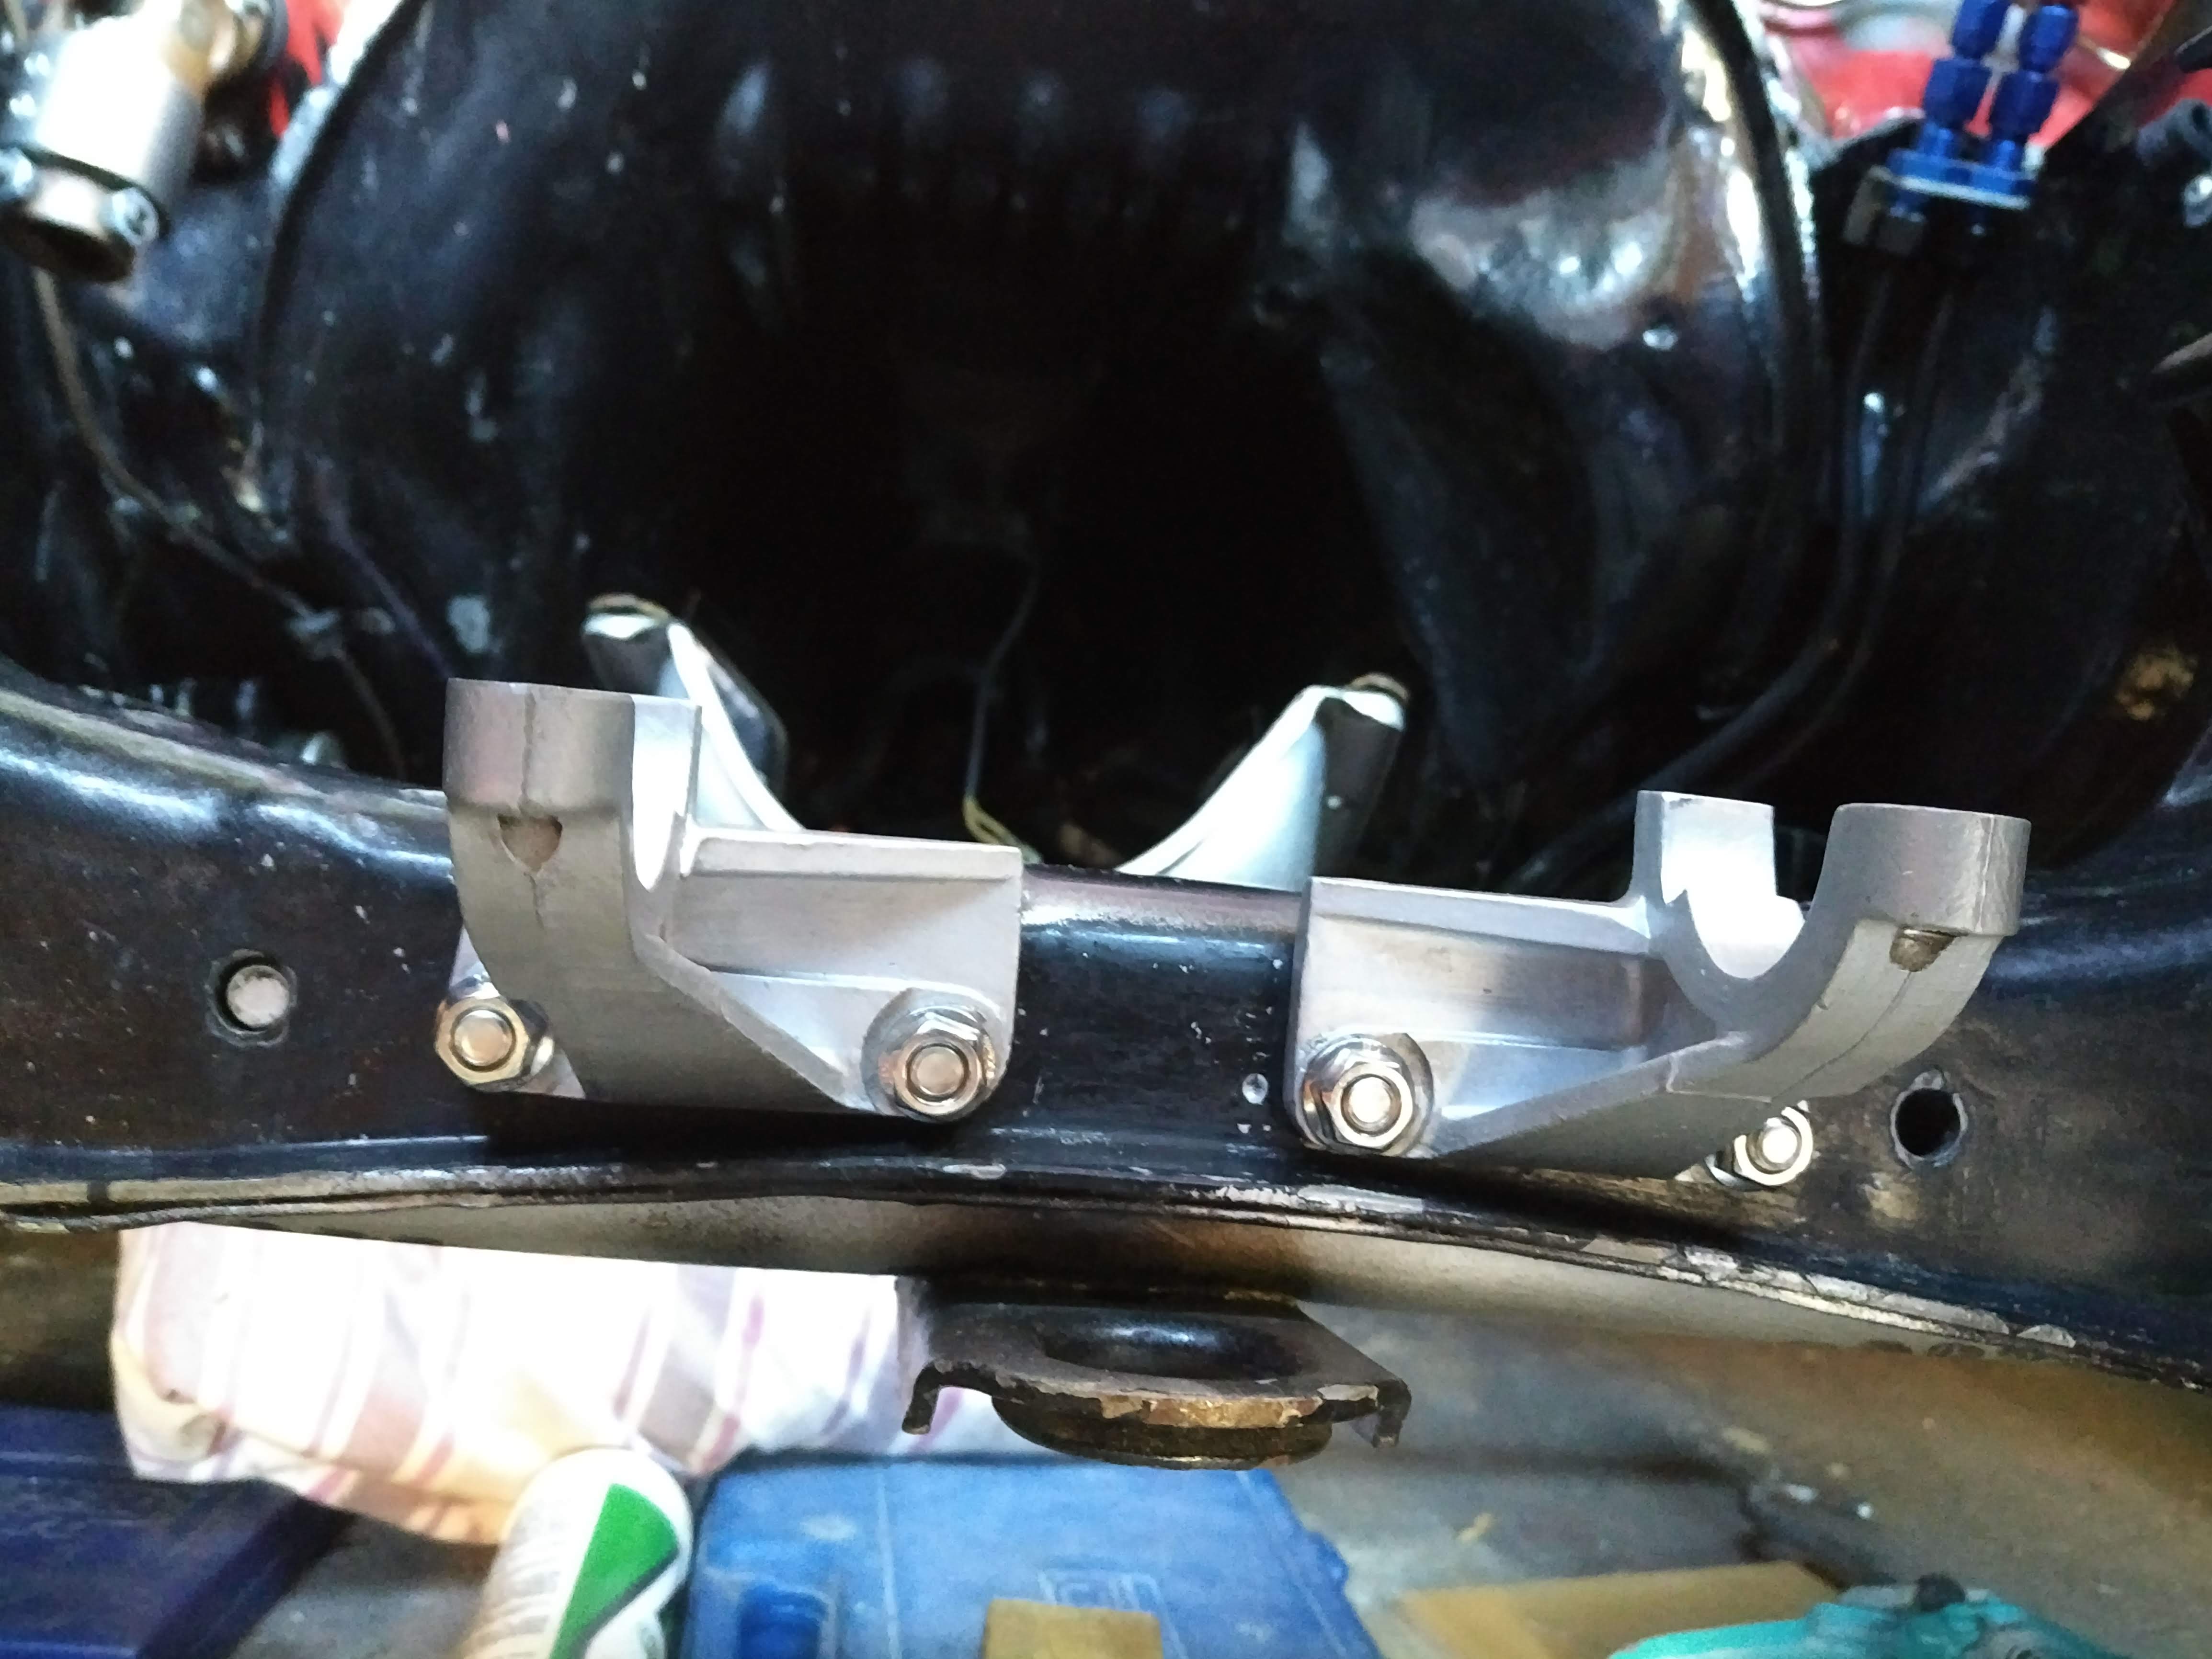
Opel Manta A Series steering rack conversion.
Opel Manta A Series steering rack conversion.
I have manage to fit the brackets on the cross member so they are located just inside of the original bolt holes for the original steering racket as these still need to have a bolt through the cross member as they hold the lower arm to body brace. The only other thing i had to do was have some weld added to the back of the bracket as the manta cross member taper in towards the top and is not vertical. So a little bit of weld and some faffing to get the right angle and we are all done.
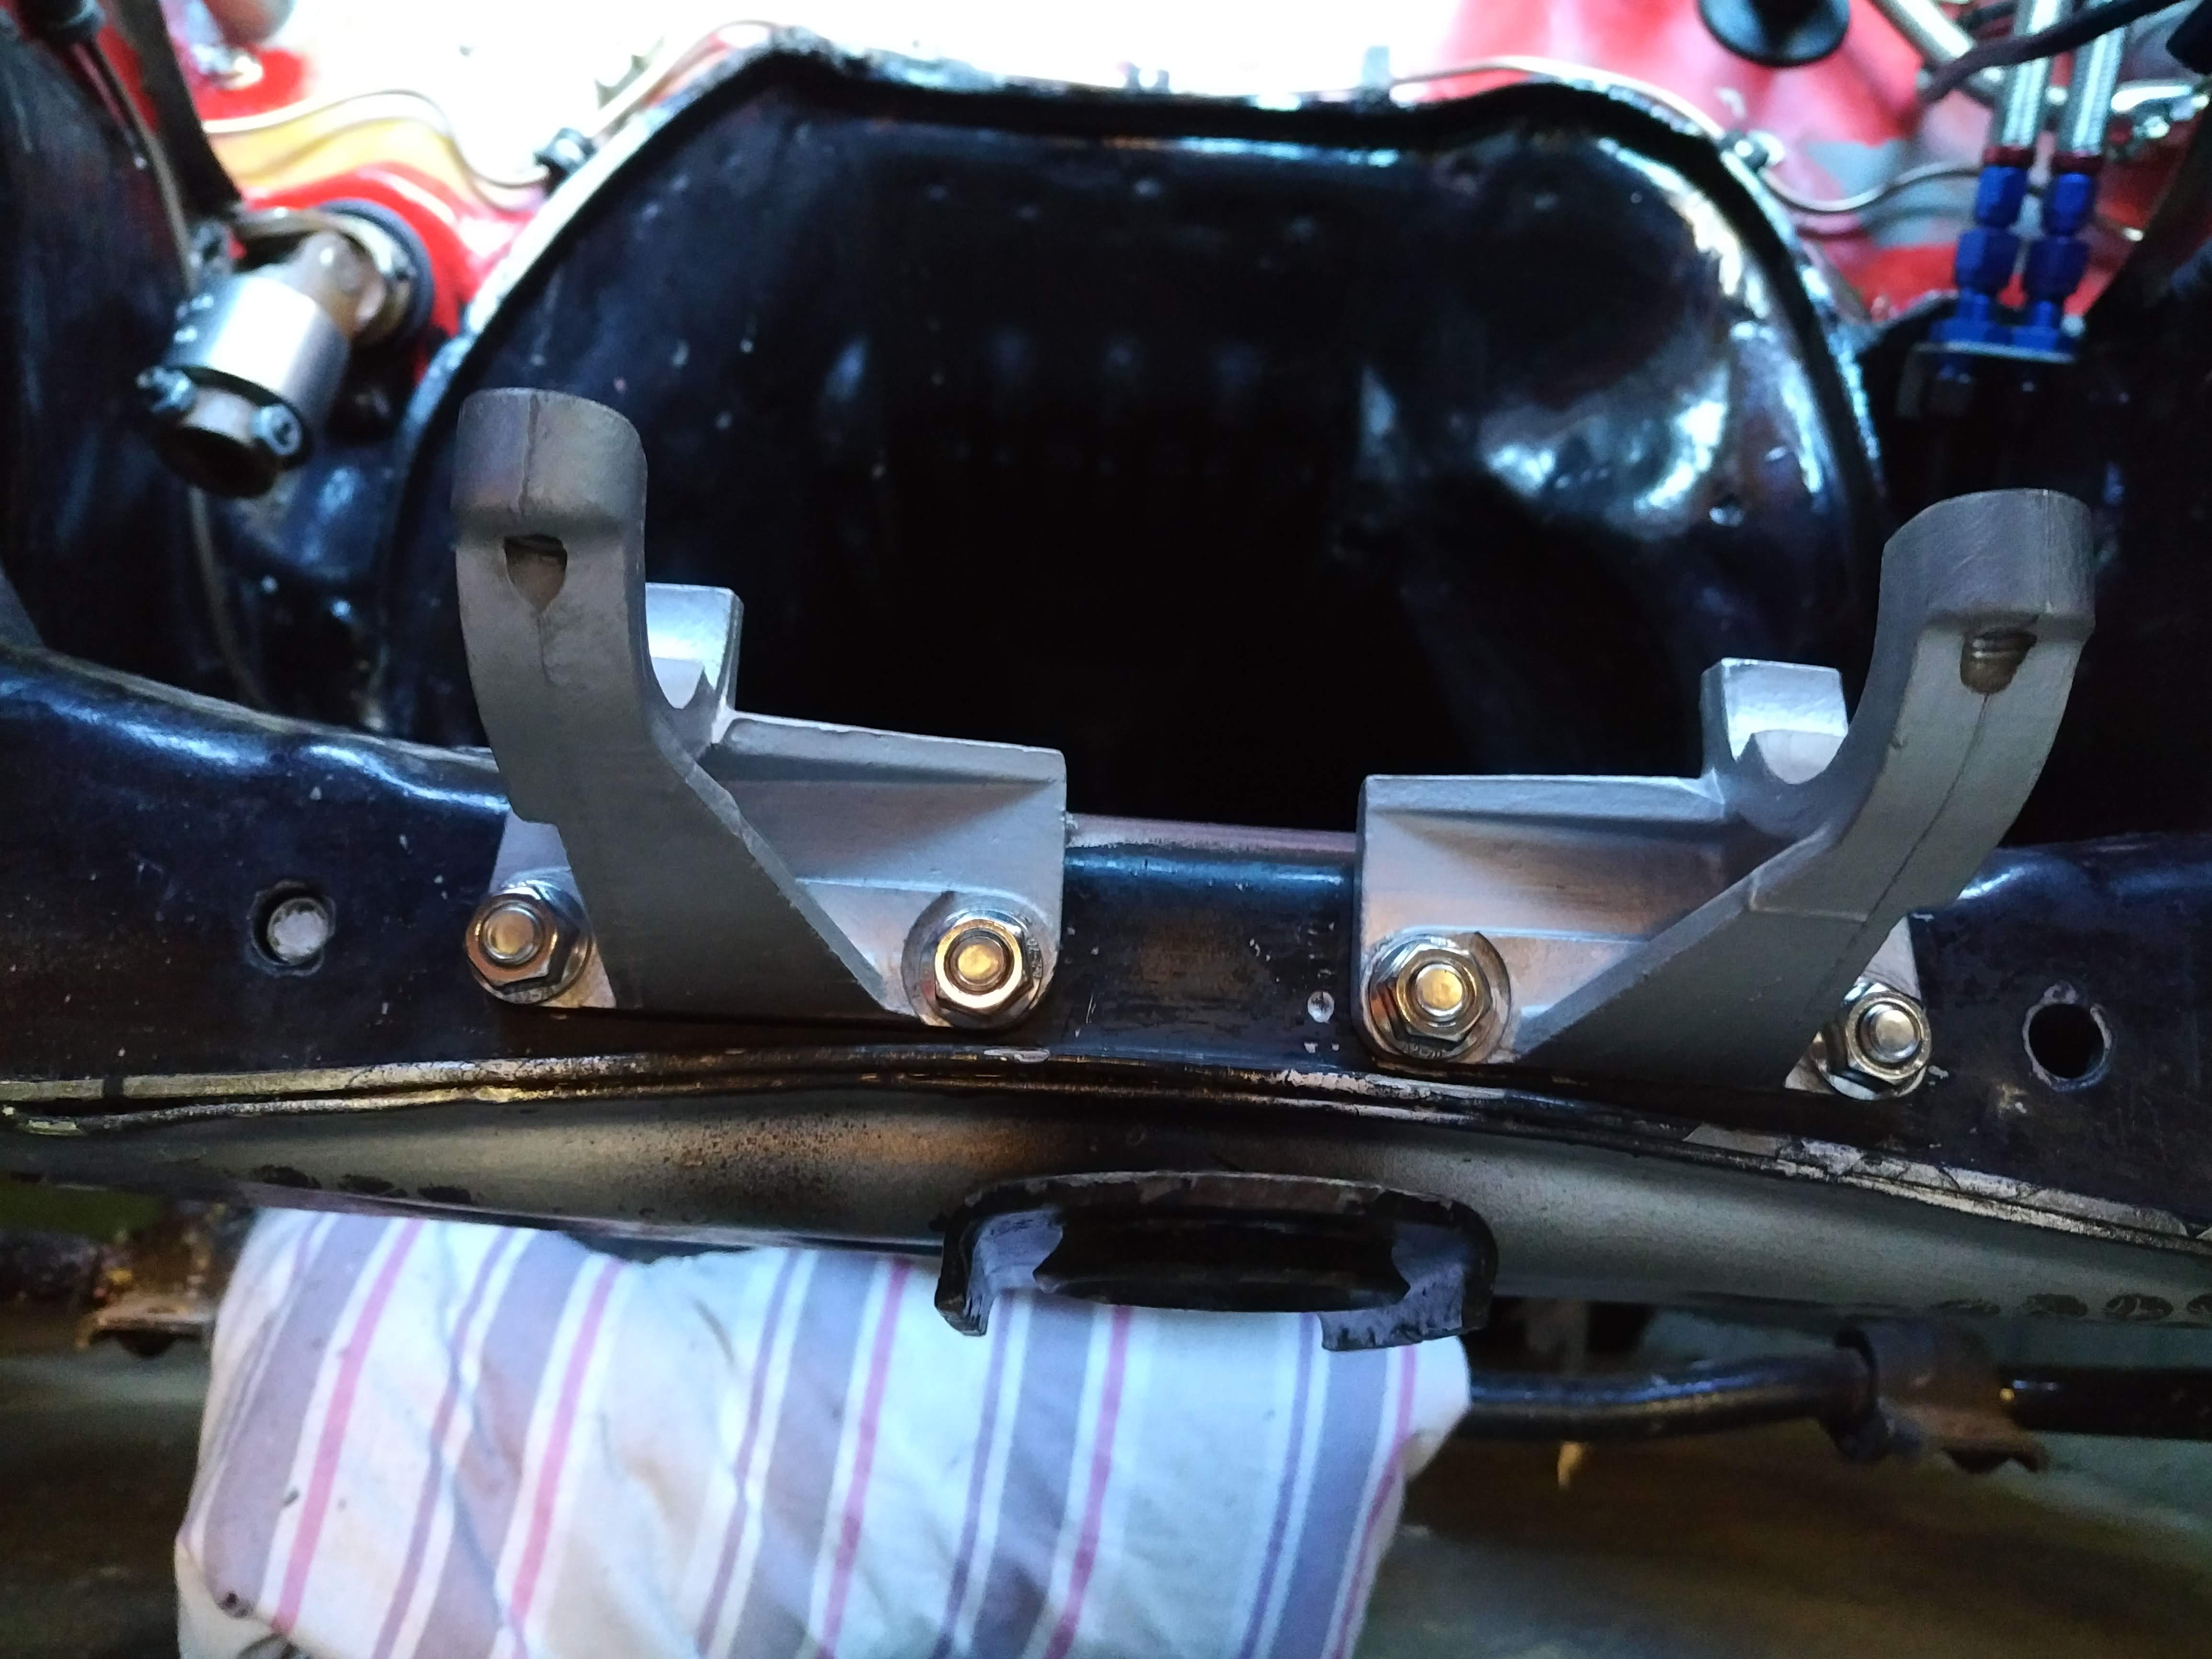
7. Rack fitted
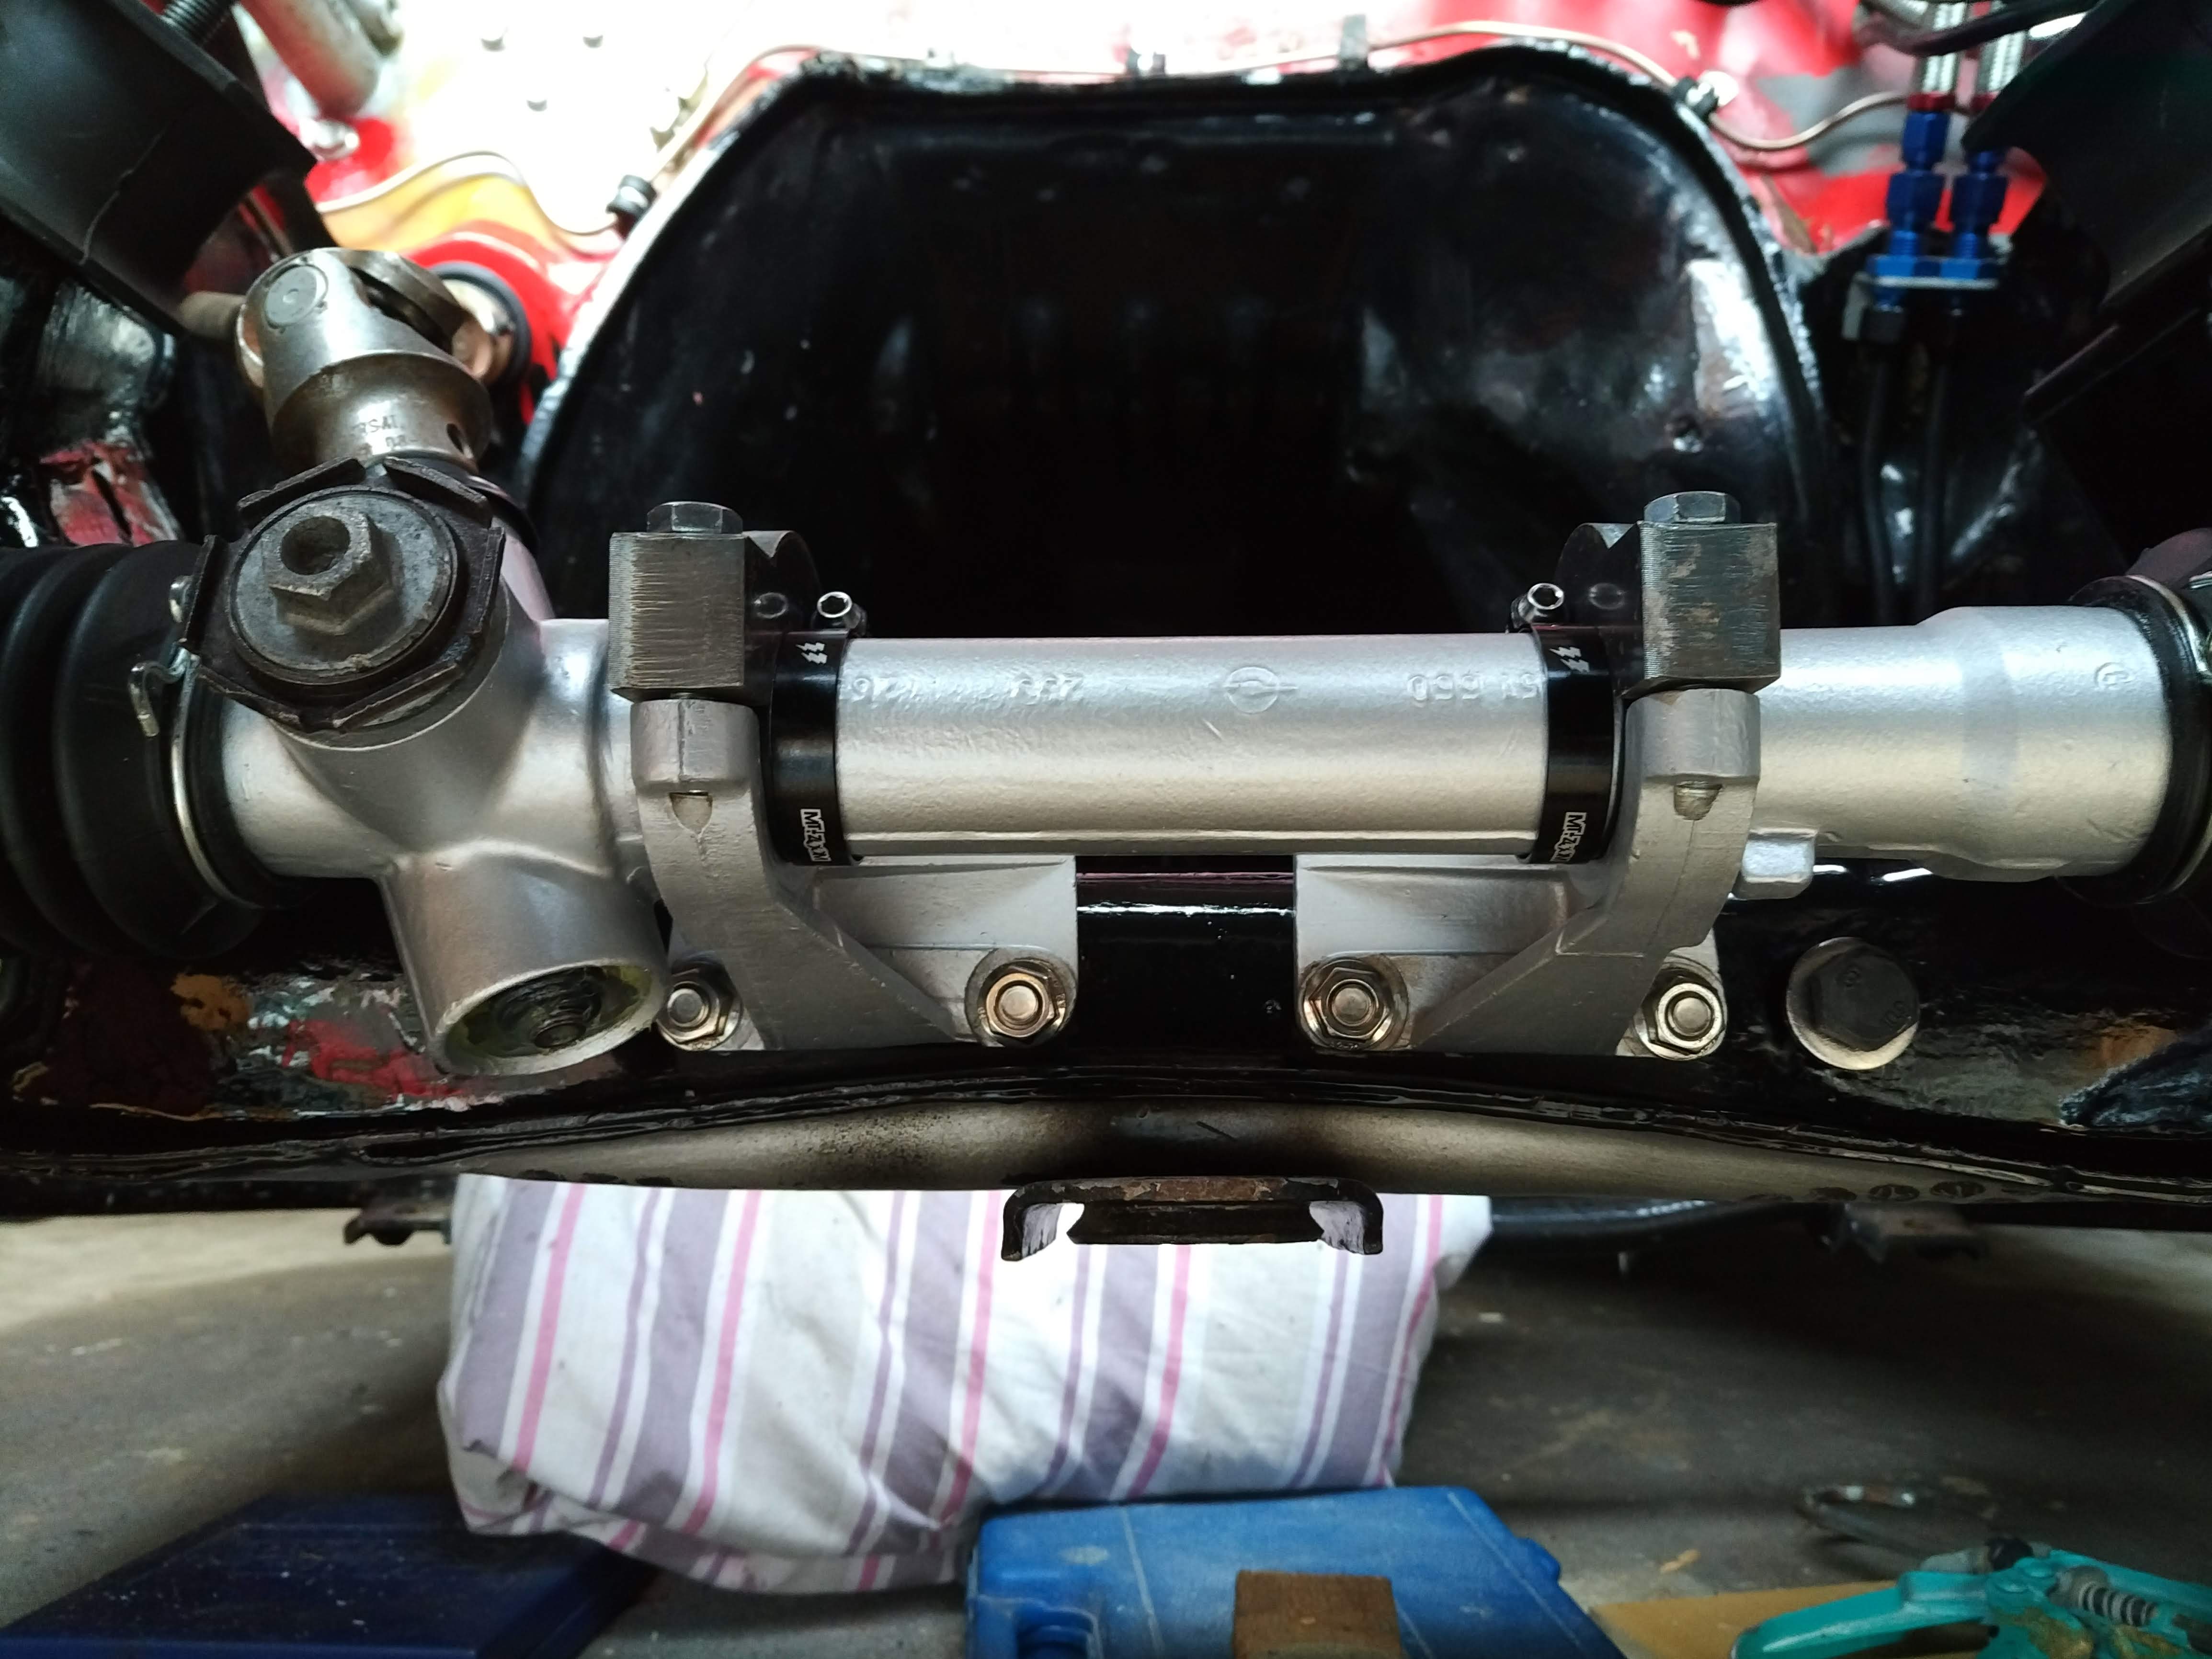
Opel Manta A Series steering rack conversion.
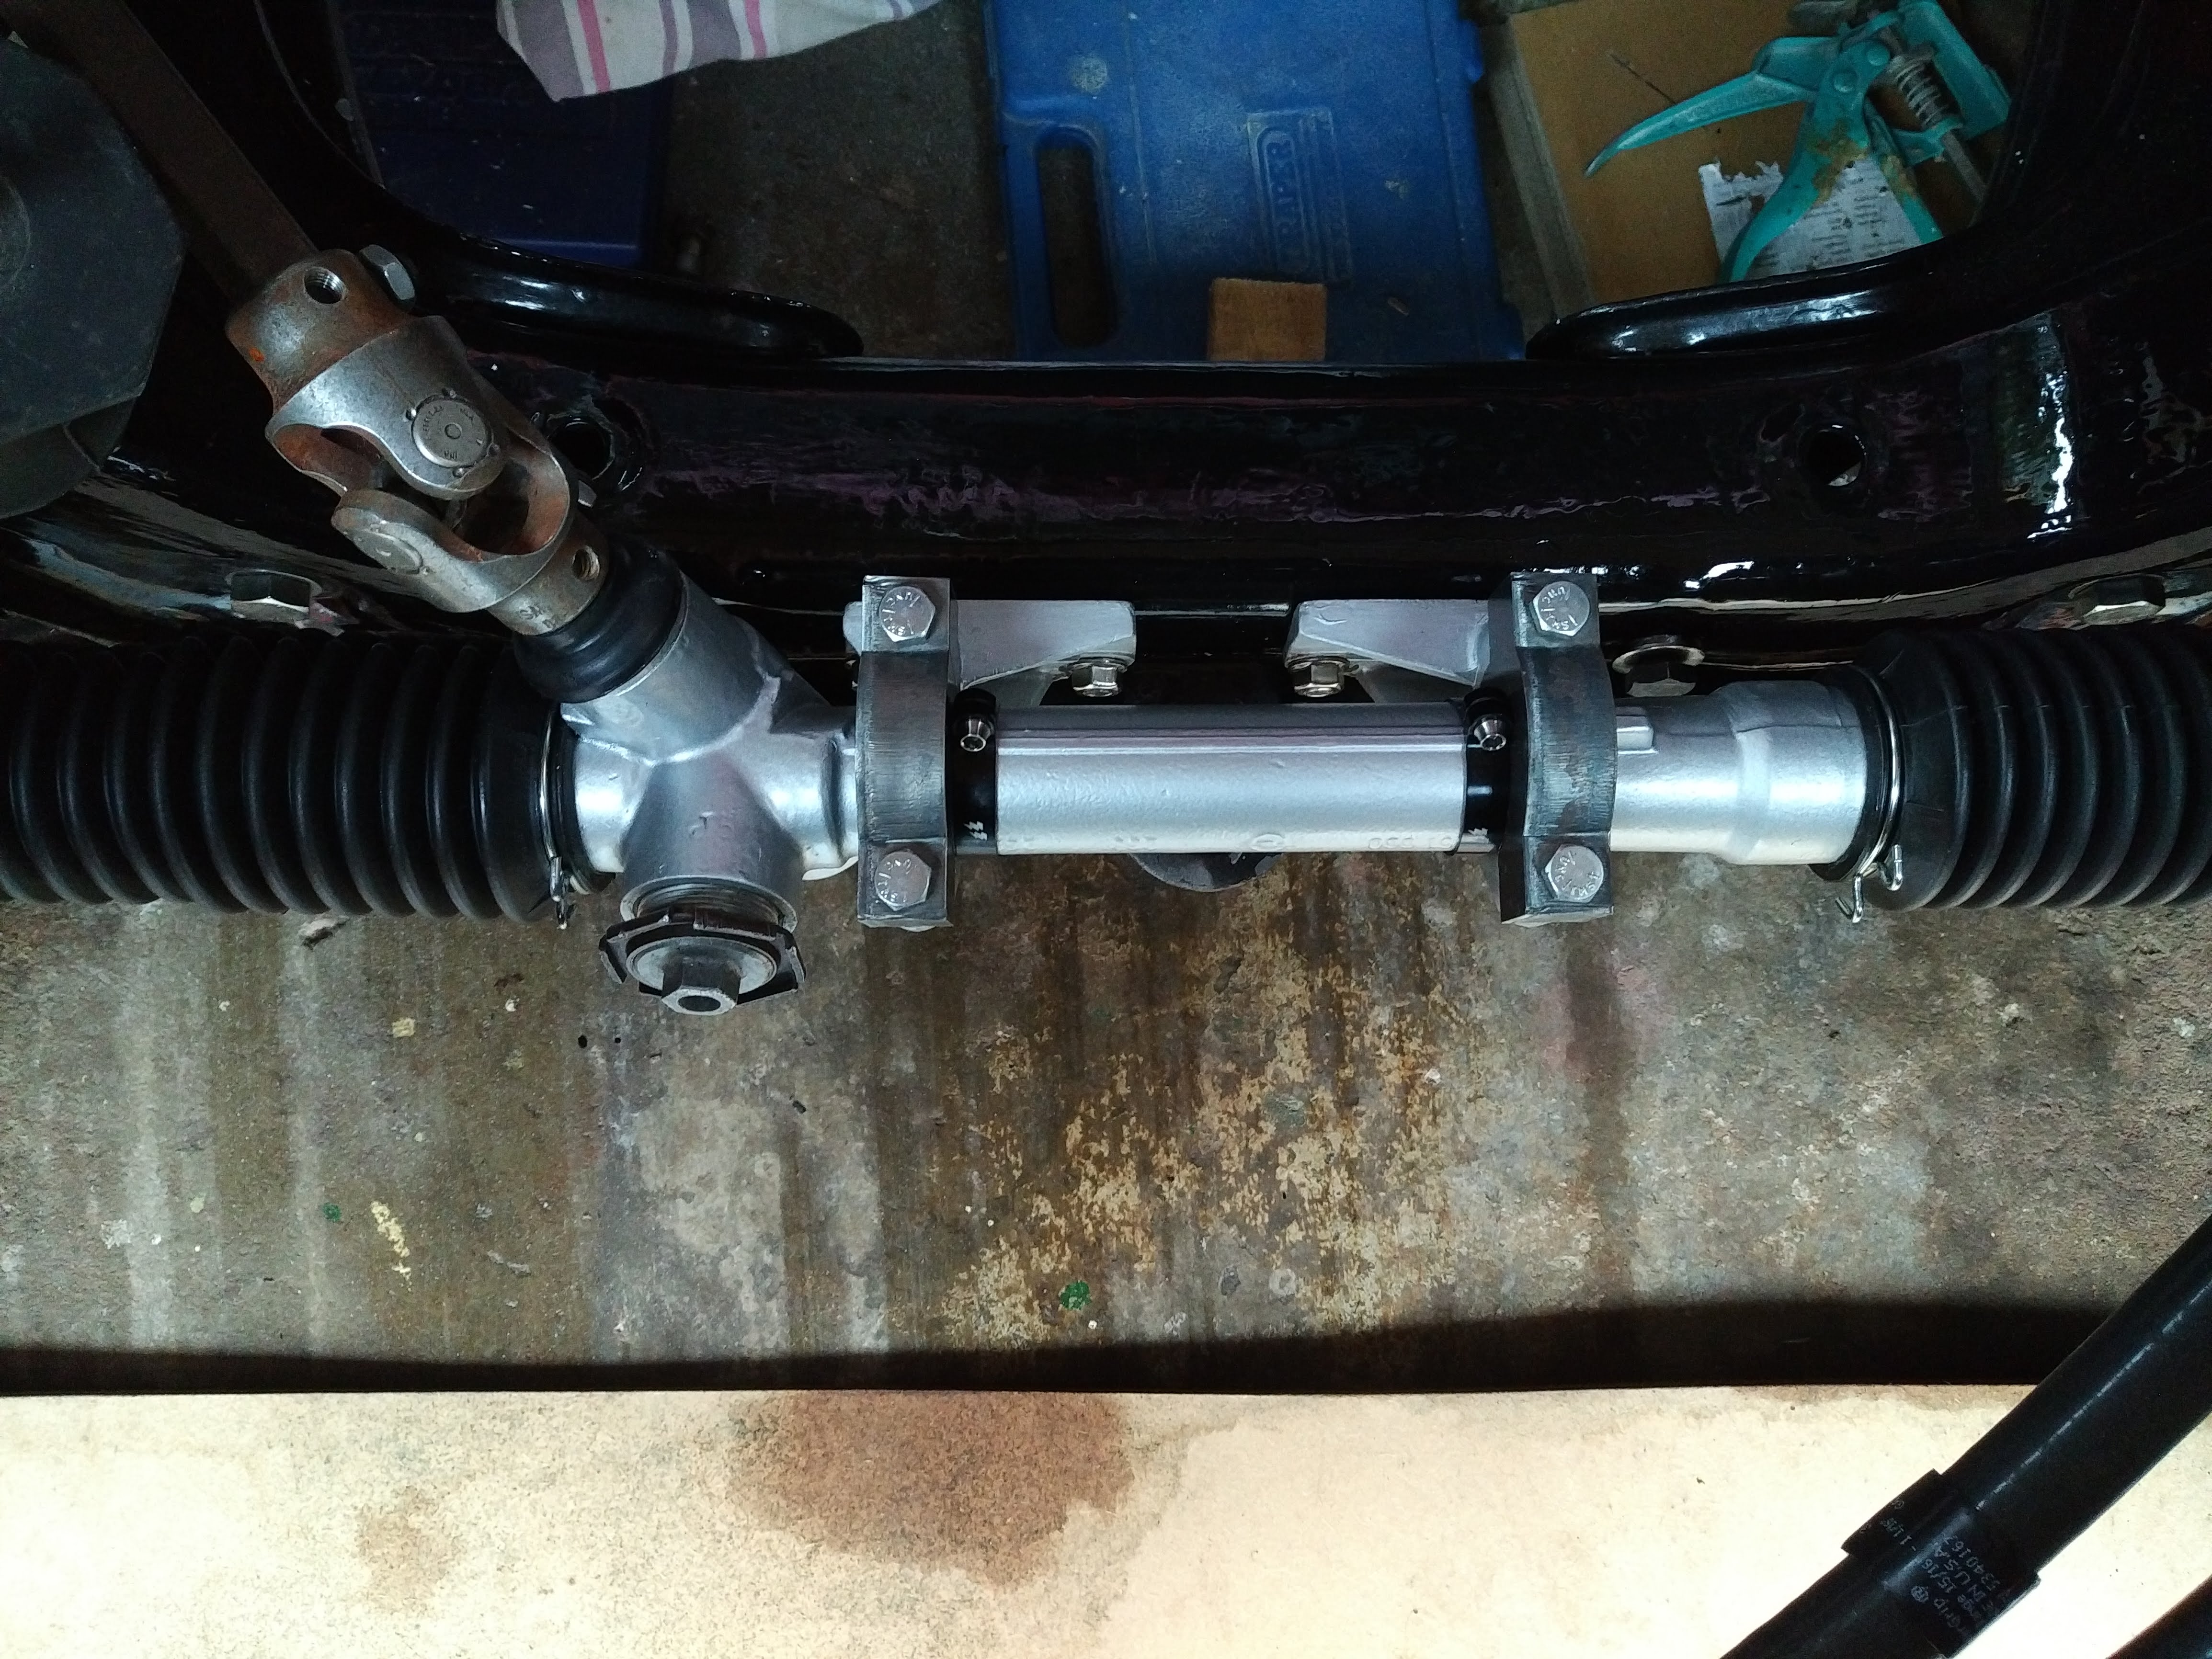
Opel Manta A Series steering rack conversion.
Opel Manta A Series steering rack conversion.
Opel Manta A Series steering rack conversion.
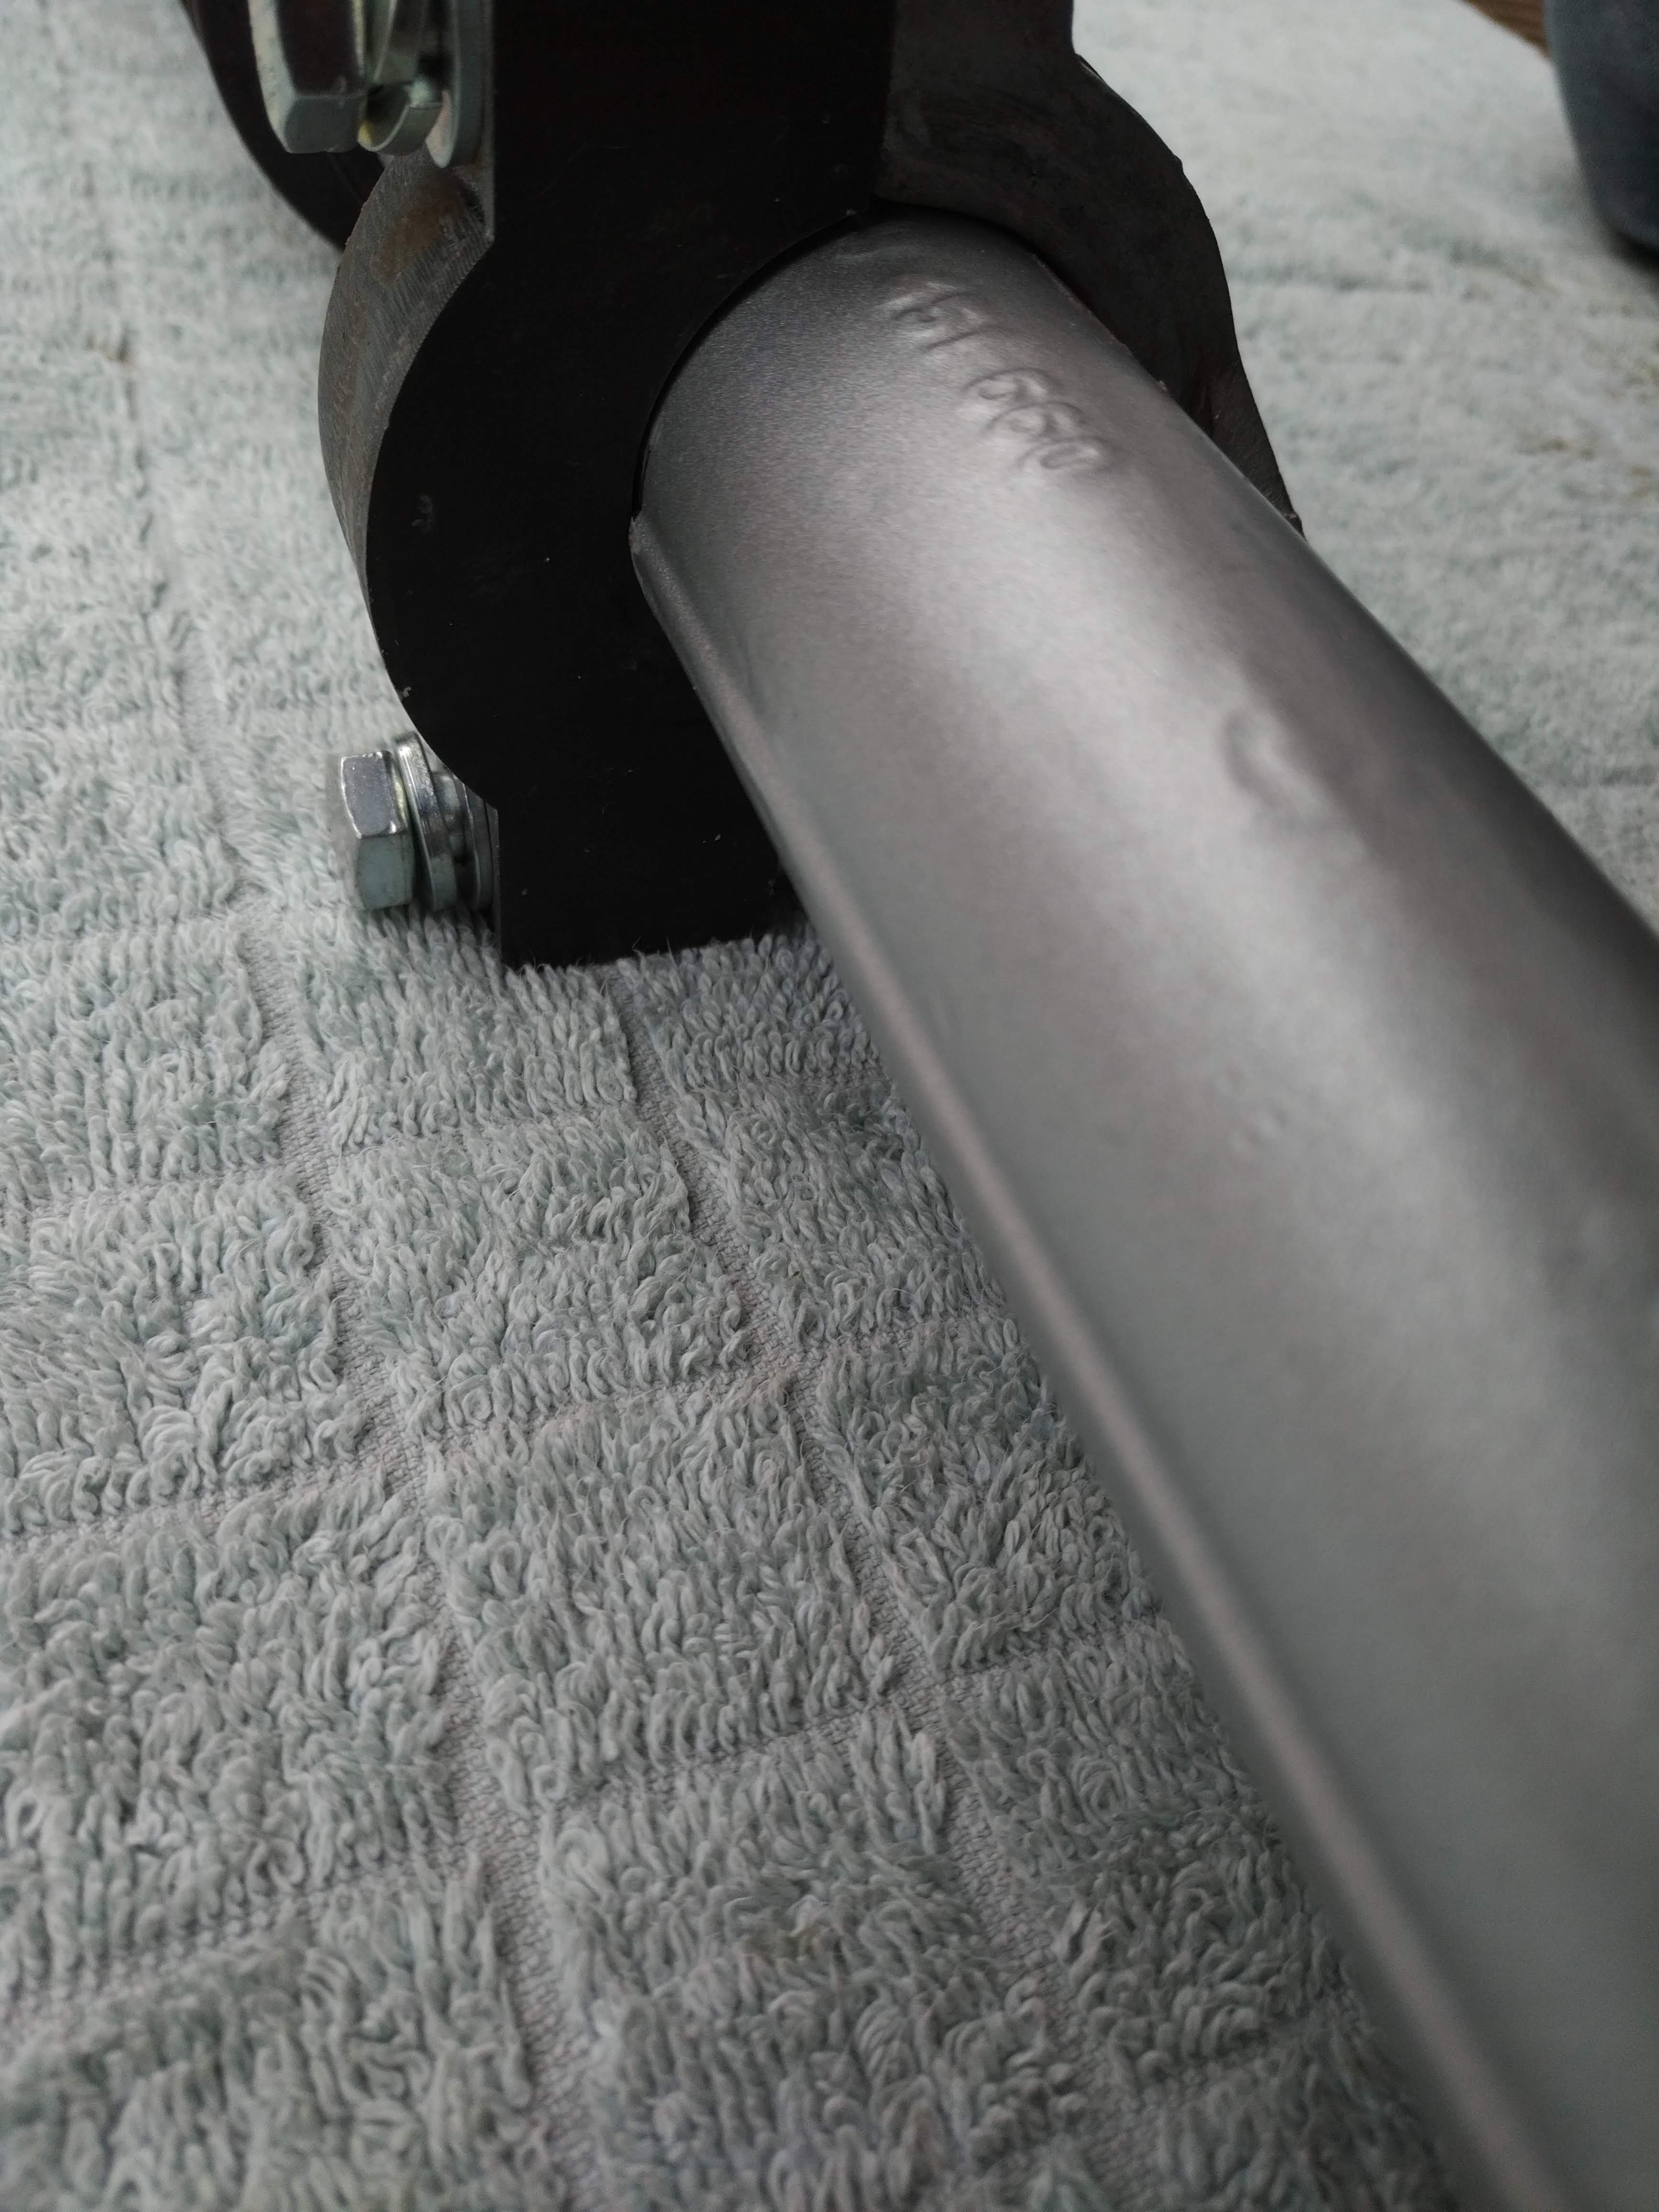
I have added a thin rubber shim to the bracket to give it a bit more grip and i have added some little clamps just to be 100% sure there is no movement left to right. These were 38mm bike seat post clamps!
I can now setup the steering rack to and angle by rotating it front to back, which will allow me to bring the steering shaft in at a different angle. I now need to drop the engine back in to see what clearance (if any!) i have between the rack and the sump and if i need to reduce the height of the bracket tops or maybe lift the engine slightly and with the manifold fitted work out the steering shaft route. I will be writing up the steering shaft route in Part 2 of the steering saga very soon when the head comes back from having new cam bearing and the engine is all complete and in.
Here is a little taster of the idea i have for the steering shaft, i hope to keep it tighter to the chassis rail on the completed one and im not sure if i will use the joint with the rubber damper as it quite big, lets see how it goes when the engine is in!
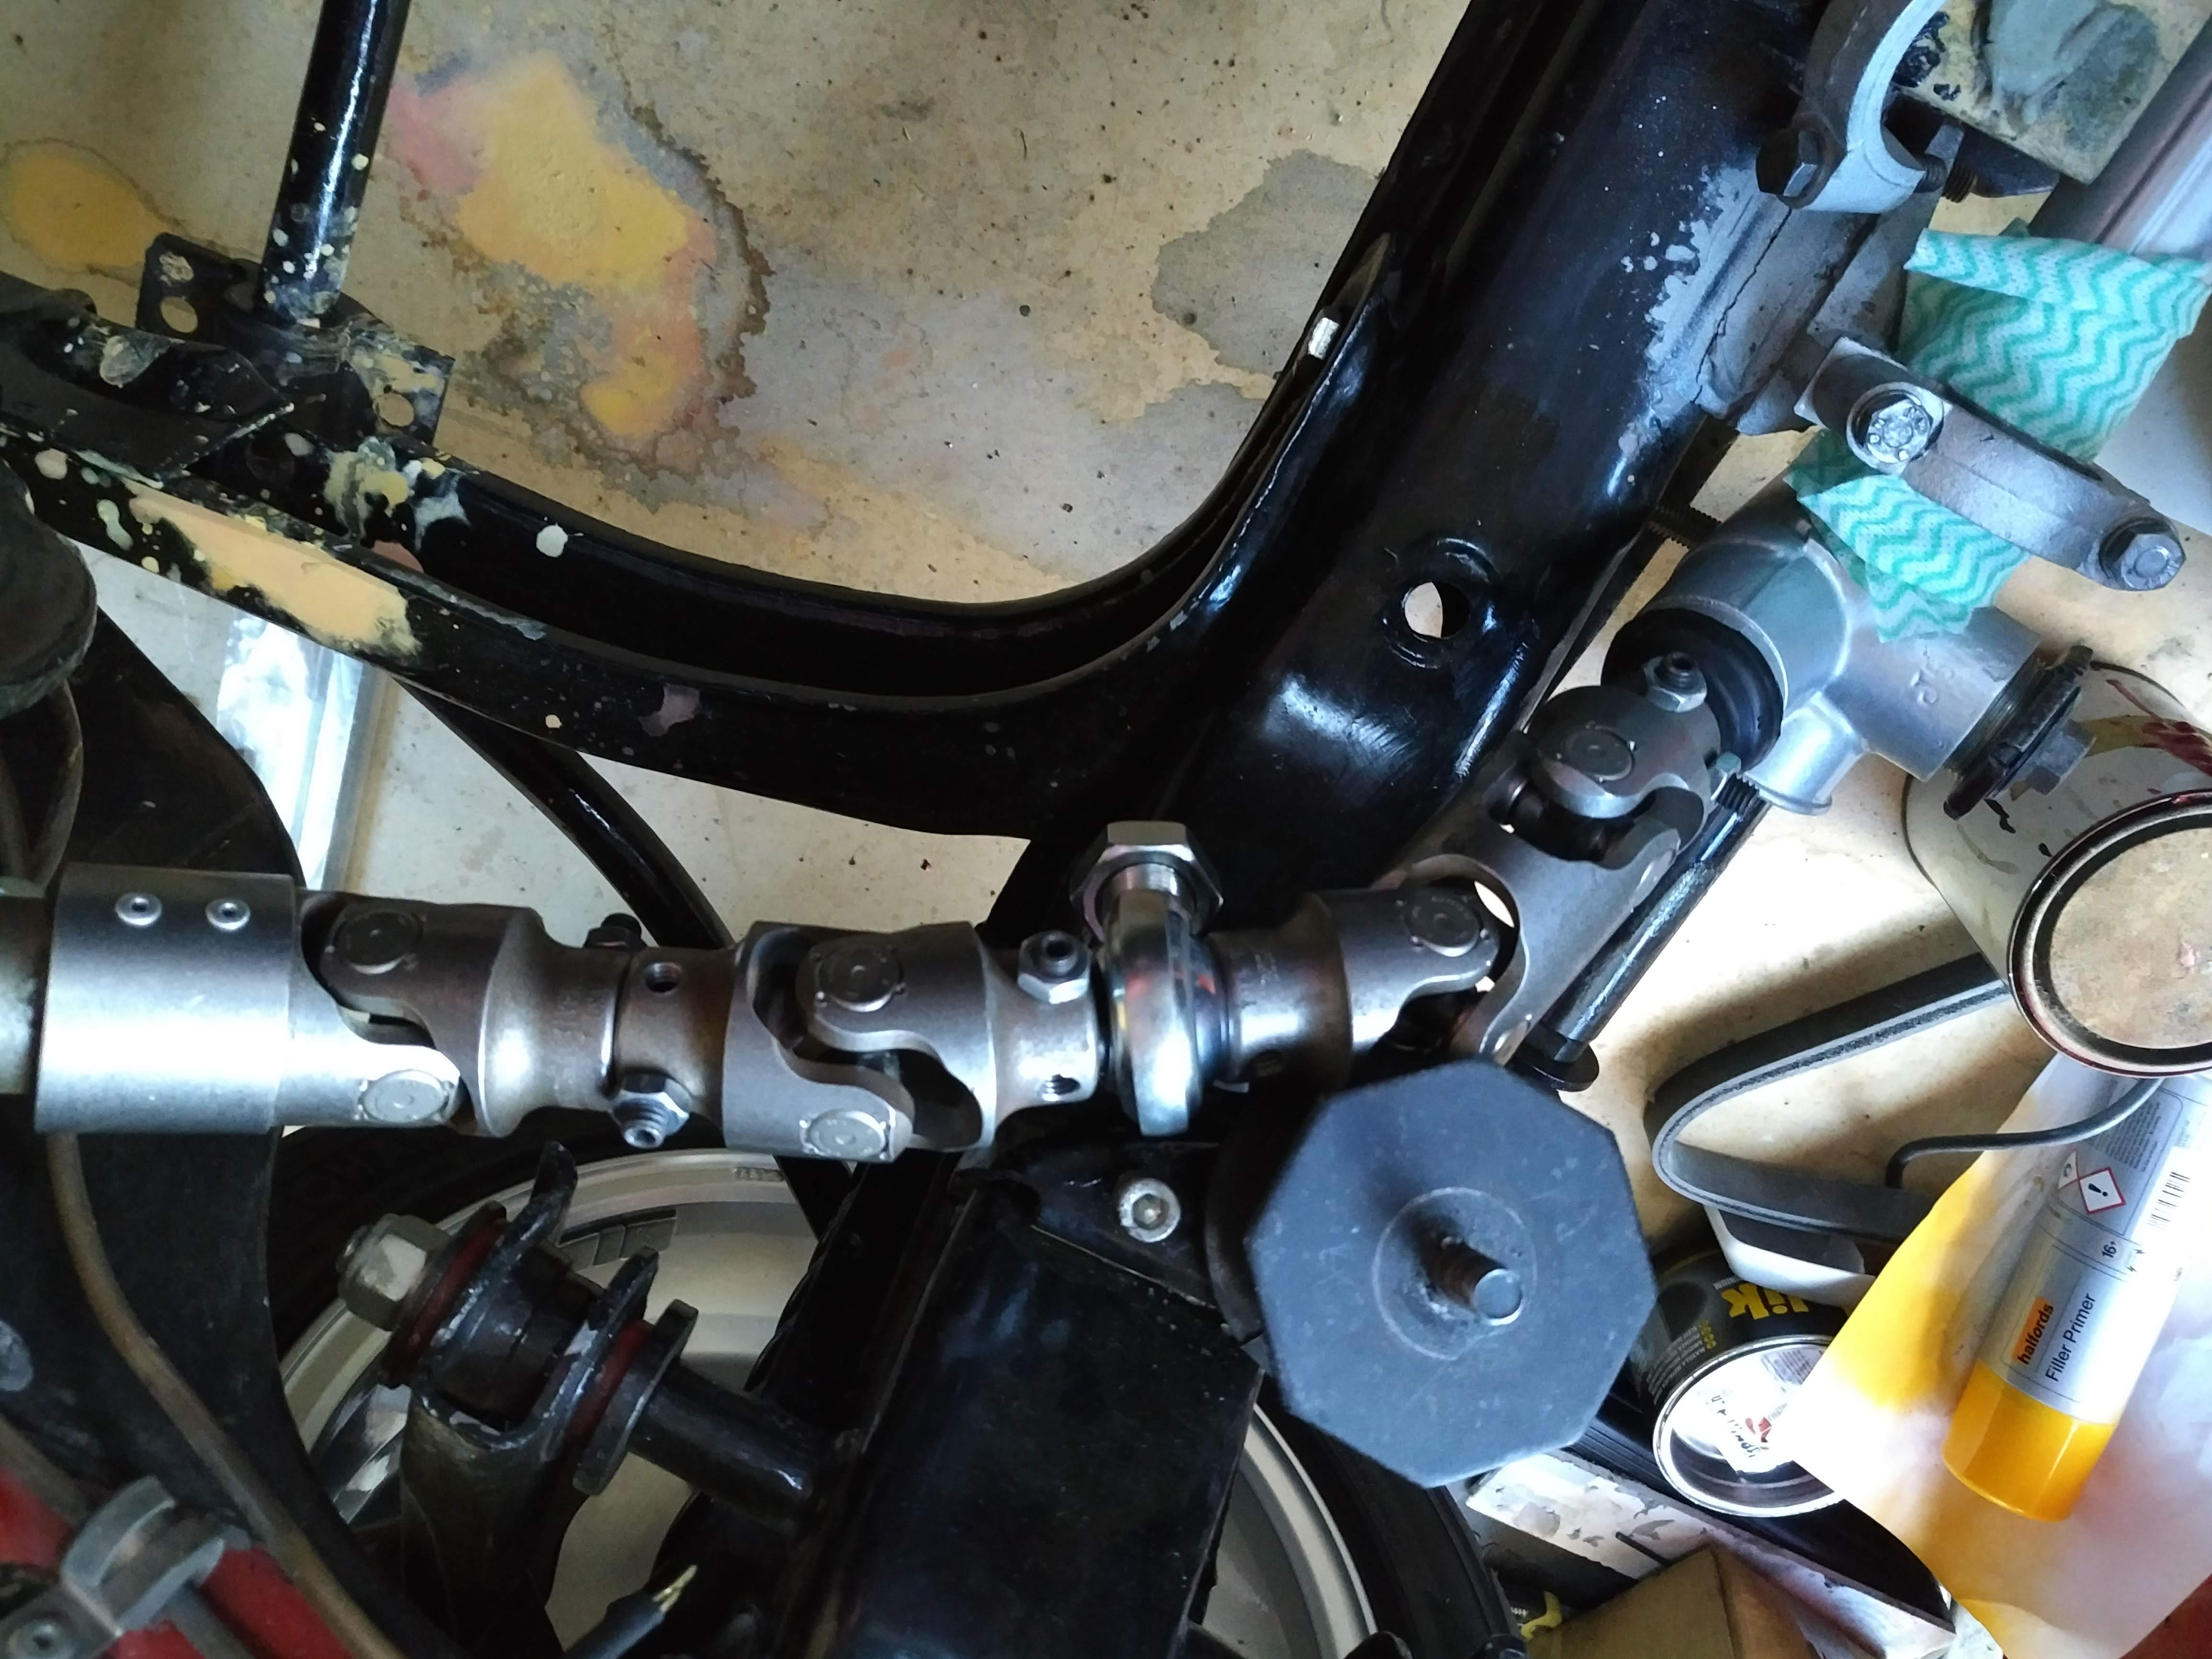
Opel Manta A Series steering rack conversion.